

Visit Japan Web Guide 2026: Osaka Family Registration
Planning a family trip to Osaka? Save hours at immigration with our 2026 mobile guide to setting up your Visit Japan Web account for the whole family.

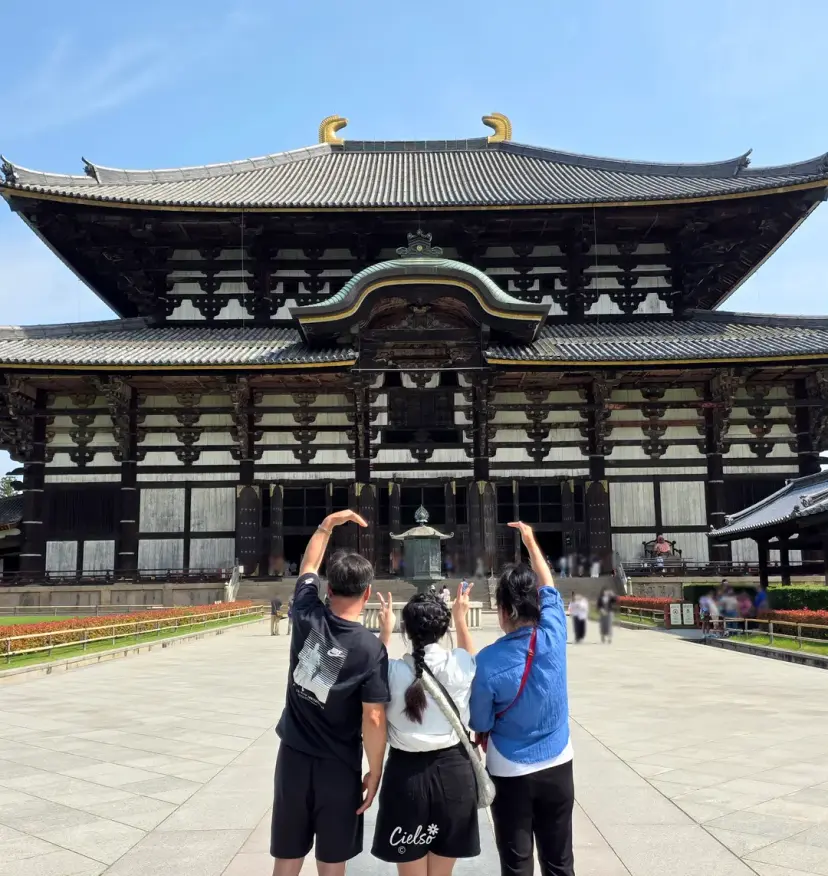
Family Trip to Osaka, Japan
Essential Travel Prep
Visit Japan Web
Visit Japan Web
Hey everyone! I'm Ciel, your friendly travel guide!
Today, I'm going to show you how to register for
"Visit Japan Web (Mobile Version)"—a total lifesaver to set up before your trip to Osaka!

🇯🇵 Osaka, Japan Travel Prep: Visit Japan Web
Why you should definitely set this up in advance:
✔︎ It speeds up your immigration process dramatically.
✔︎ You can register your family members together, making family travel super easy.
✔︎ You can complete your customs declaration online ahead of time.
How to Register for Visit Japan Web
Creating an Account
Visit Japan Web | Digital Agency Services
First, head over to the Visit Japan Web site.

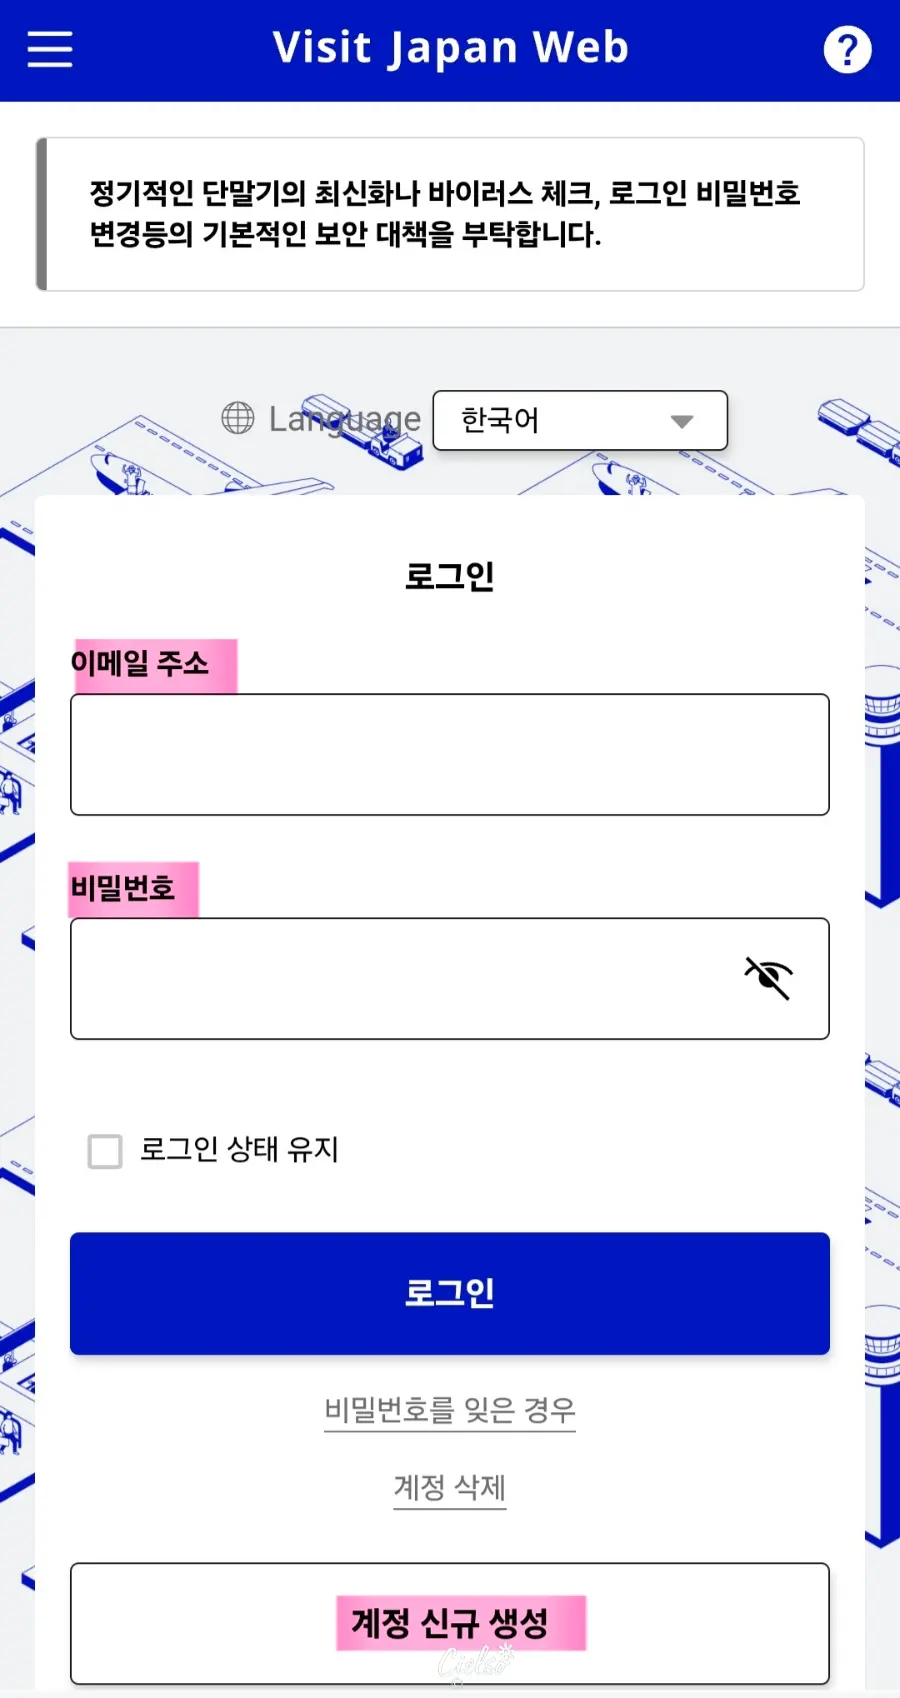
It usually displays in English automatically,
but if it doesn't, just tap the globe icon (LANG) highlighted in yellow,
switch it to your preferred language, and tap "Start using the service."
Tap "Sign up for a new account,"
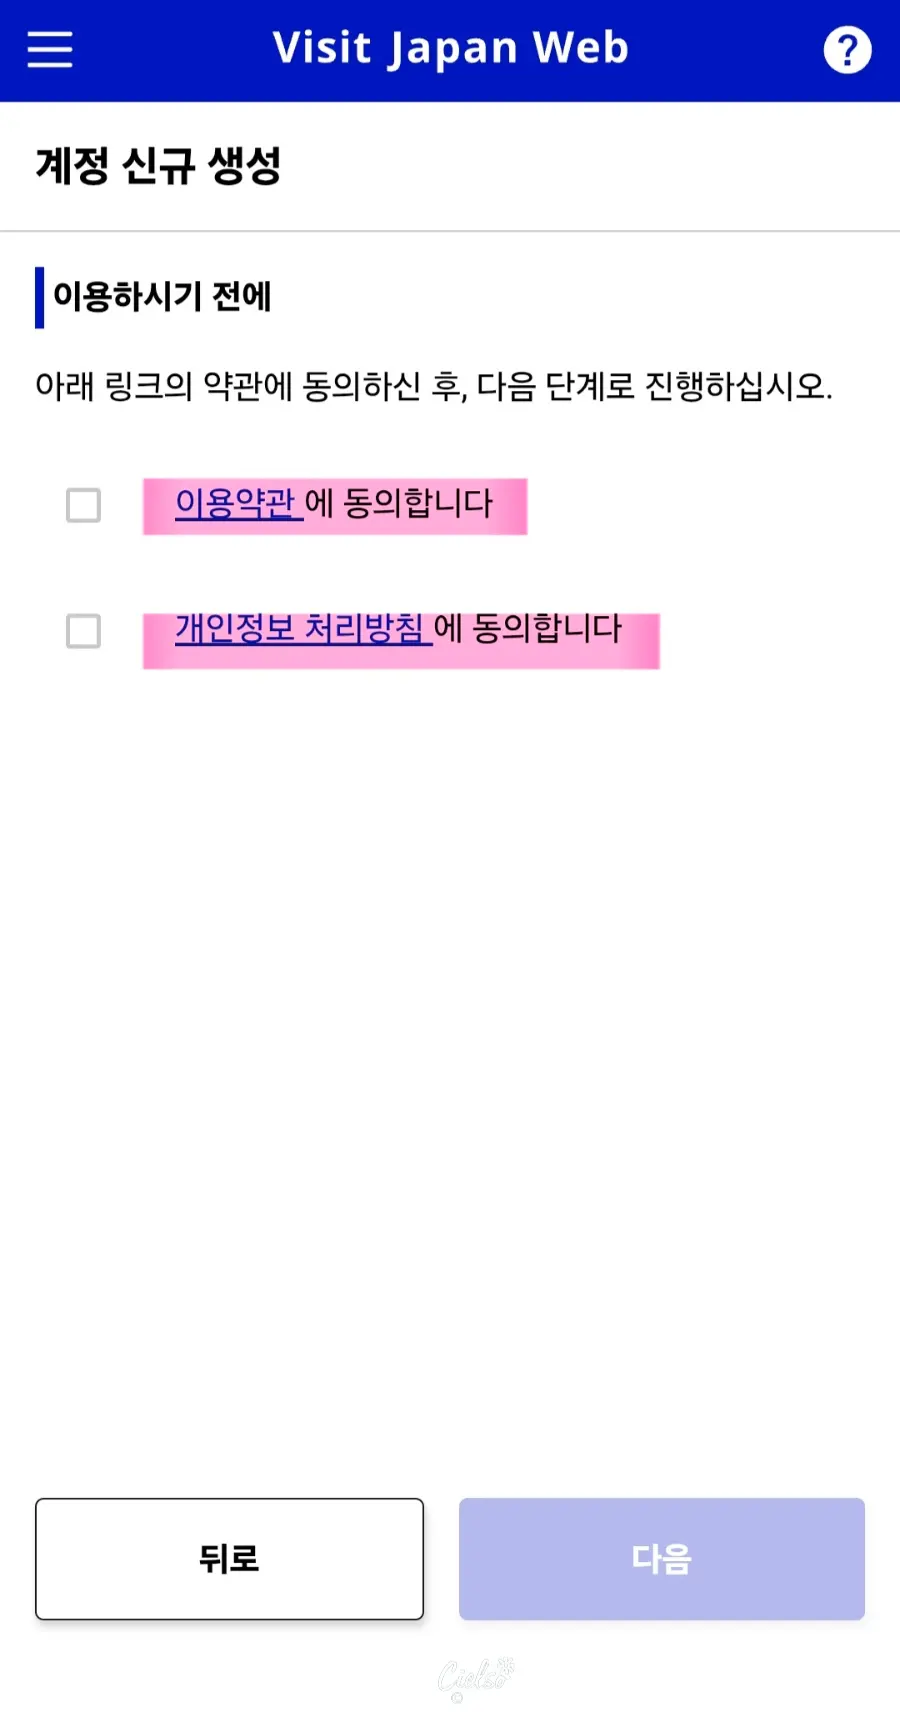
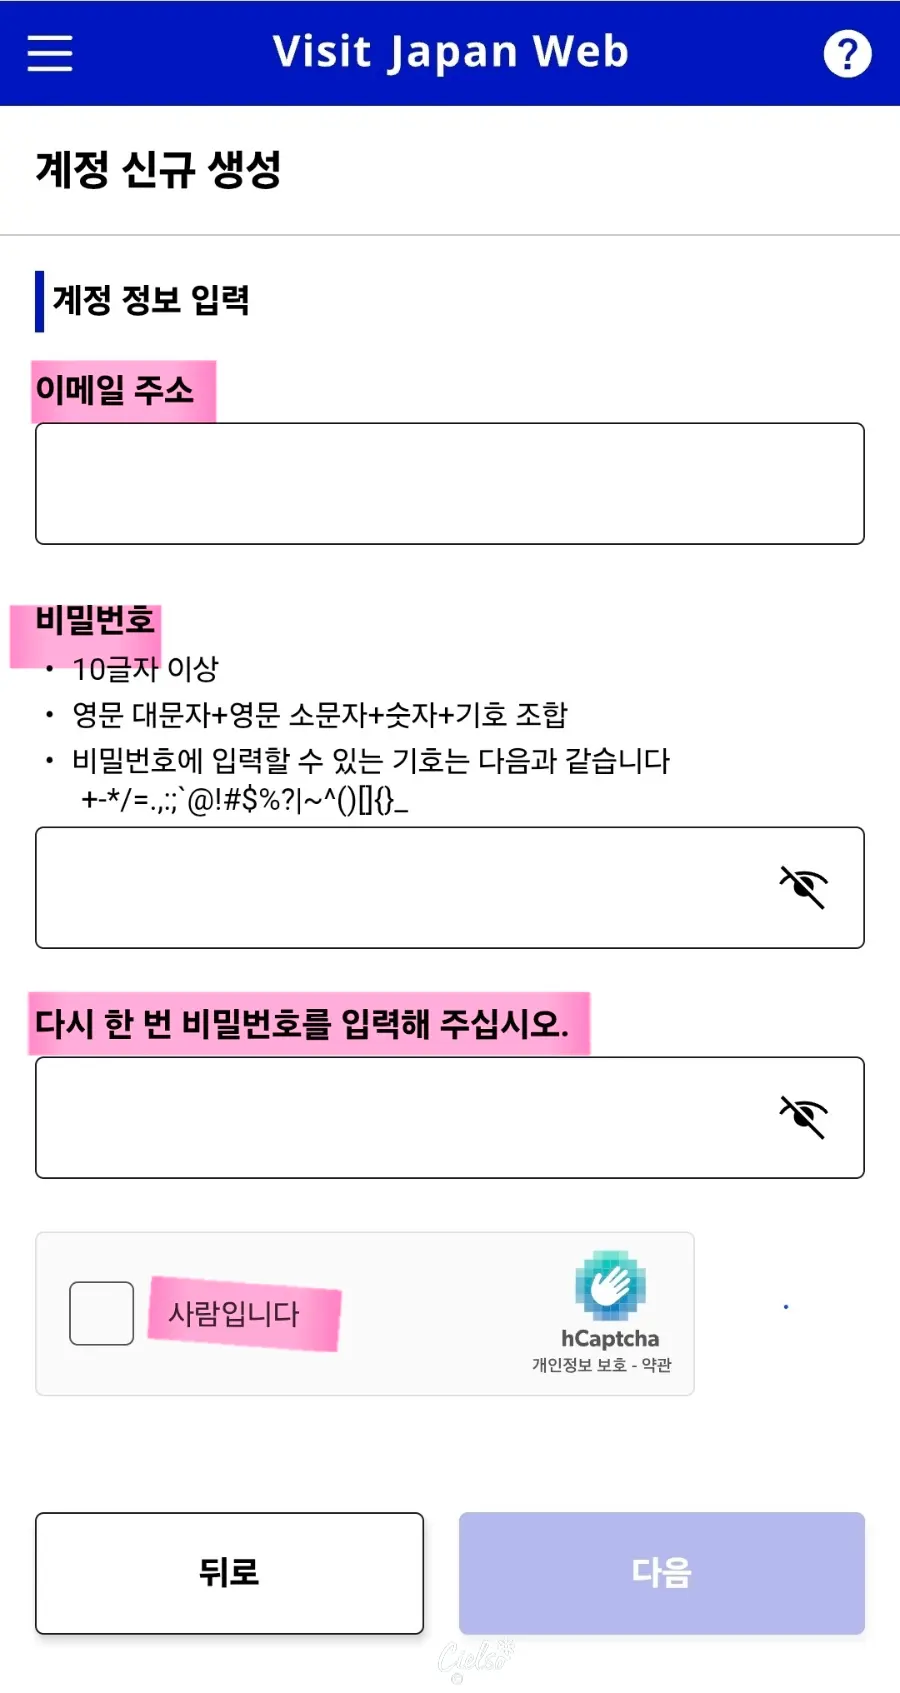
agree to the terms of use,
and enter your email address and password.
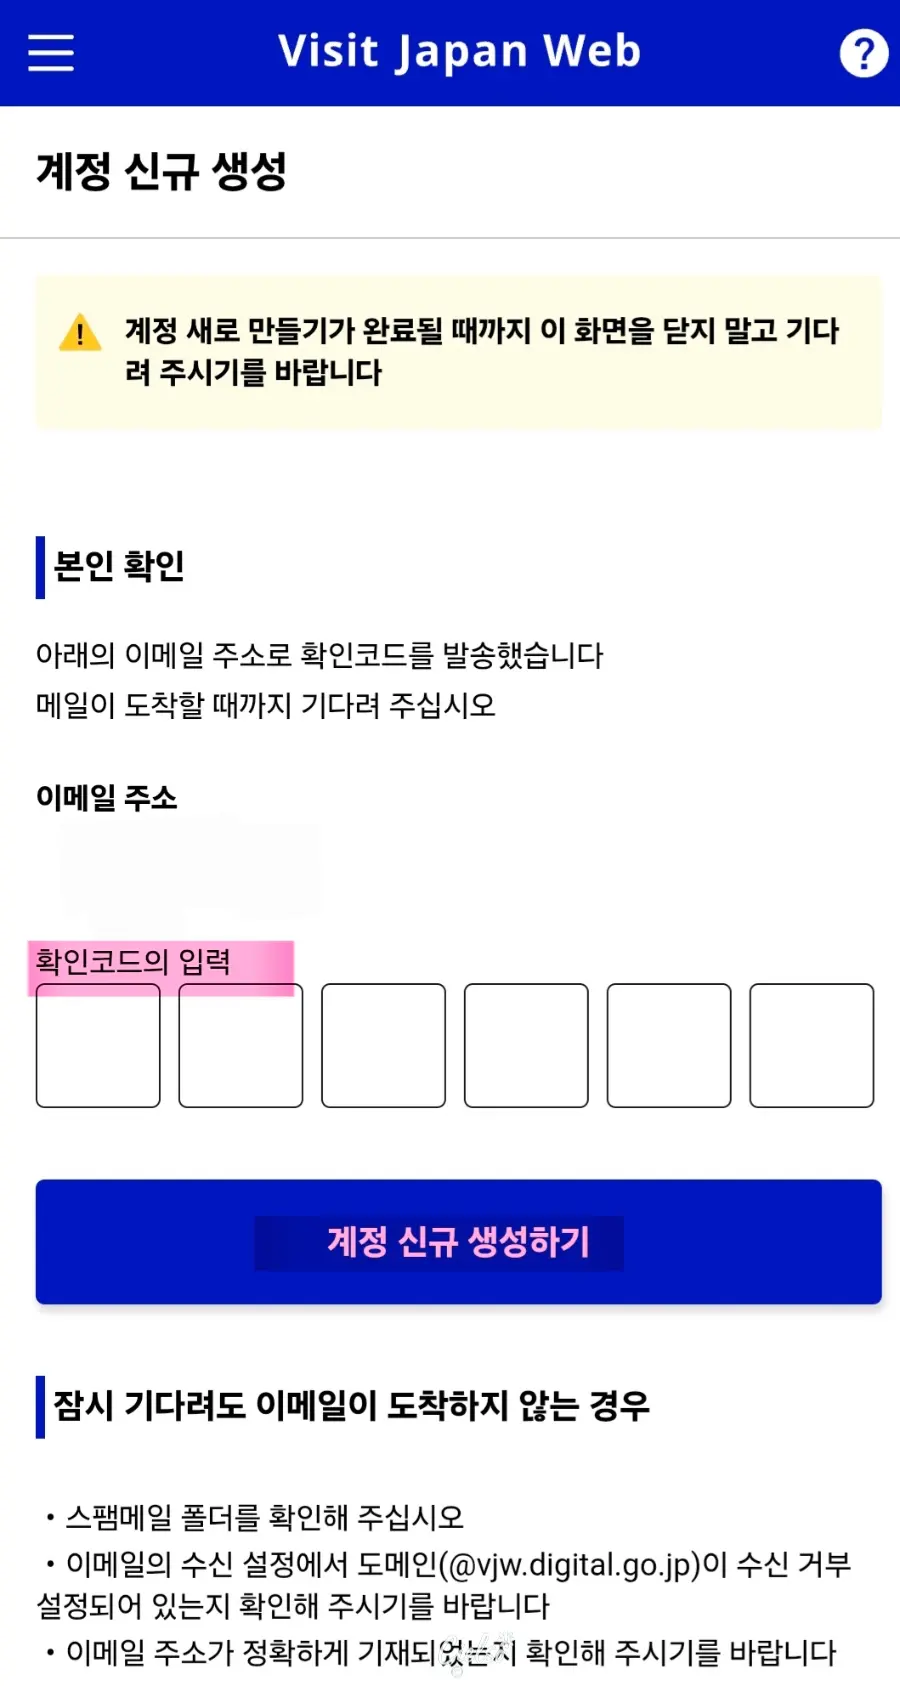
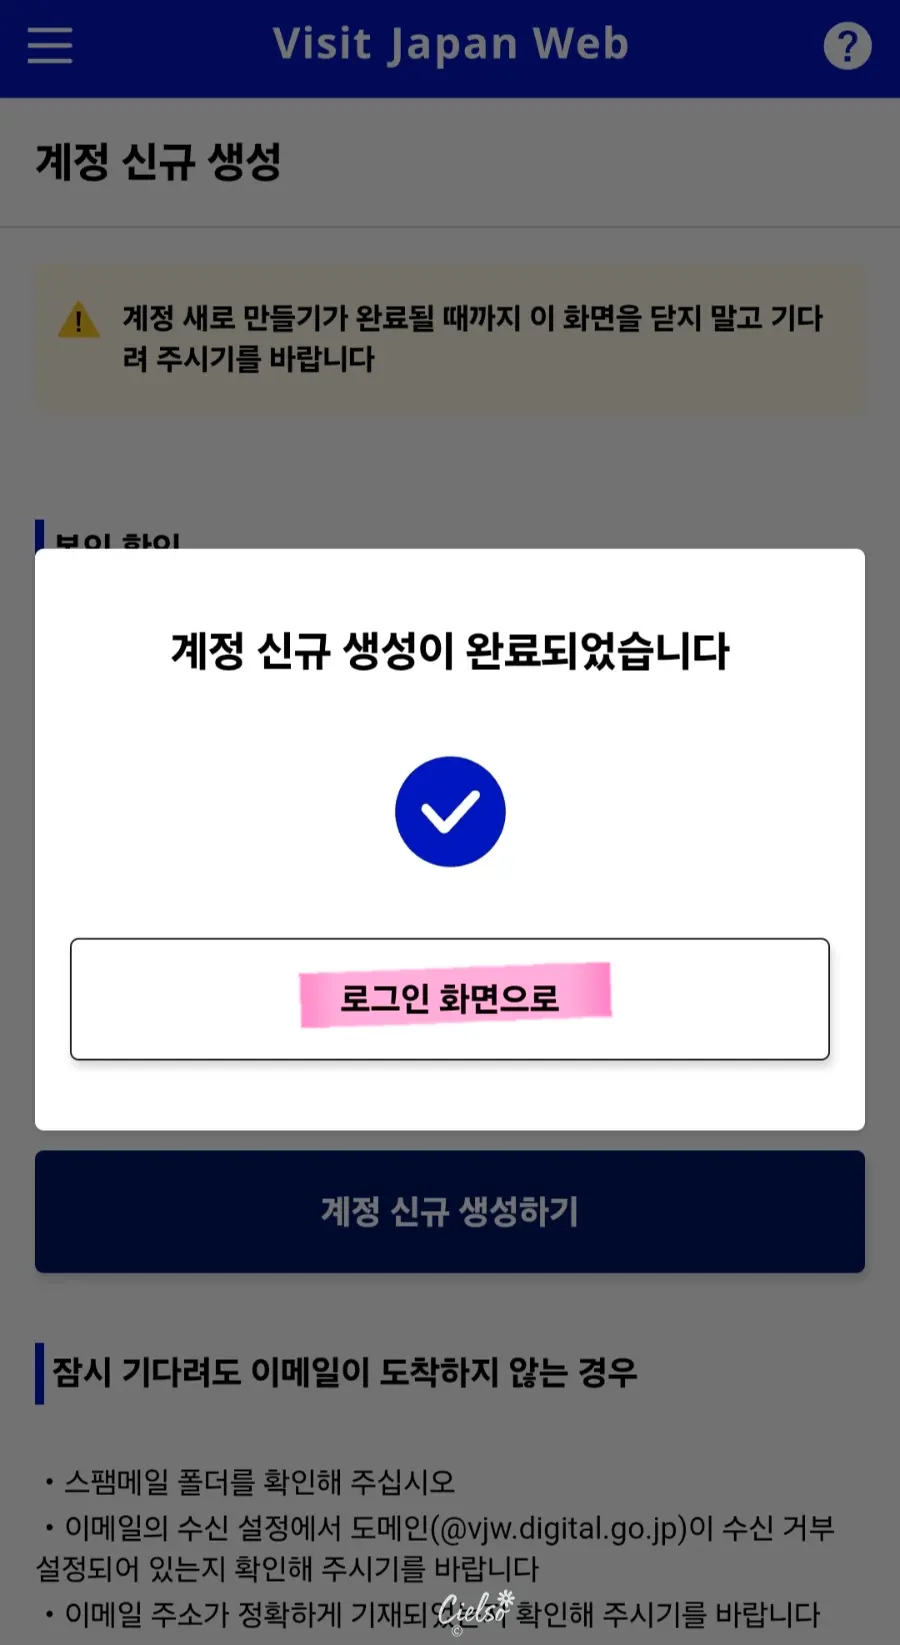
Enter the verification code sent to your email,
and your new account is successfully created!
Registering on Visit Japan Web
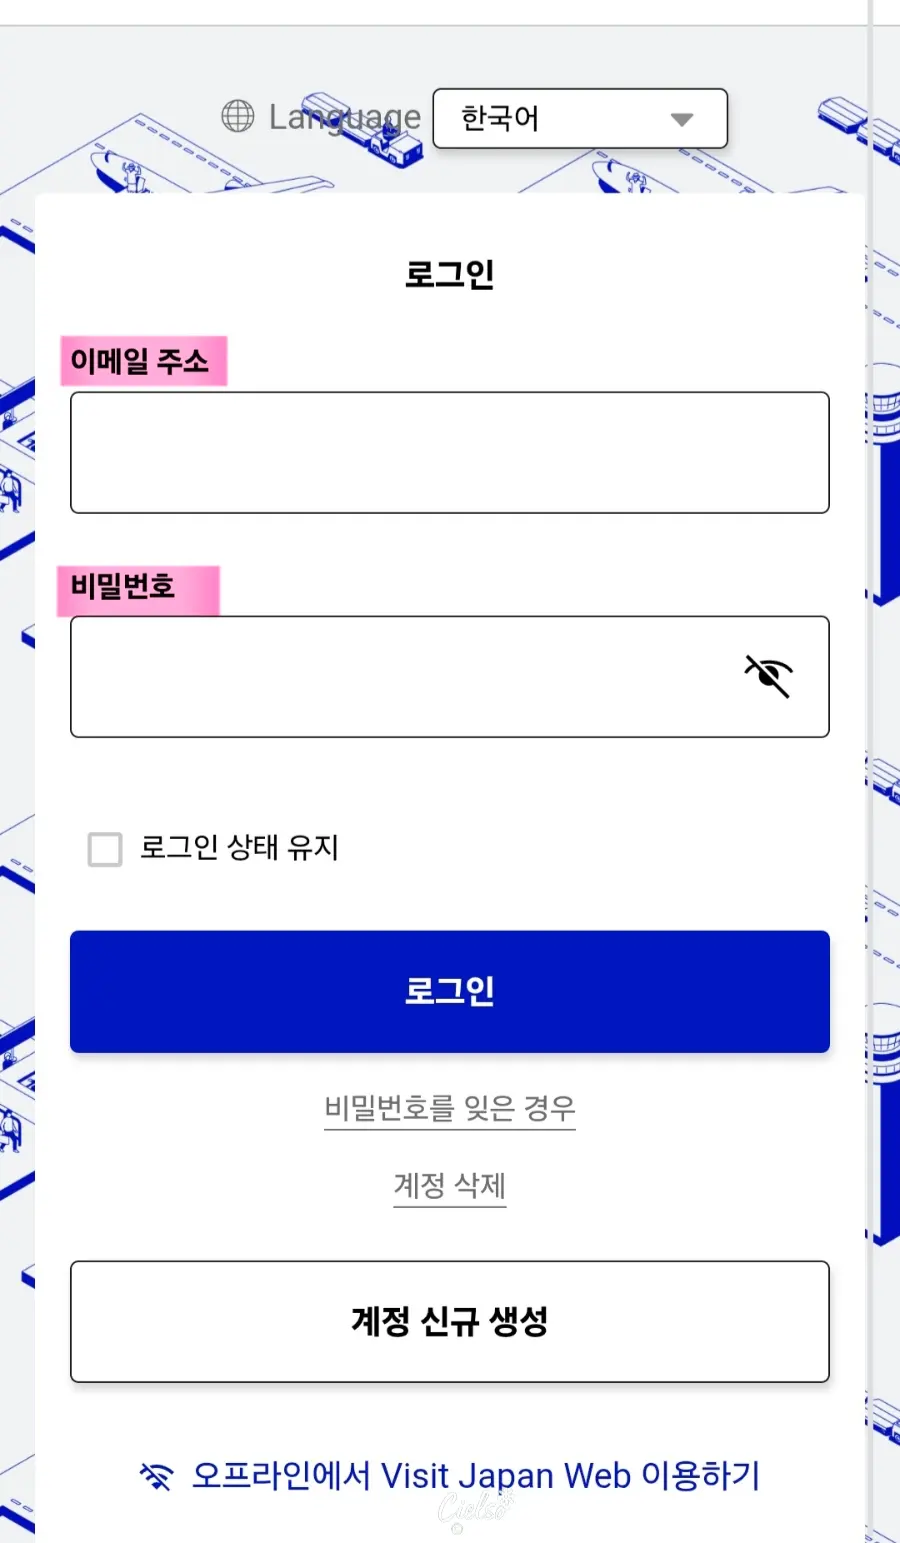
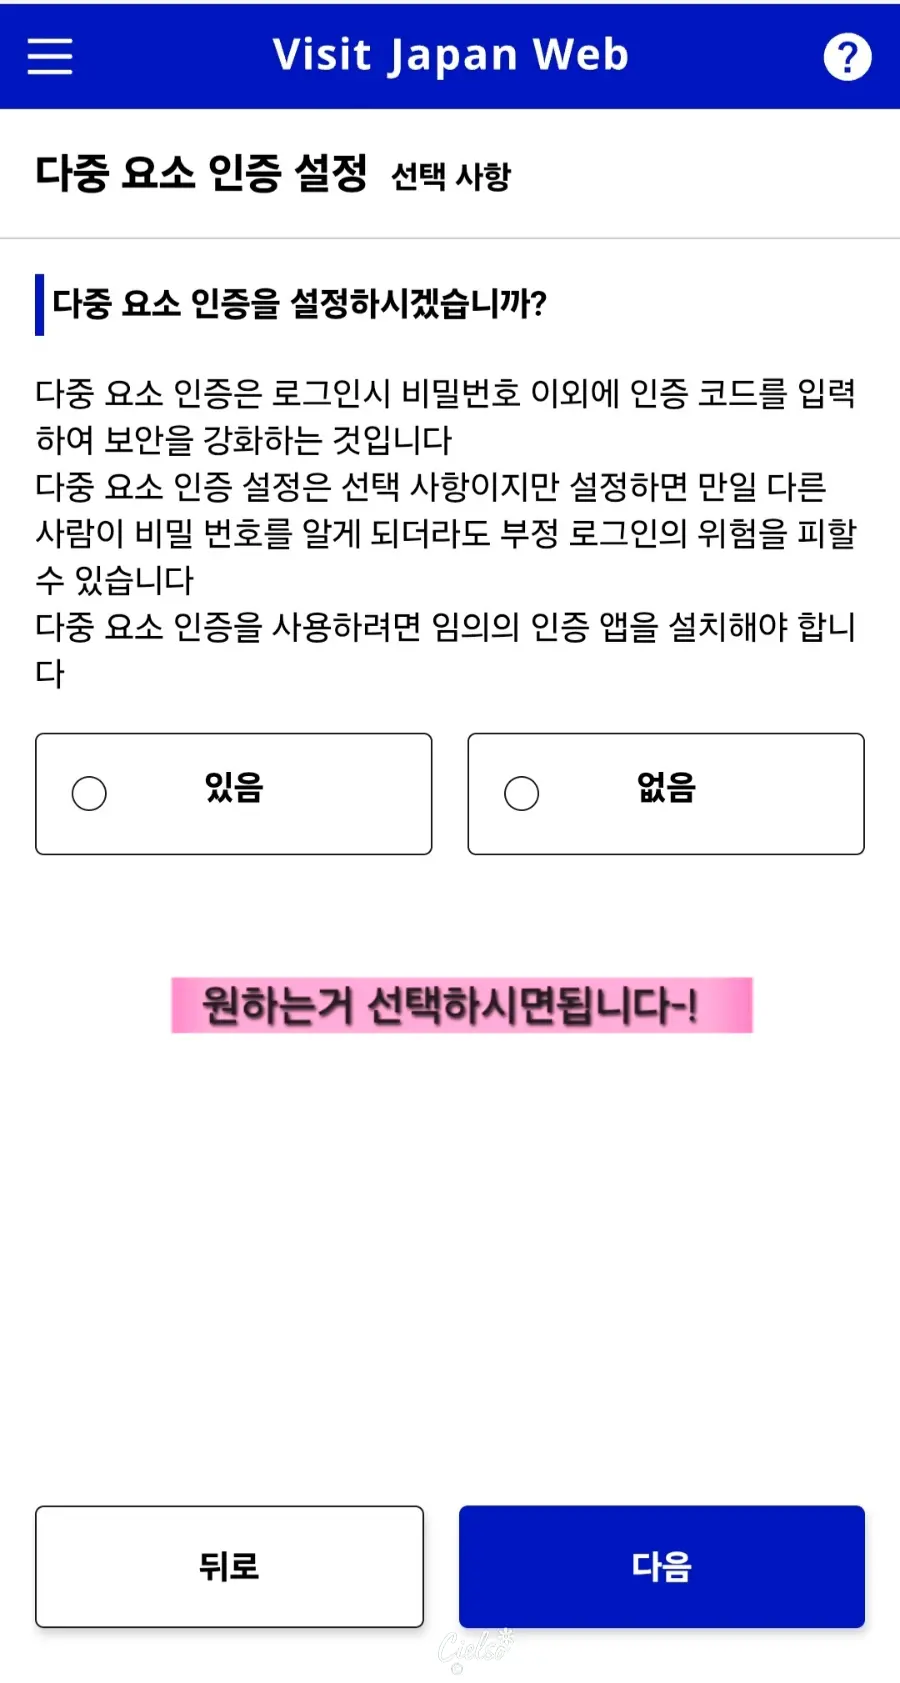
Once your account is set up, go back to the main login screen,
log in with your email,
and it will ask if you want to set up multi-factor authentication.
I chose "Skip" and passed on that step to keep things quick.
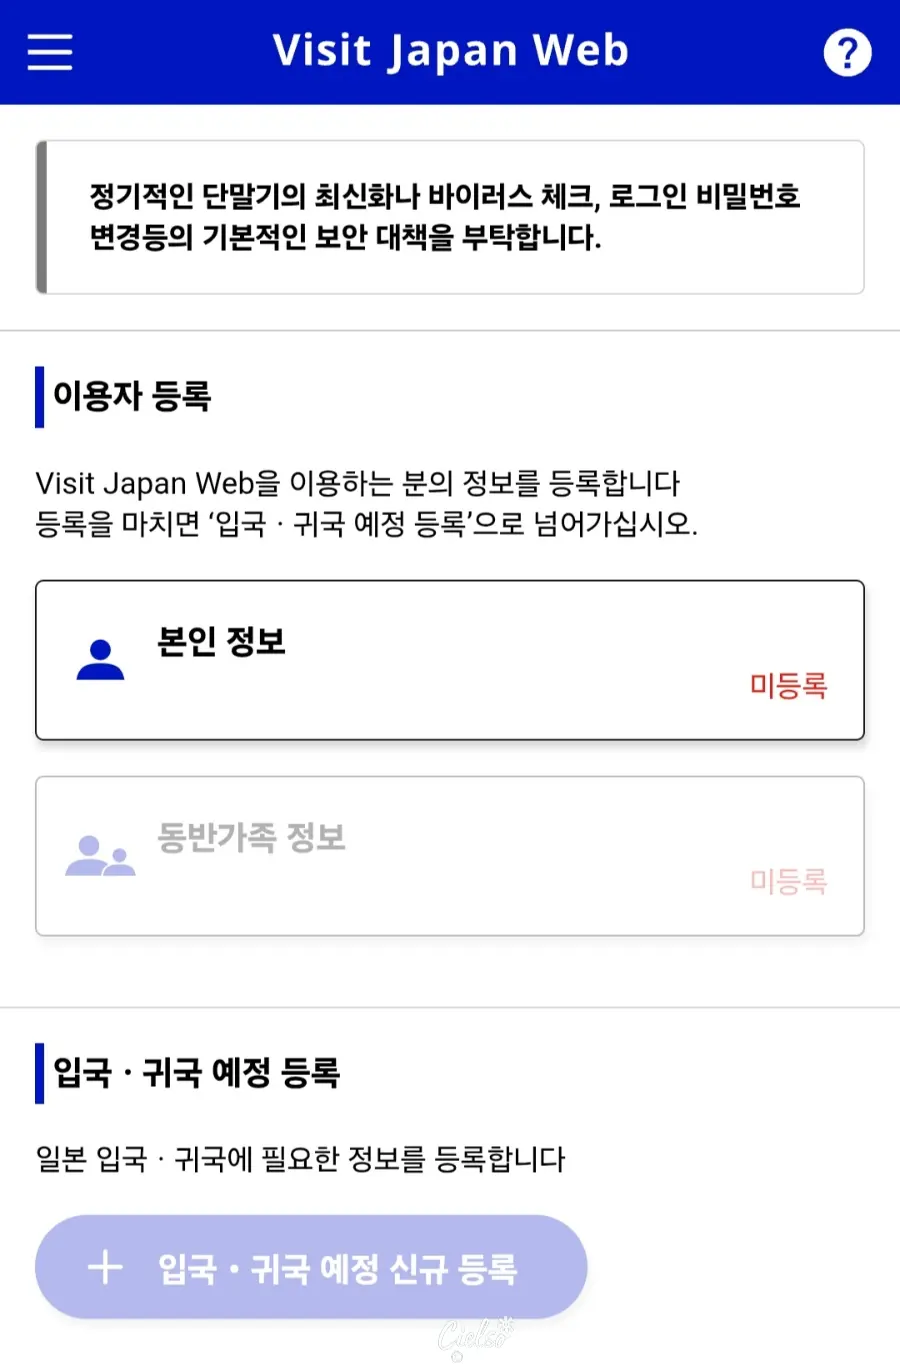
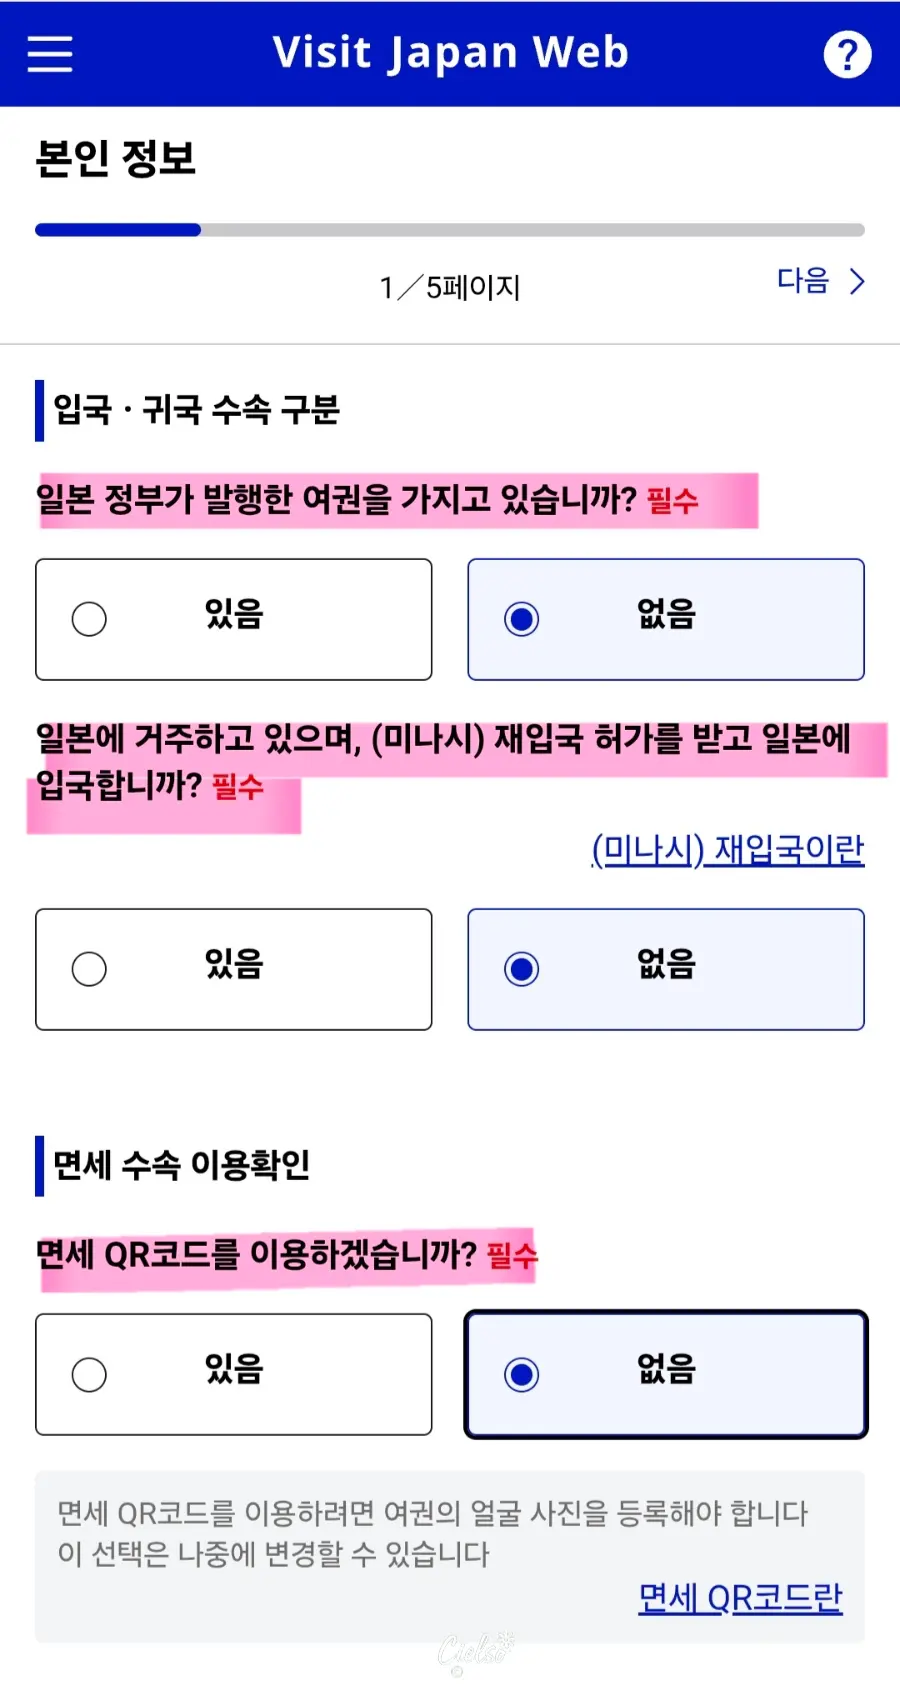
Since this was my first time using the platform, I registered my own details first.
For the tax-free QR code option,
they say you can show a QR code instead of your physical passport when shopping tax-free.
But honestly, showing my physical passport felt way less tedious
than scanning and registering my passport photo here, so I checked "No" (?) 😆.
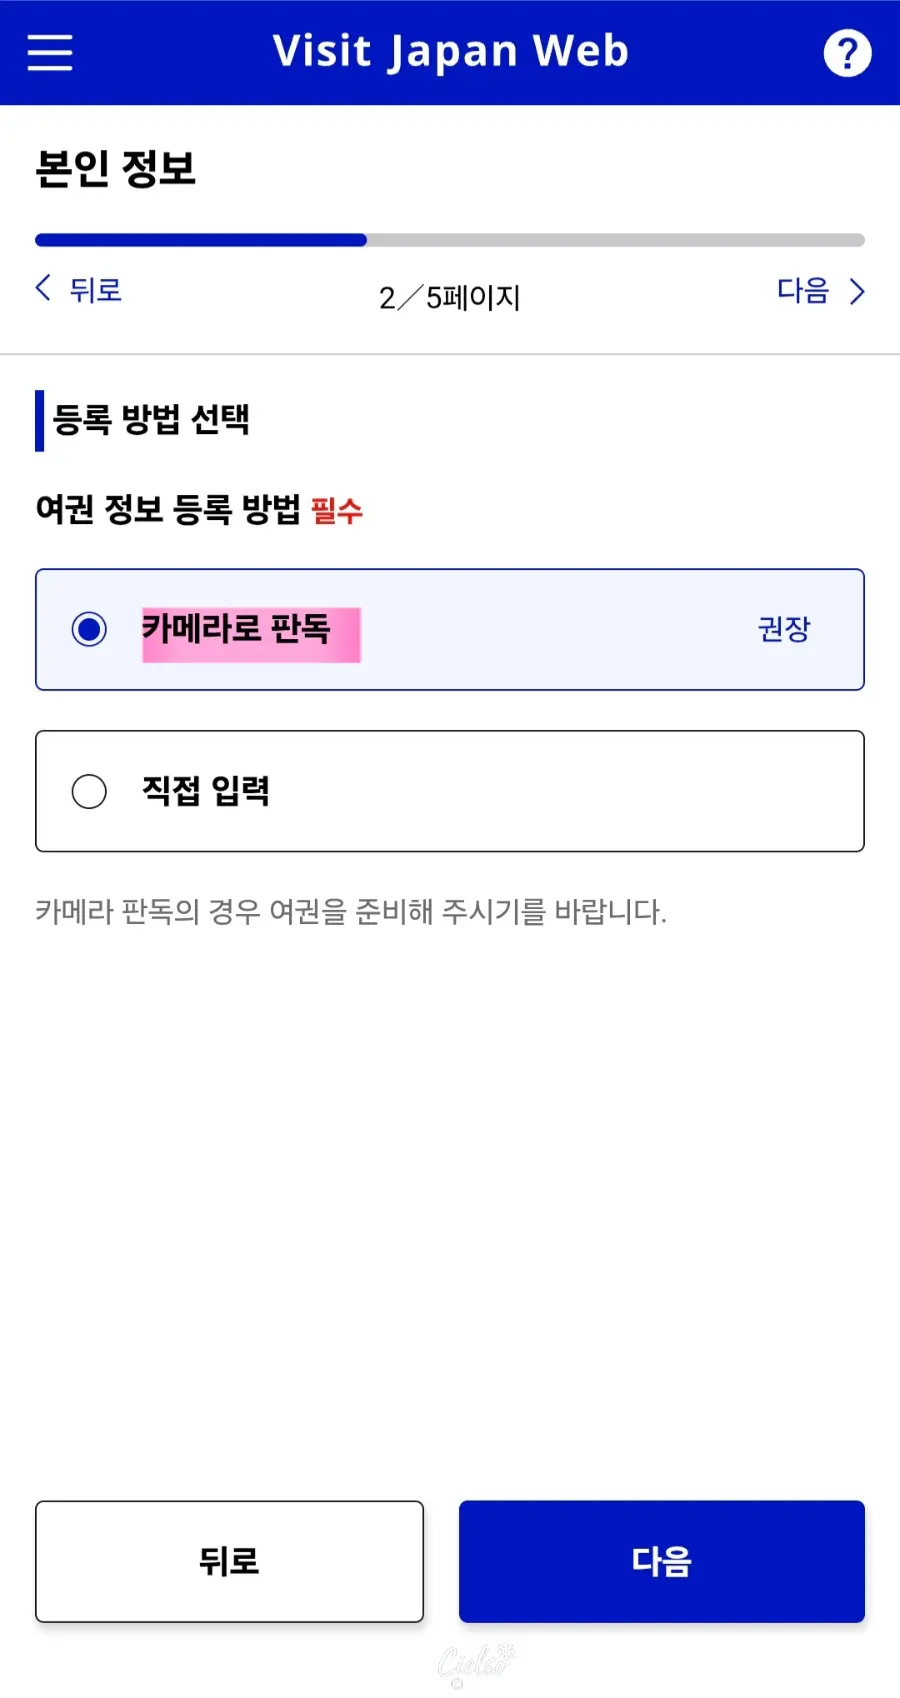
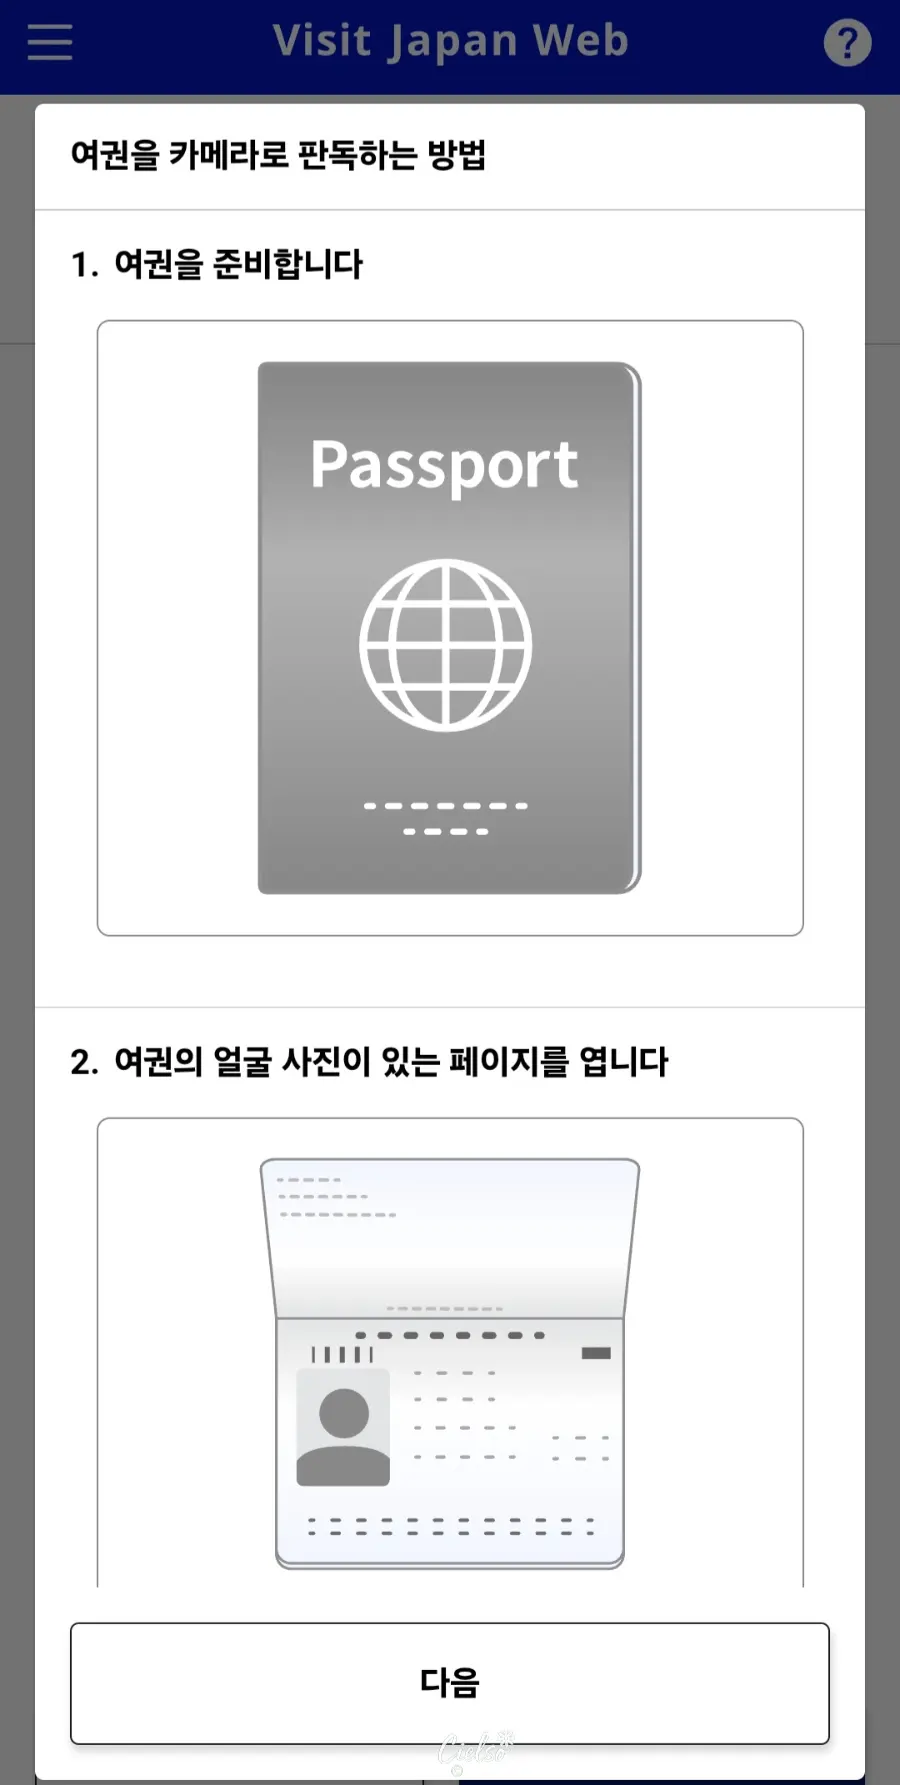
To register your passport, you can either scan it with your camera or enter the details manually. I figured the camera would be easier,
so I selected the auto-scan option. But you have to take a really perfect photo for it to recognize it...
I almost gave up and switched to manual input,
but typing it all out seemed like a chore, so I just retook the photo a few times until it worked.
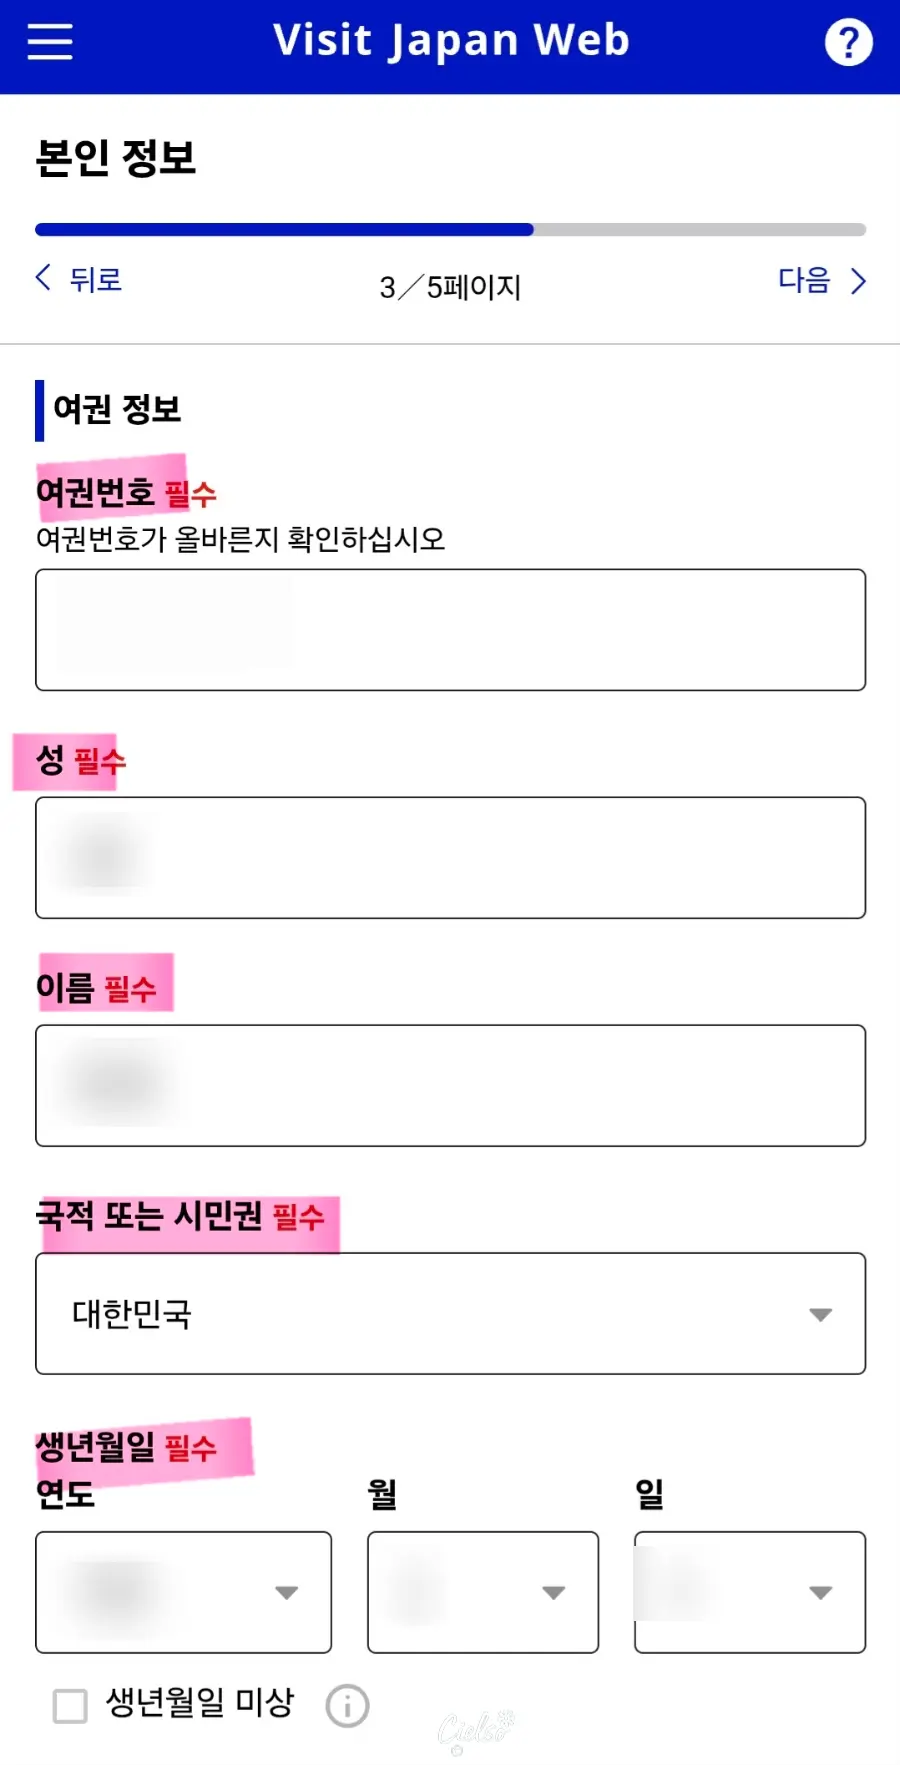
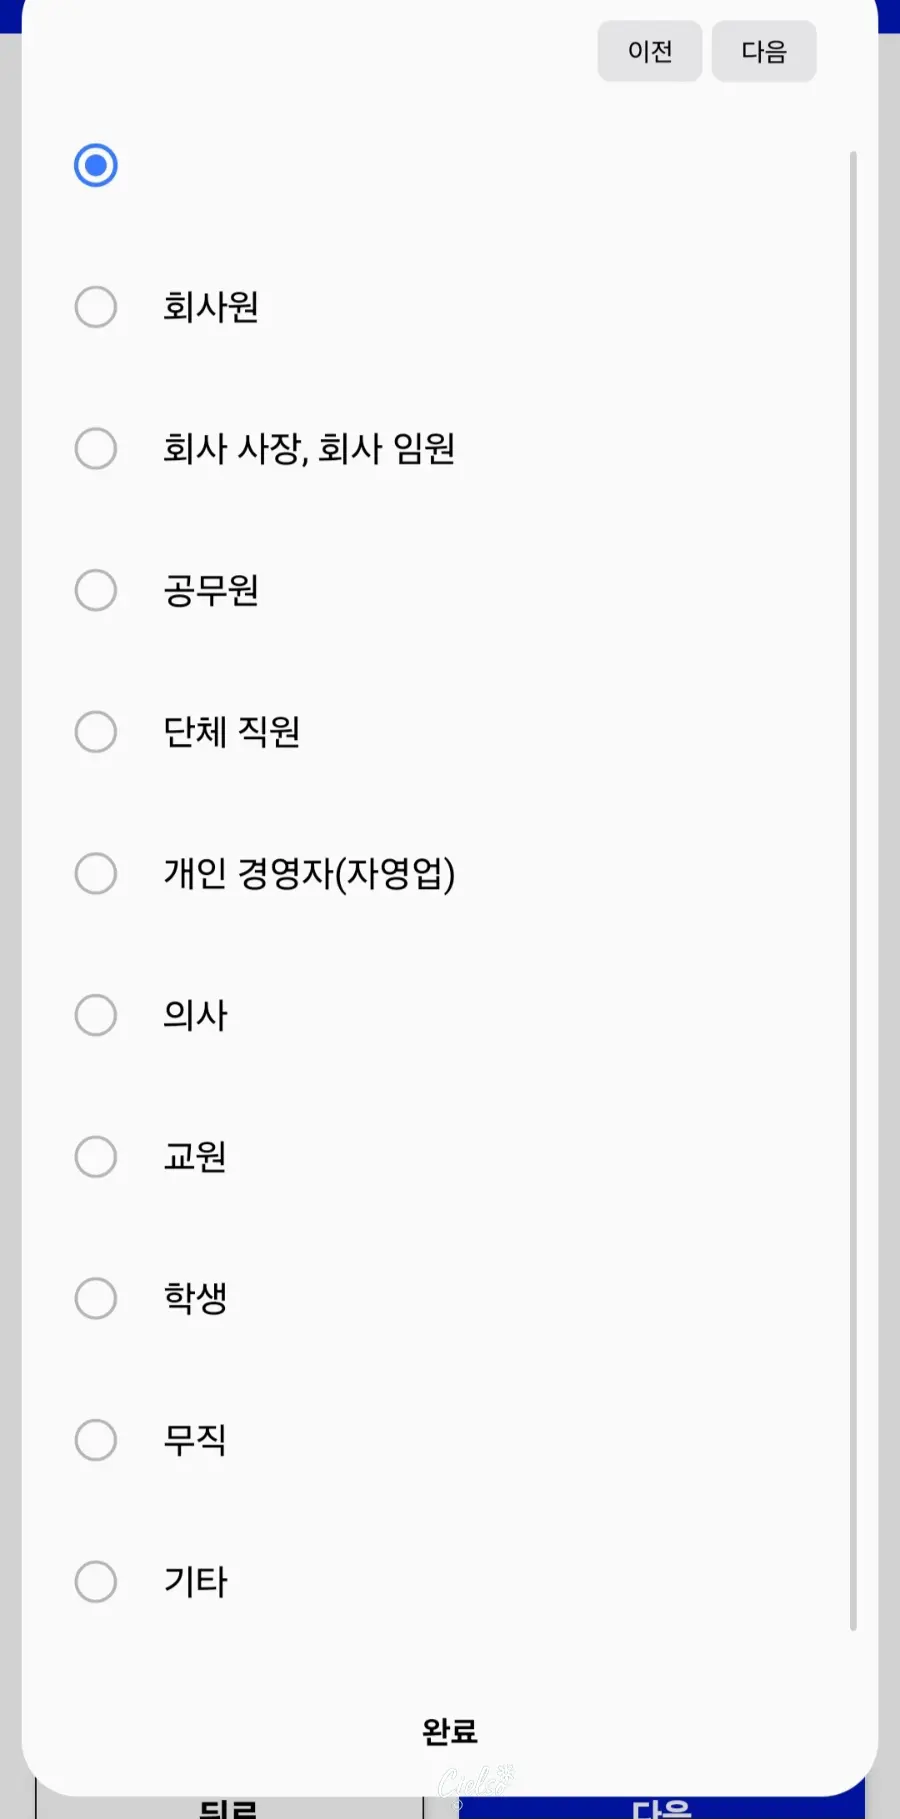
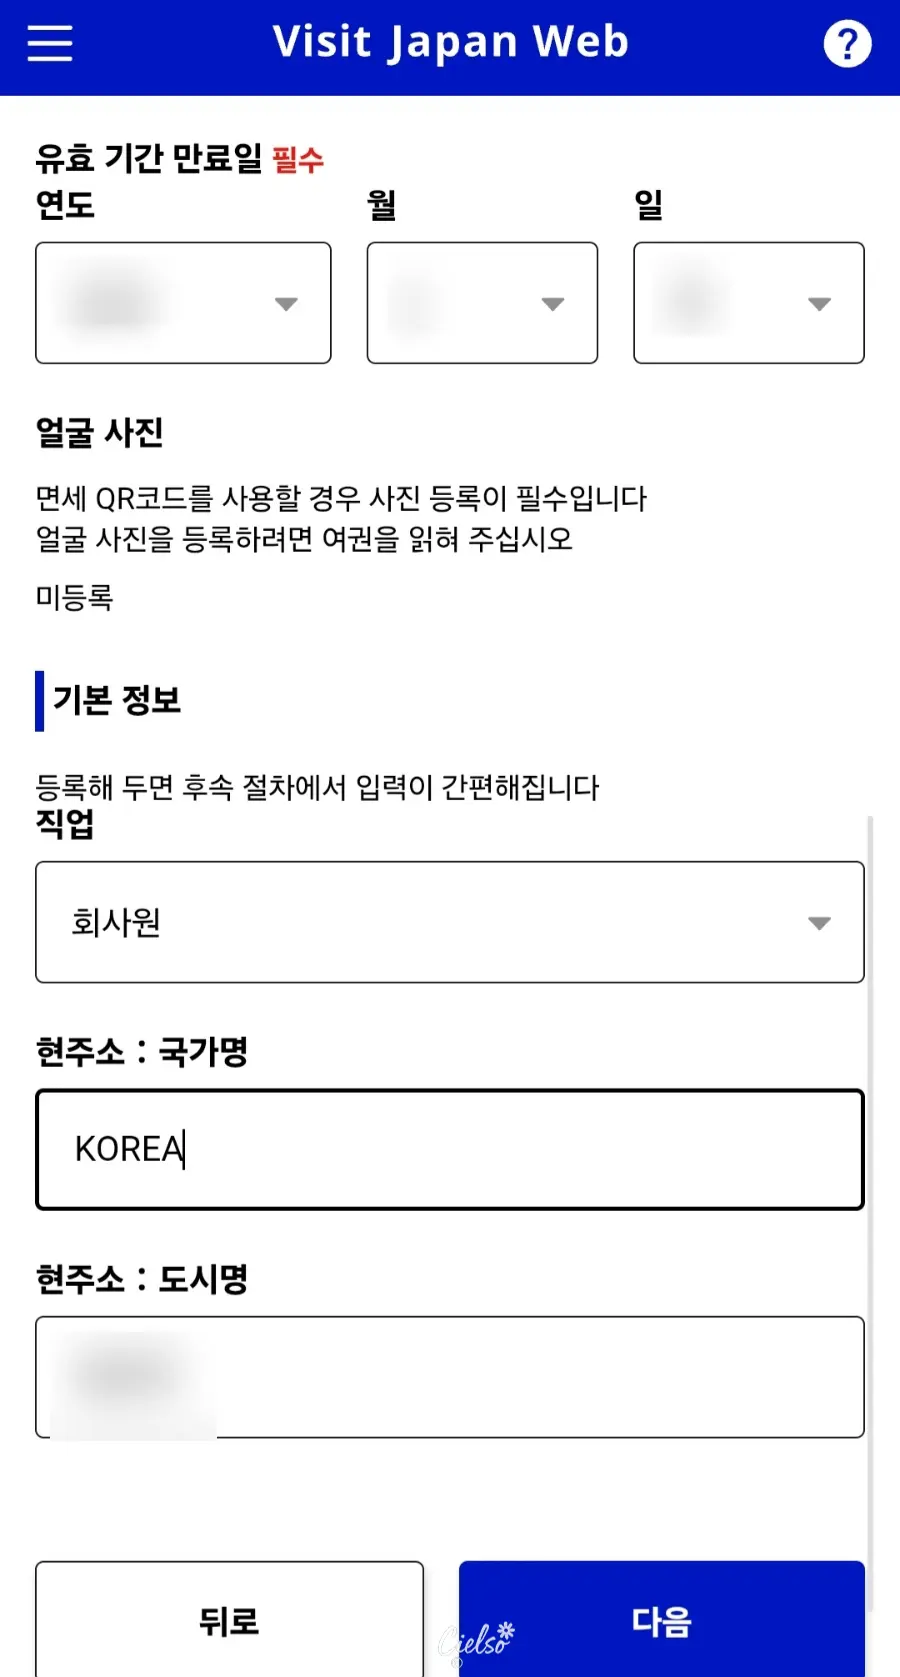
After that, verify the entered information,
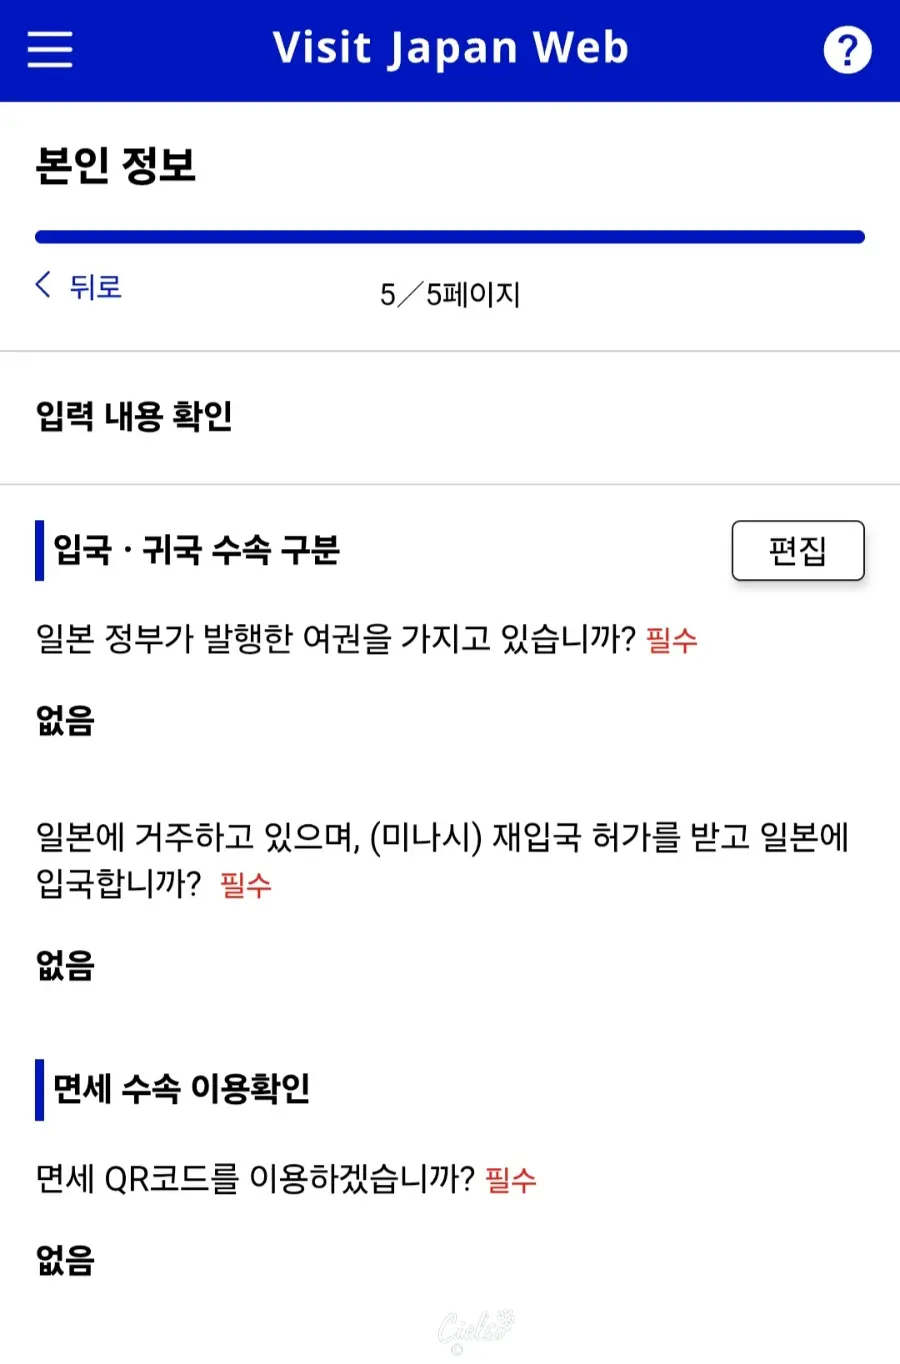
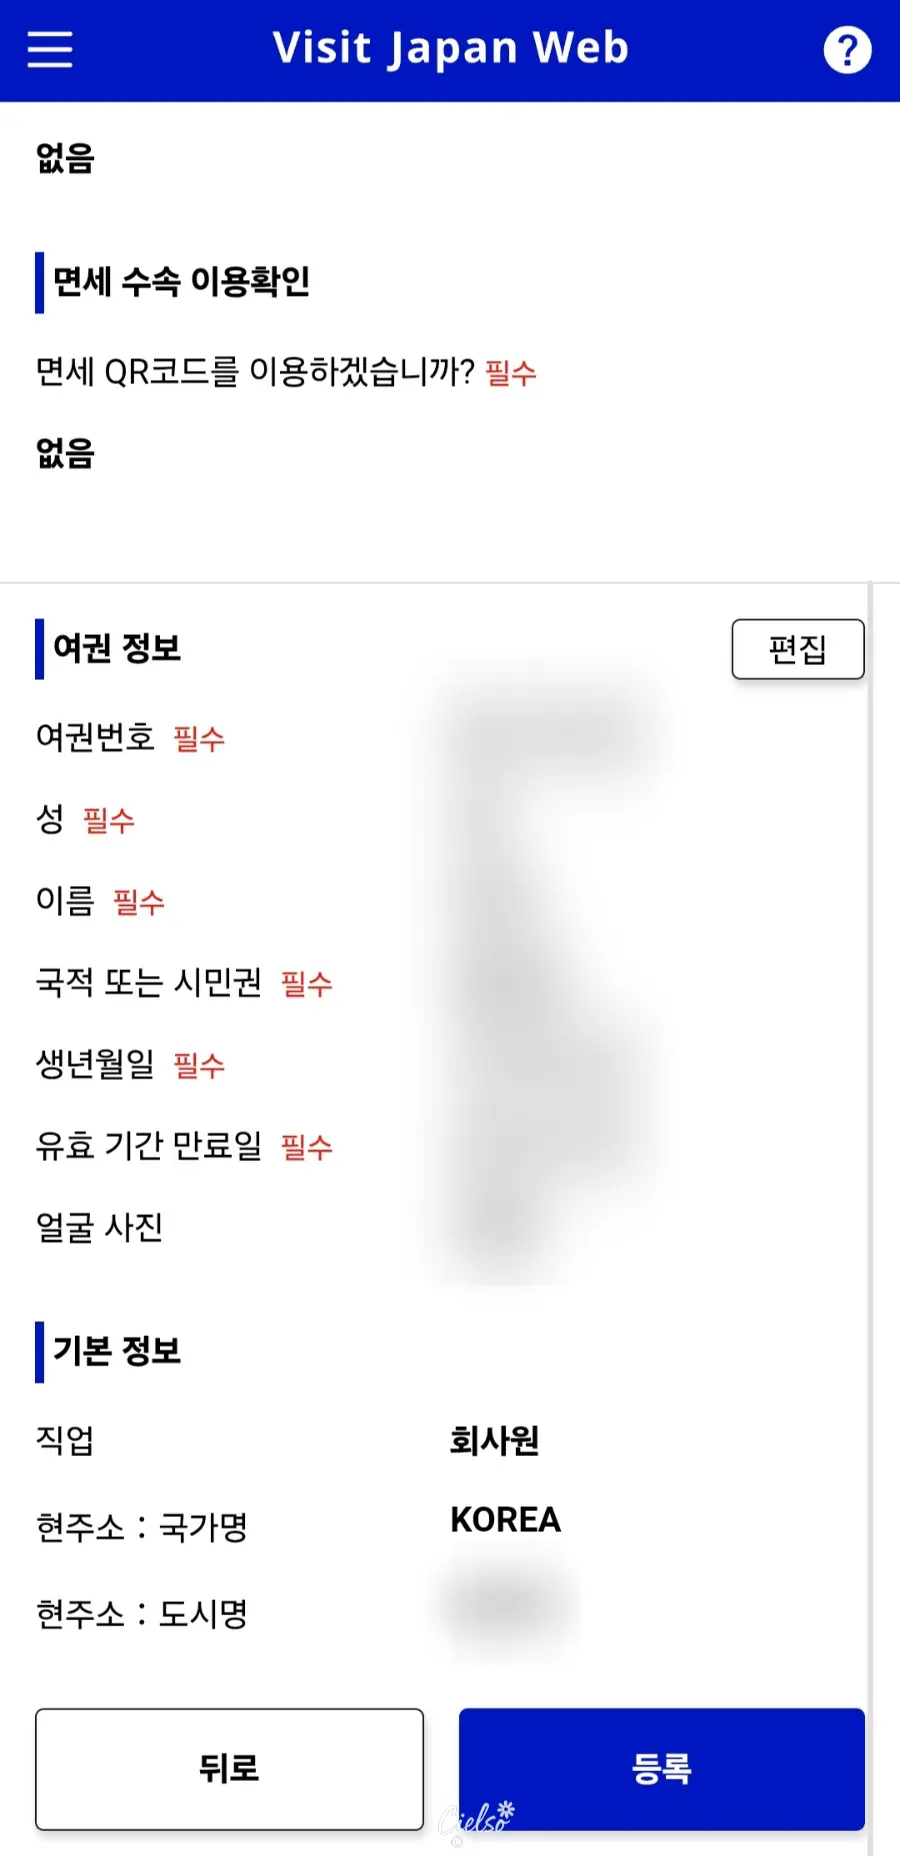
double-check to make sure everything is correct,
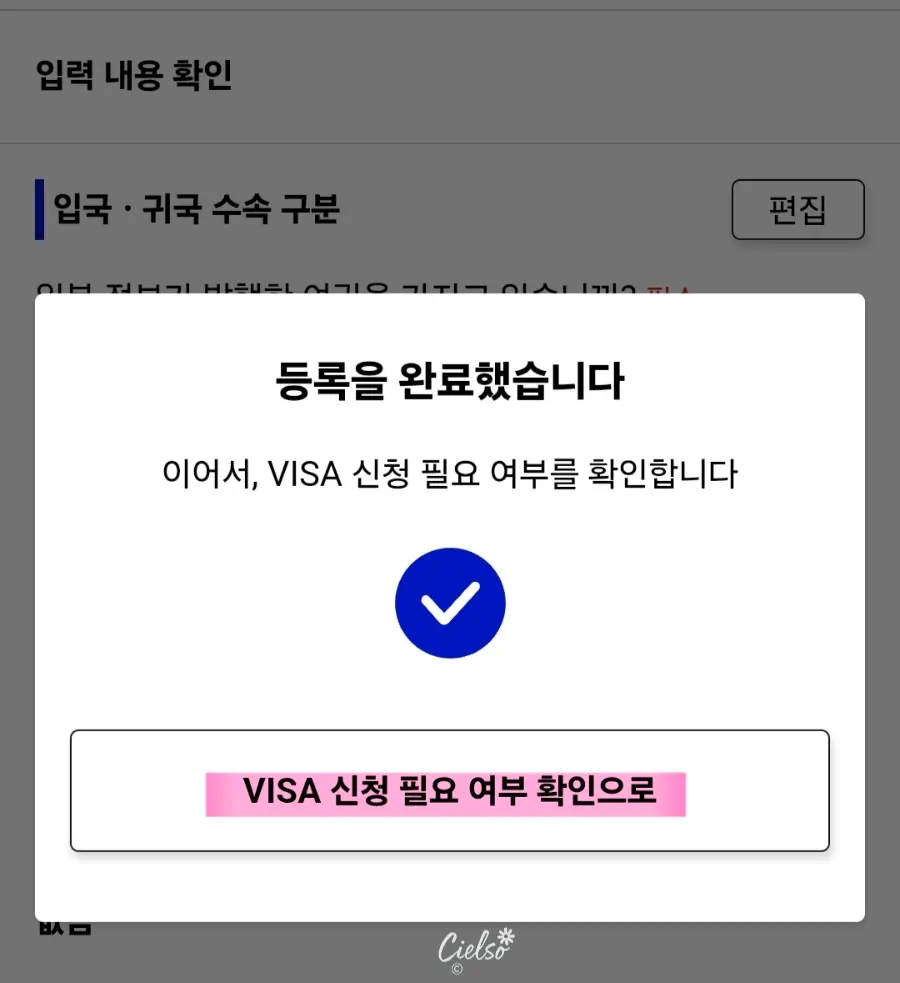
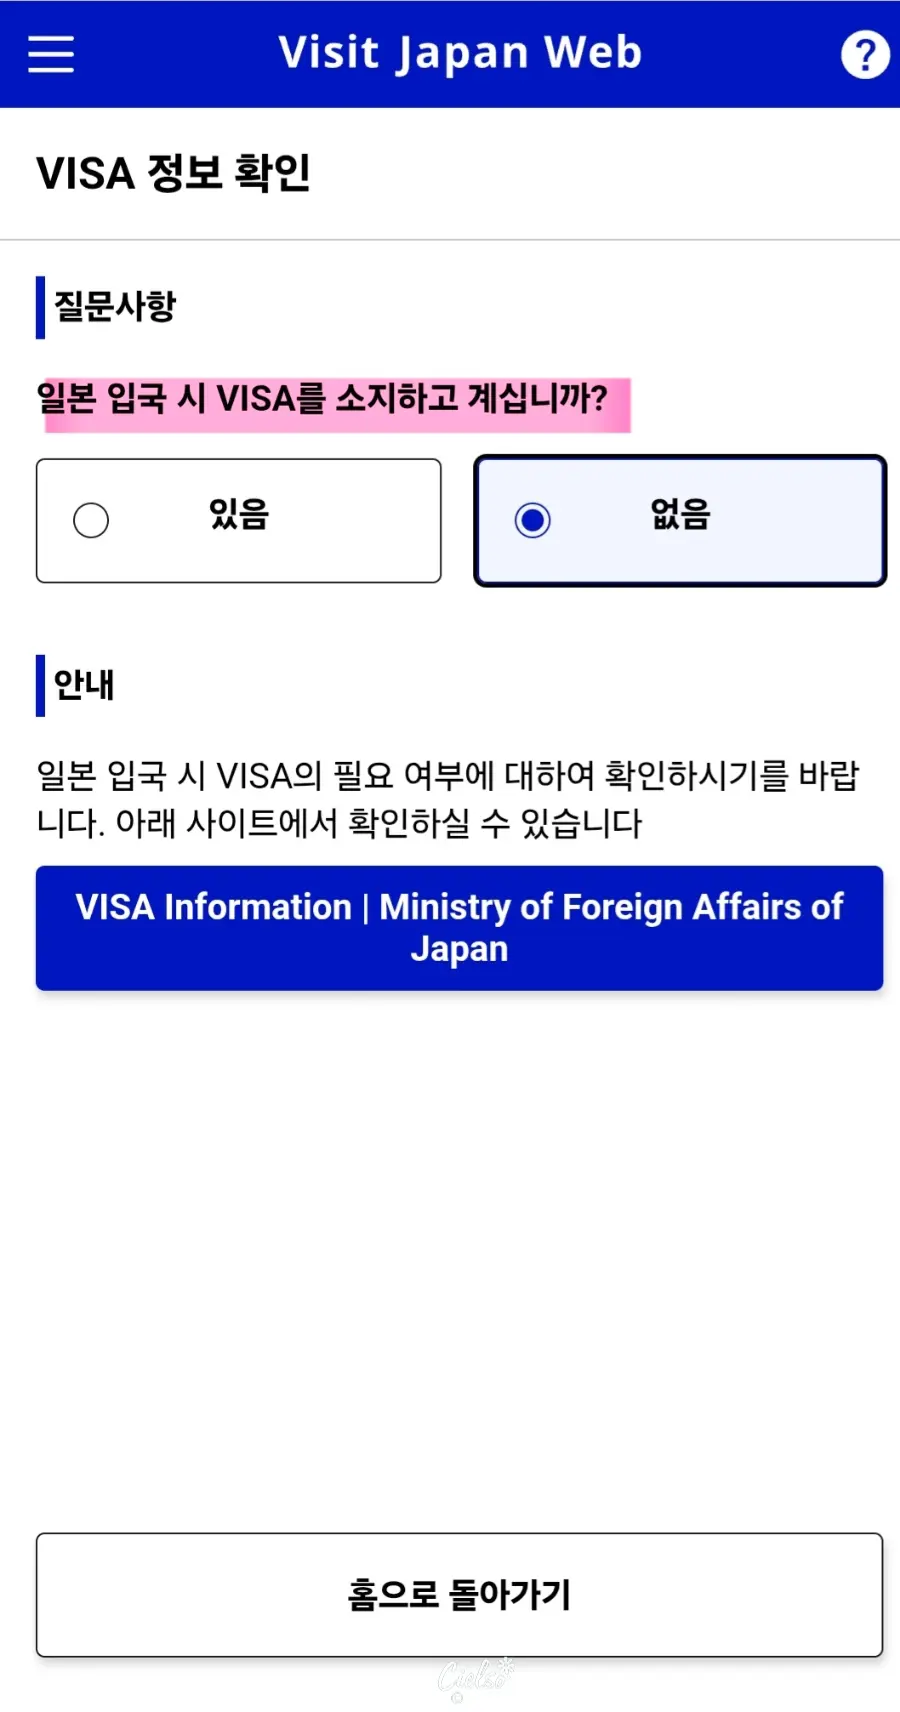
and your personal details registration is complete!
Registering Accompanying Family Members
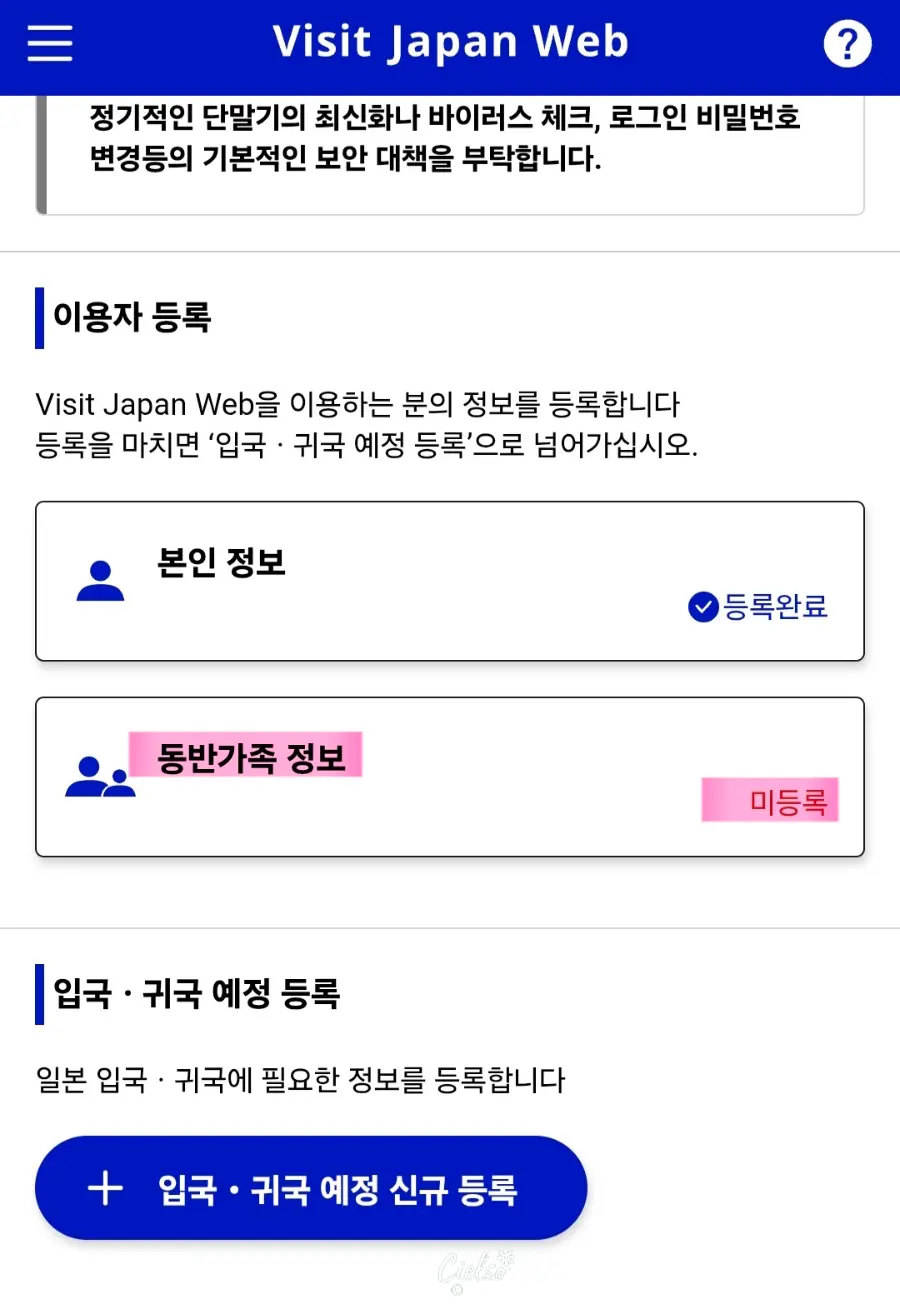
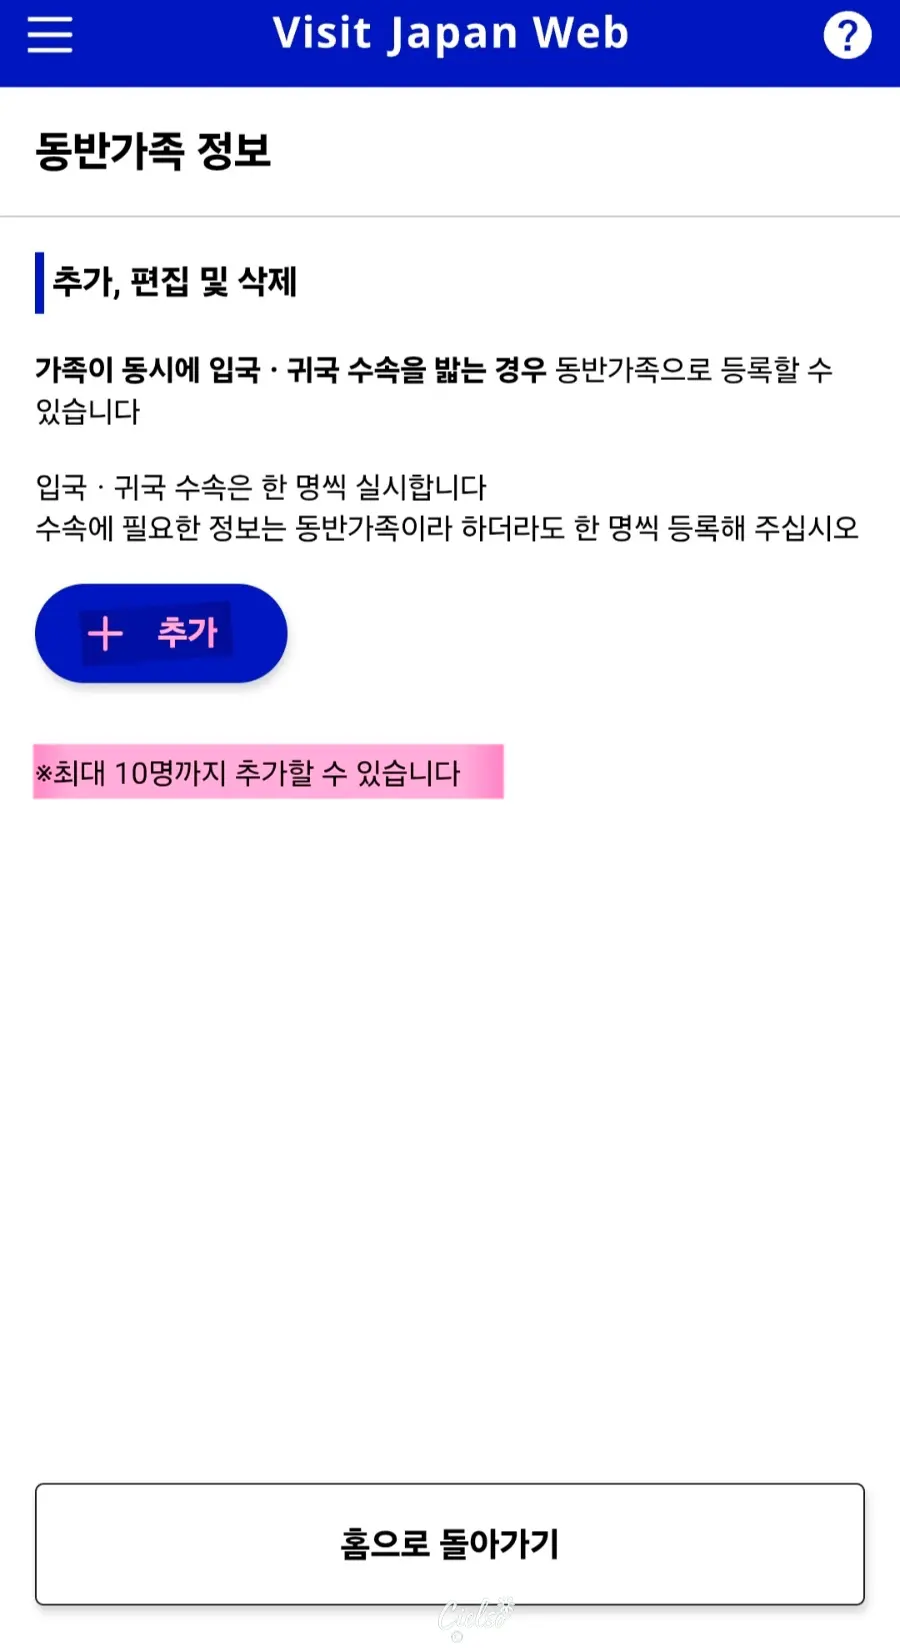
If you are traveling with family,
you'll need to register each family member's details separately.
You can register up to 10 accompanying travelers!
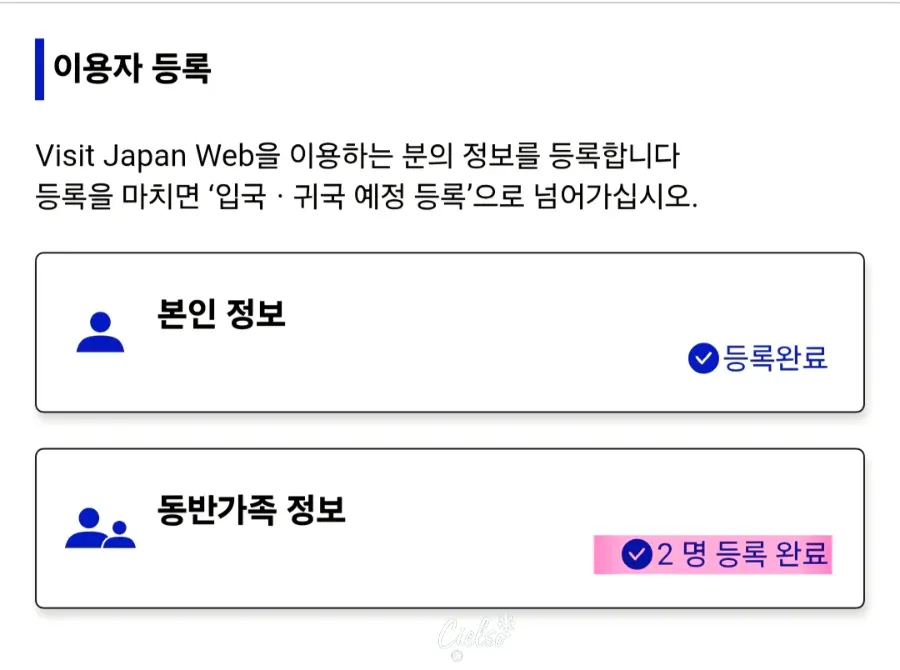
Registering them is exactly the same as registering yourself,
so it's super easy! Once done, just like in the photo,
you can double-check how many people have been successfully registered.
Register Planned Entry/Return
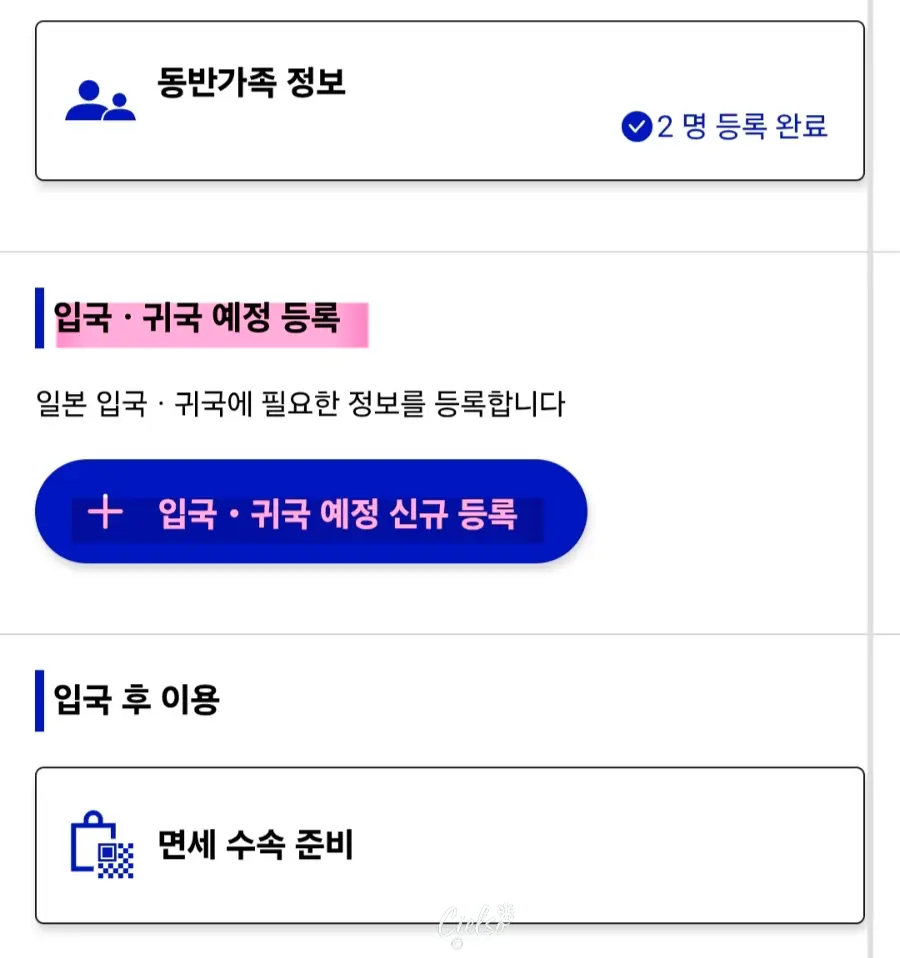
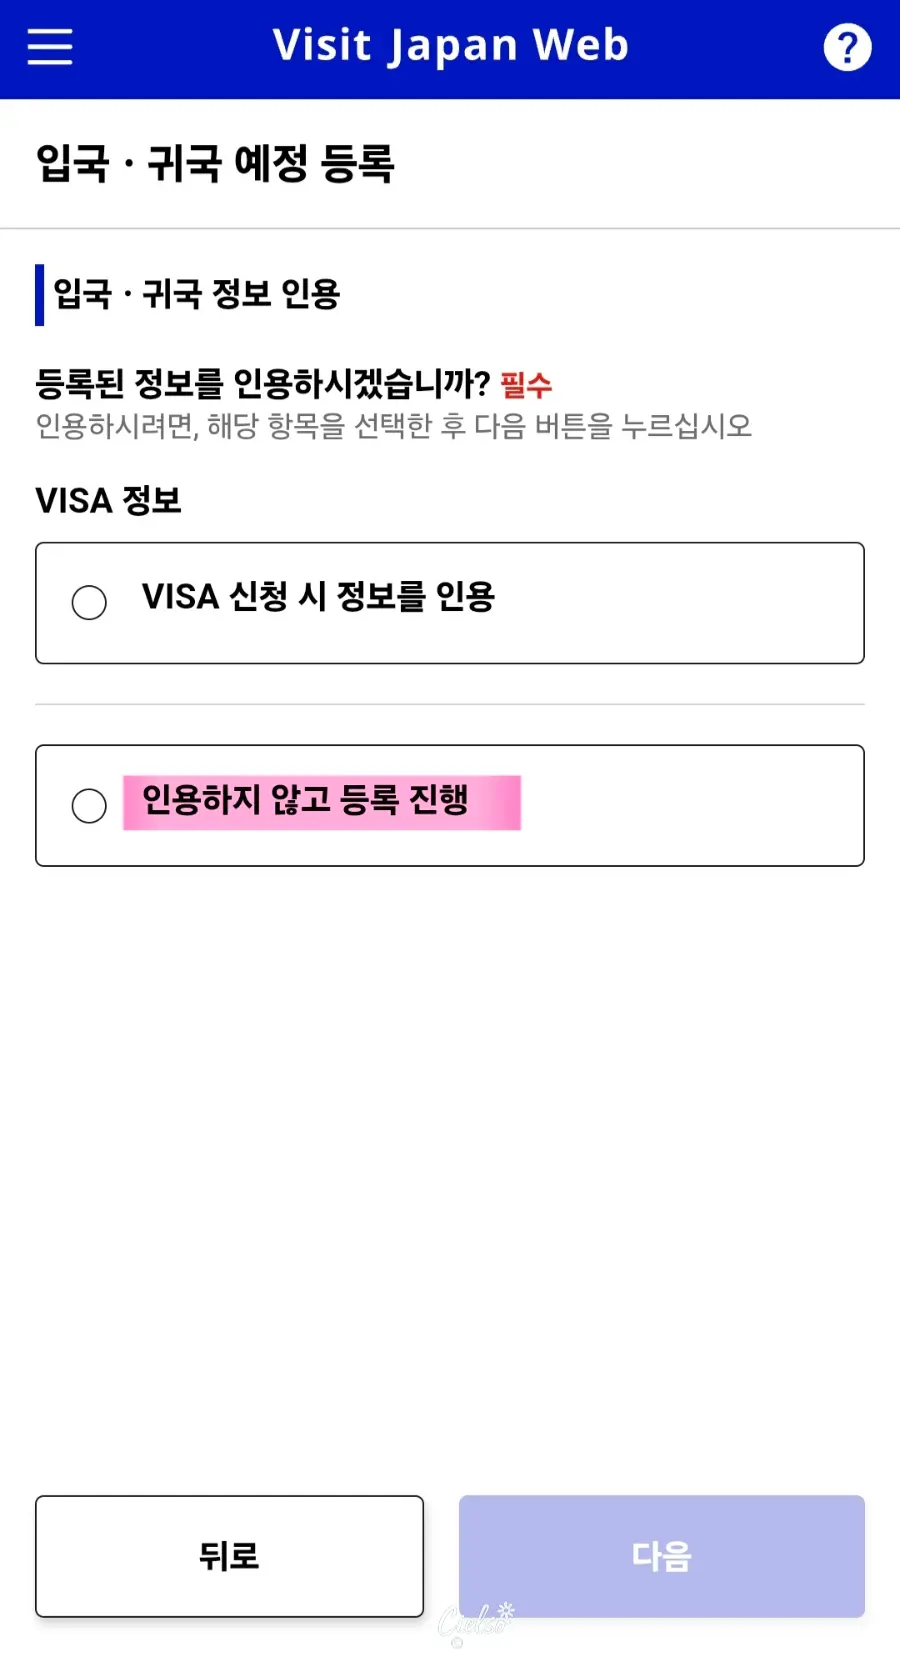
Select "Register New Planned Entry/Return,"
and then choose "Proceed to registration without copying details."
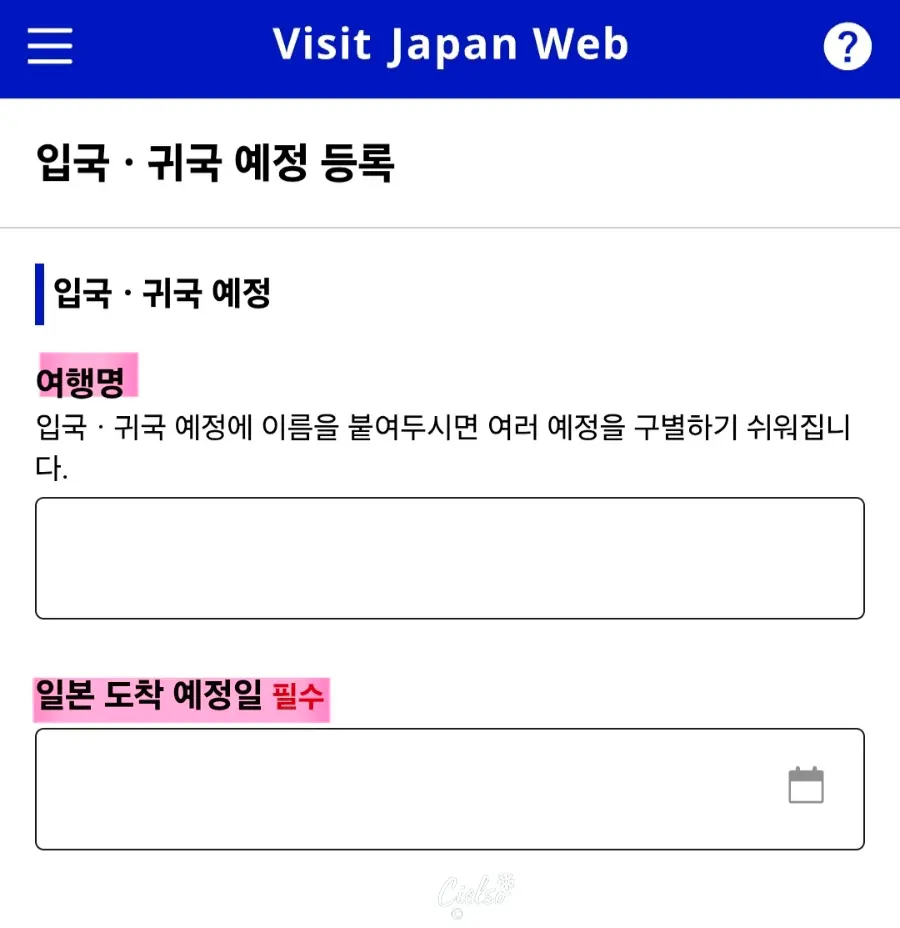
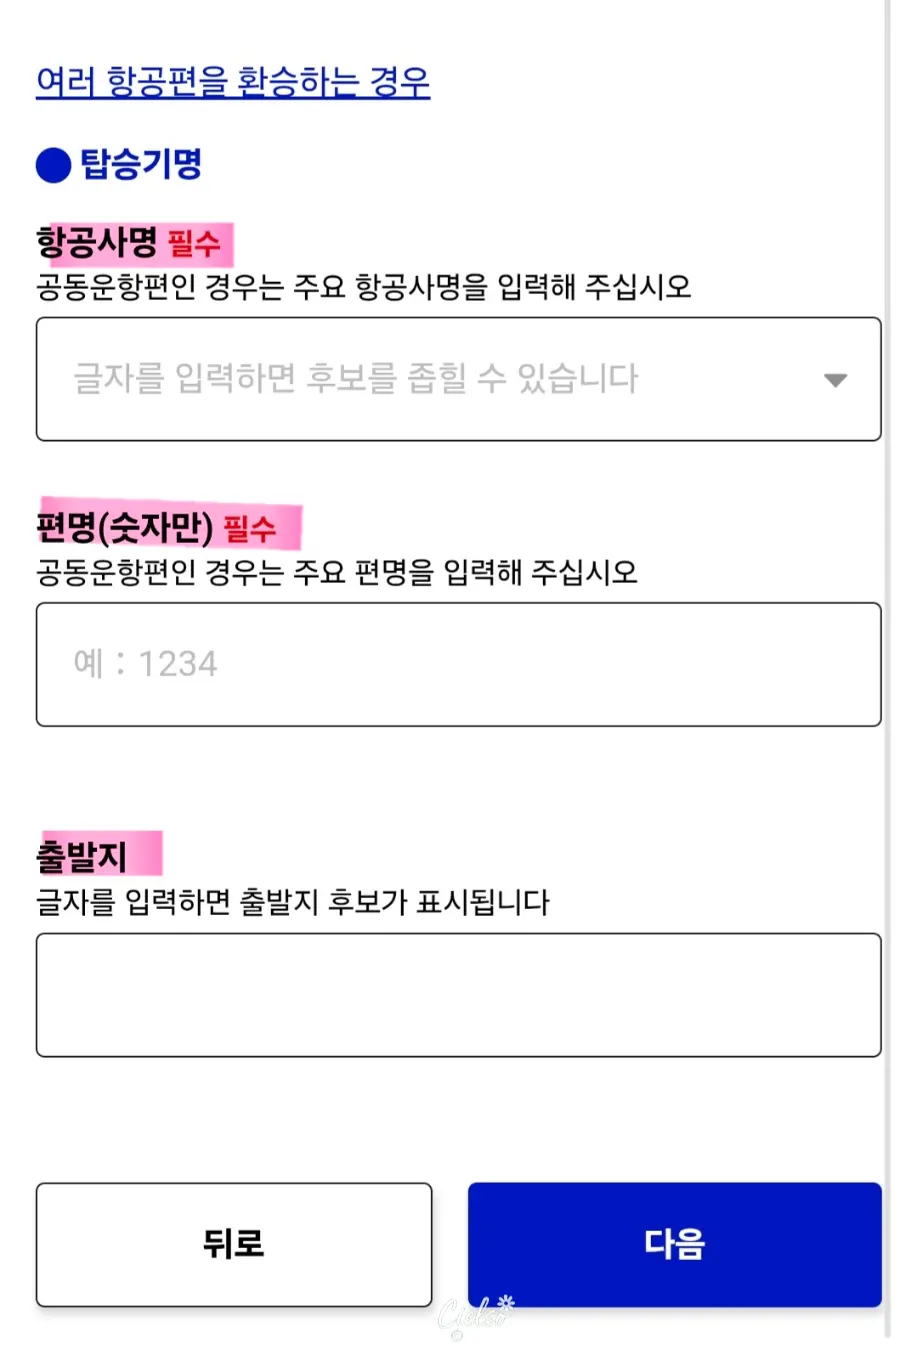
Fill in all the required fields,
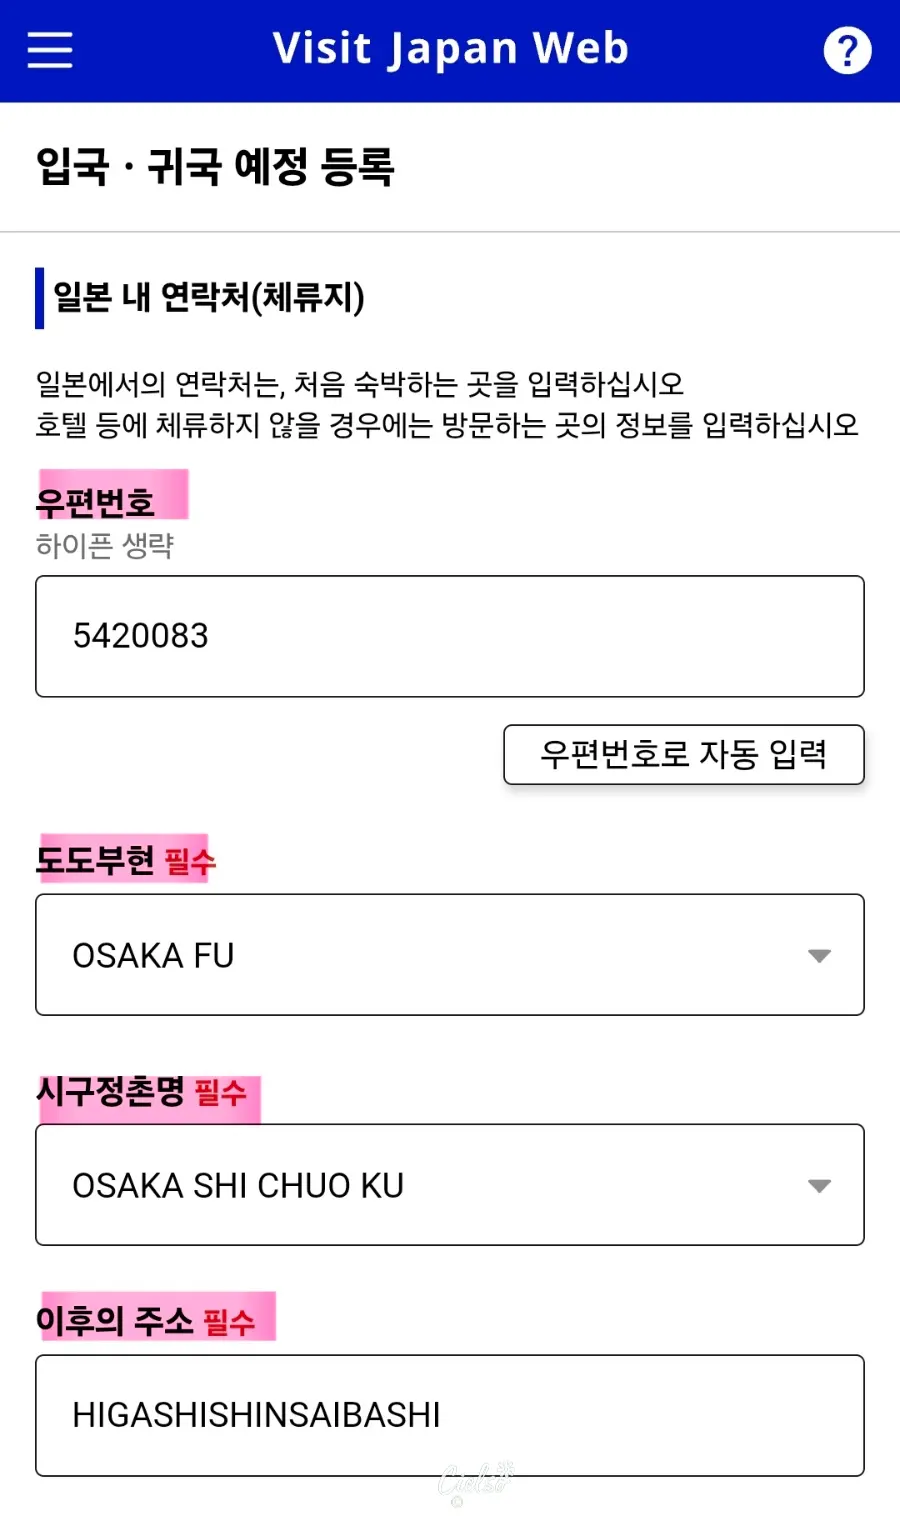
and enter your accommodation details.
‼️Since I stayed at Candeo Hotels Osaka Namba,
I filled this out based on Candeo Hotels.‼️
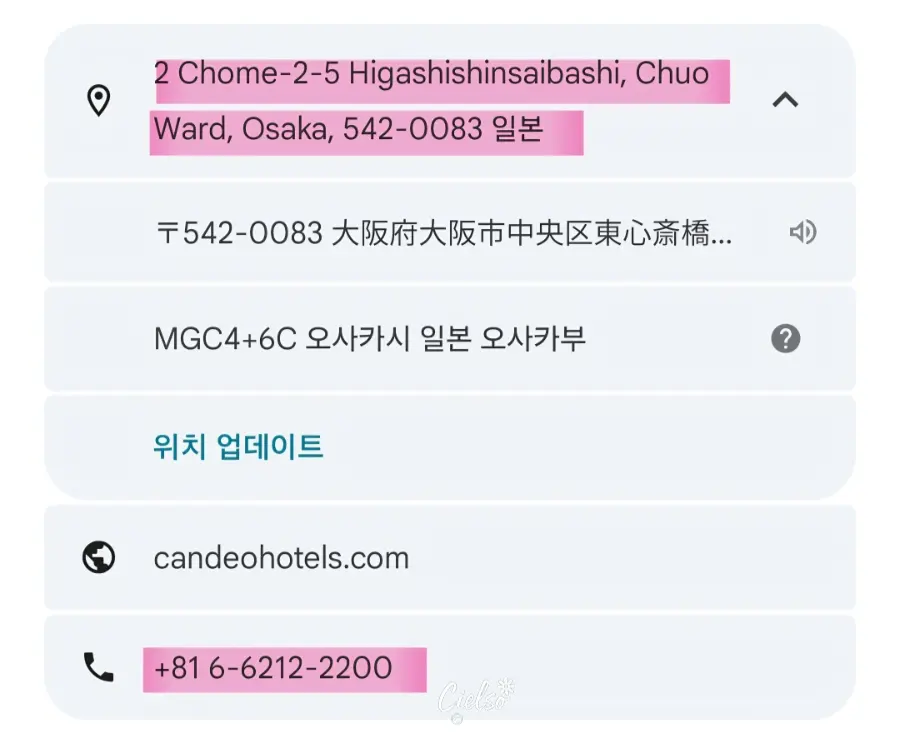
By the way, if you search for your hotel on Google,
you can easily find the address of where you'll be staying.
Typing in the postal code will automatically fill in the prefecture, city, and subsequent address. But if you can't find the postal code or just want to manually enter the required fields,
in this address—"2 Chome-2-5 Higashishinsaibashi, Chuo Ward, Osaka, 542-0083 Japan"—here is how you break it down:
Prefecture - Osaka
City/Town/Ward - Chuo
Street Address - Higashishinsaibashi
This should make it easy to map out!
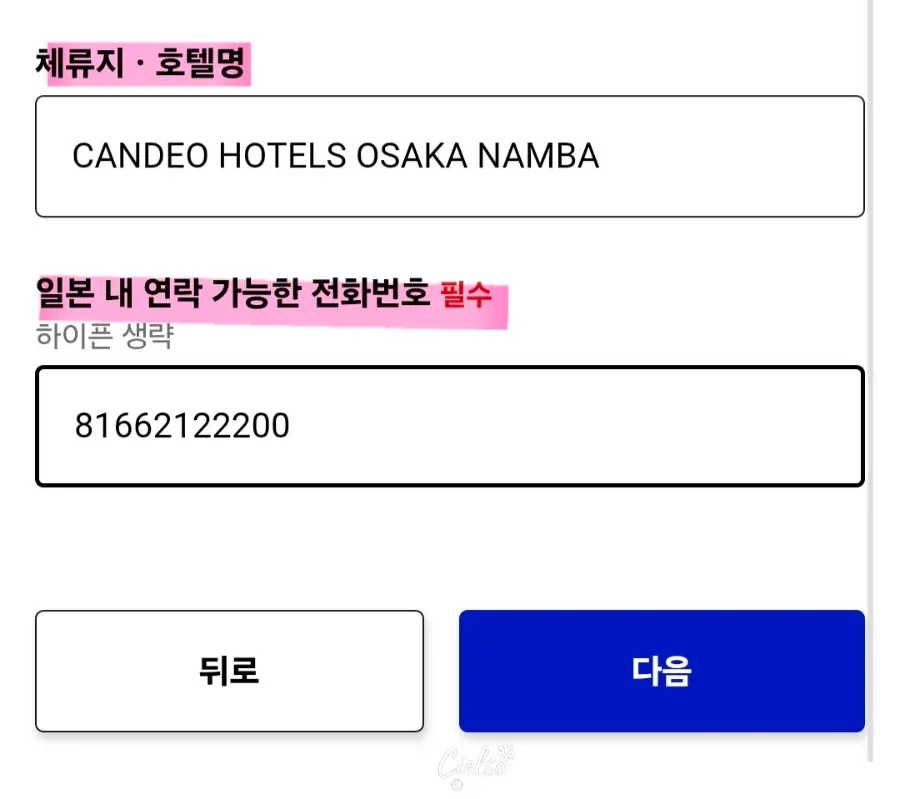
For the hotel name and phone number,
you can just refer to Google Maps and type them in.
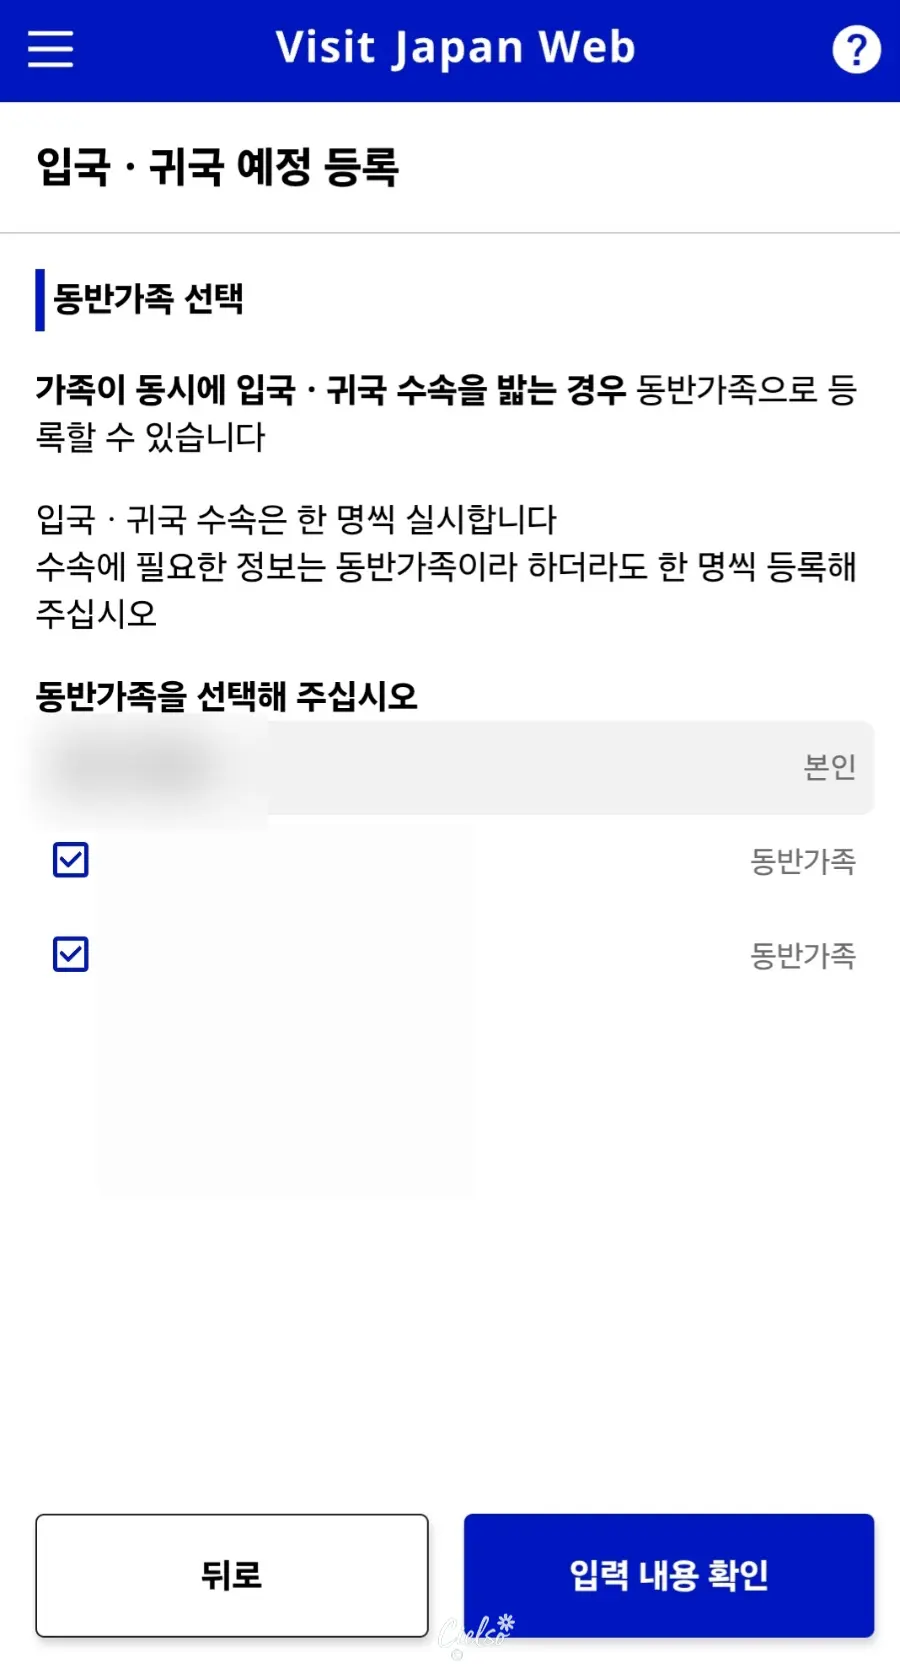
If you're traveling with family like me, make sure to select your accompanying family members,
and then click "Confirm Entered Details."
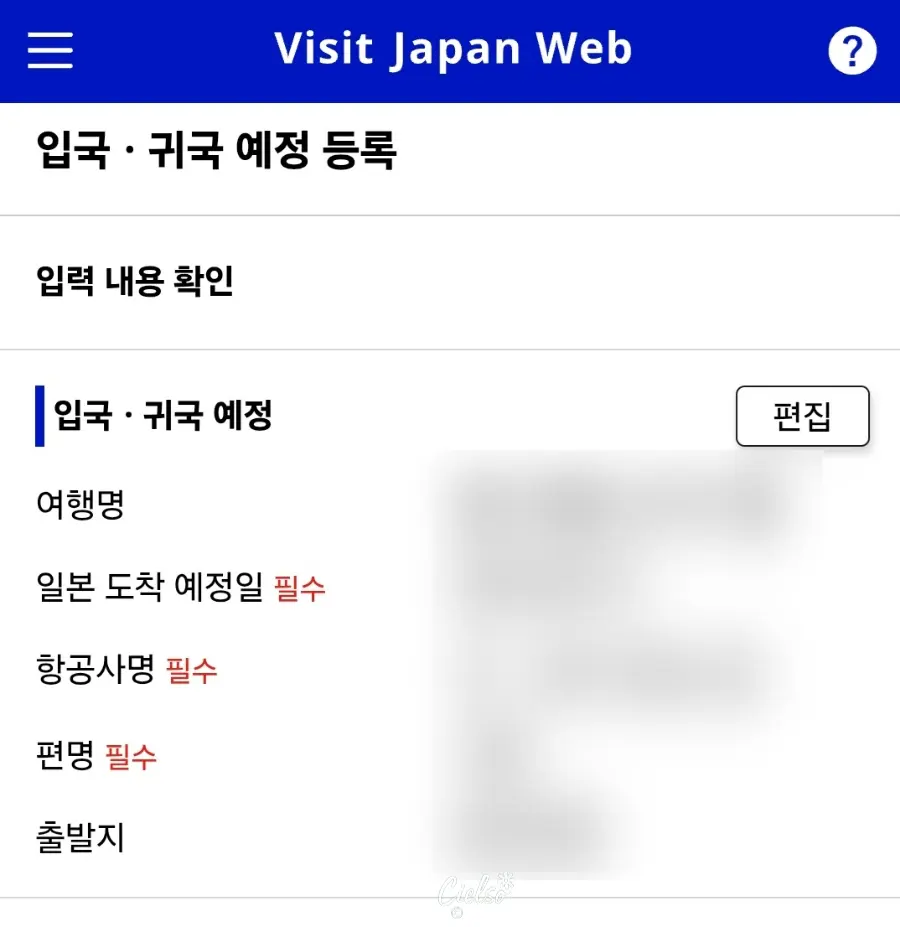
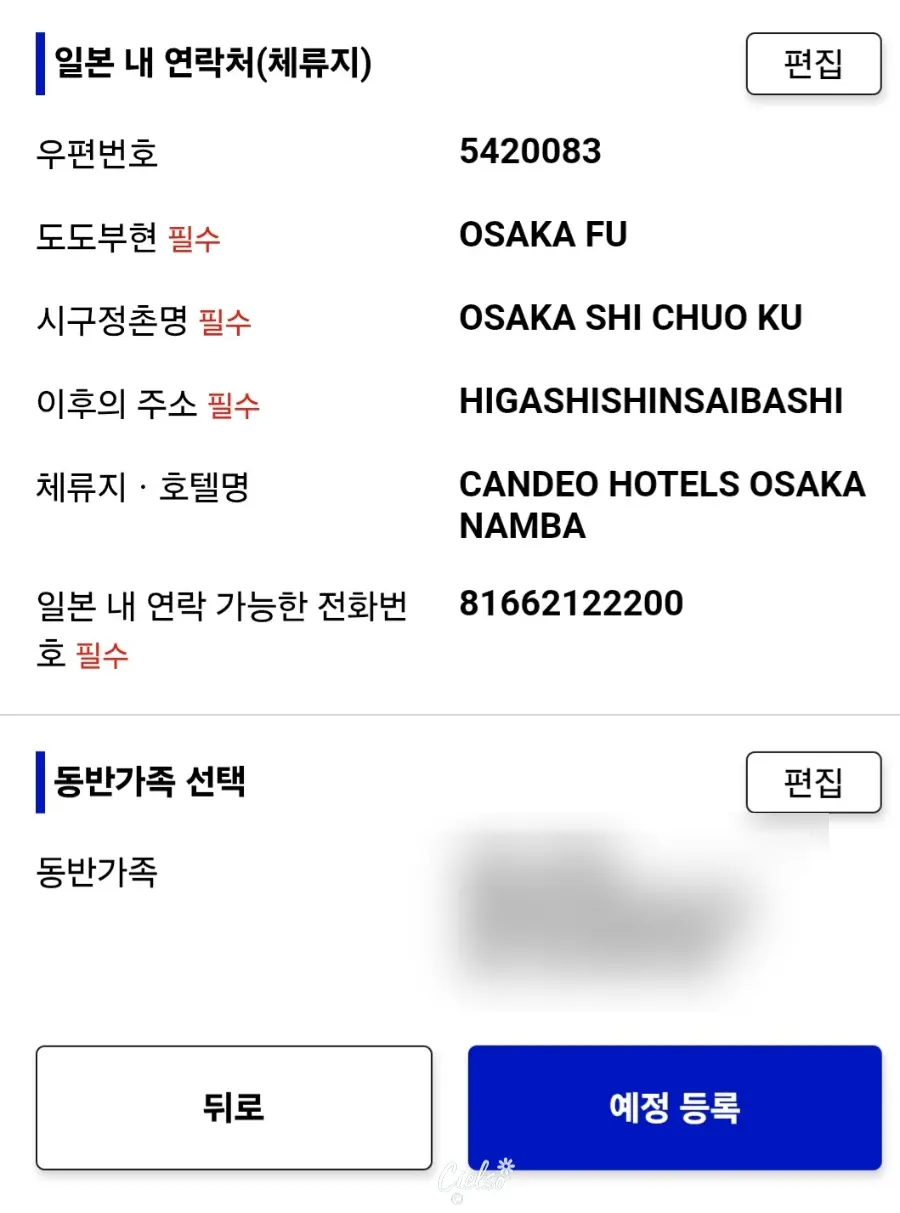
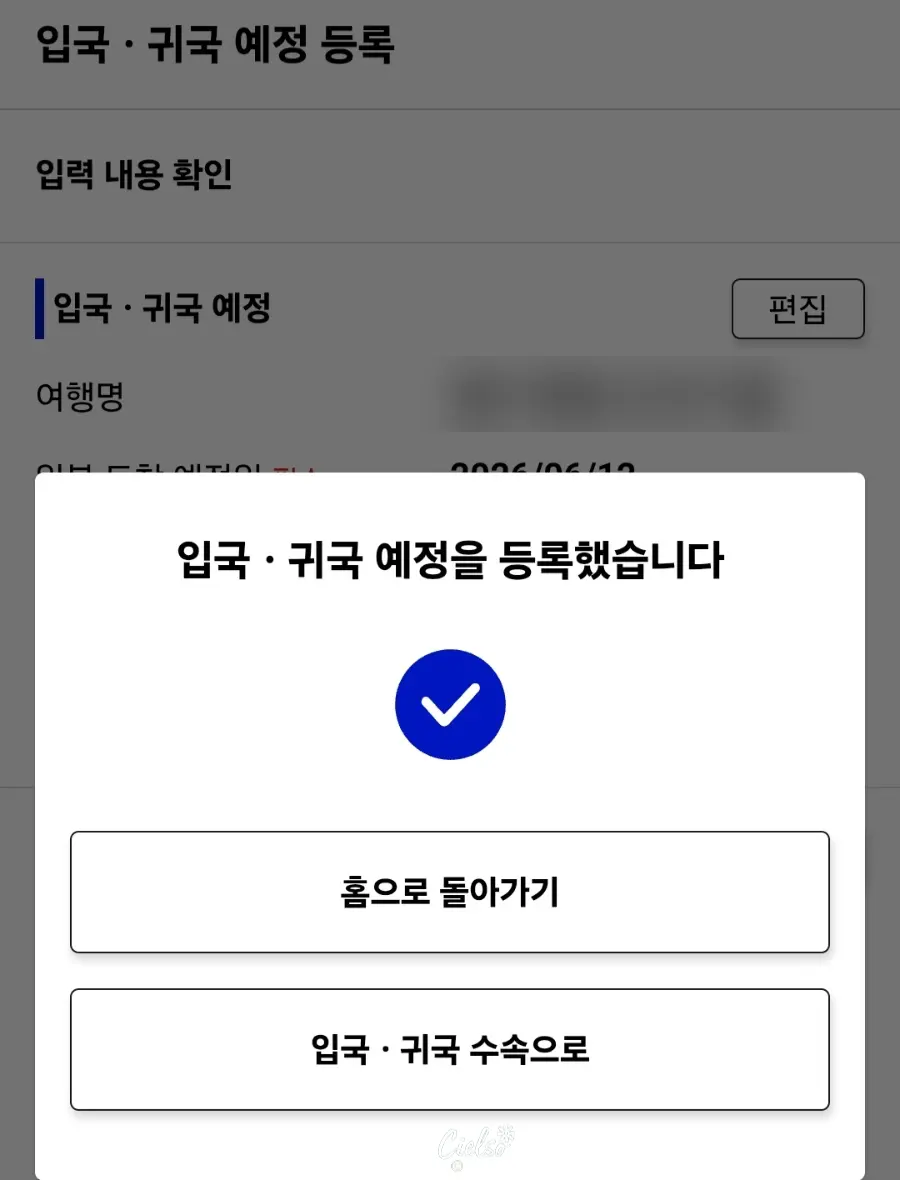
Take a quick look to make sure everything you entered is correct,
complete your planned entry registration,
and select "Back to Entry/Return Procedures" again.
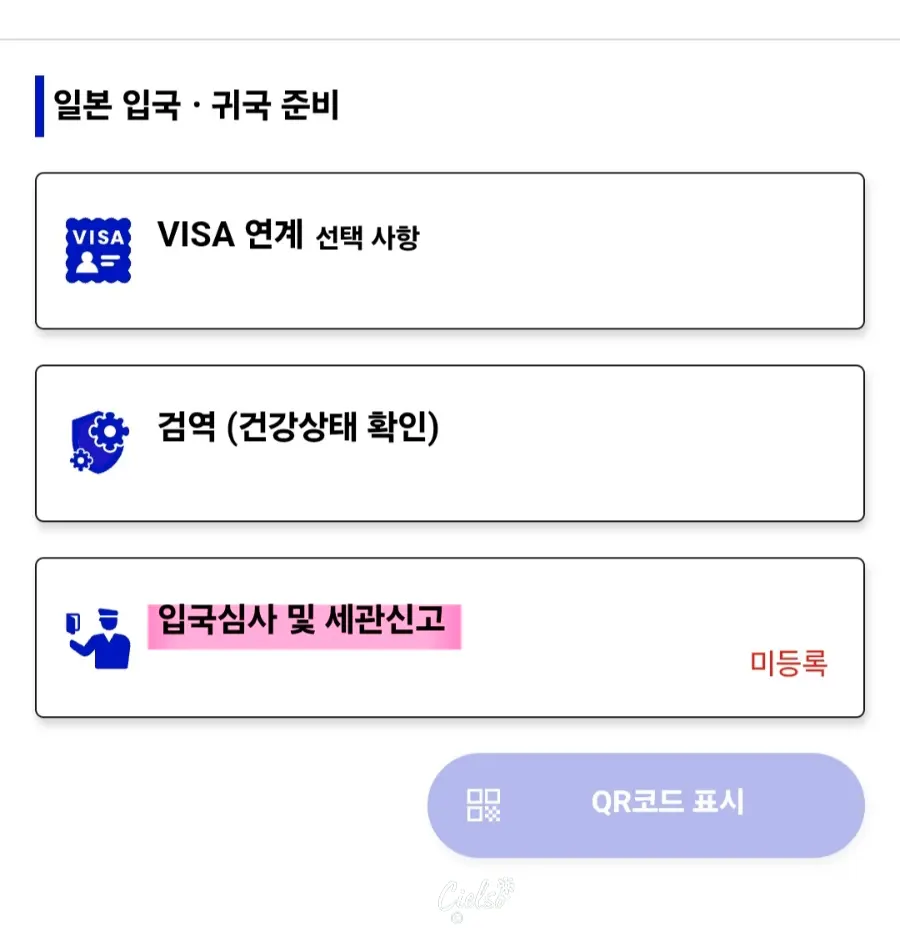
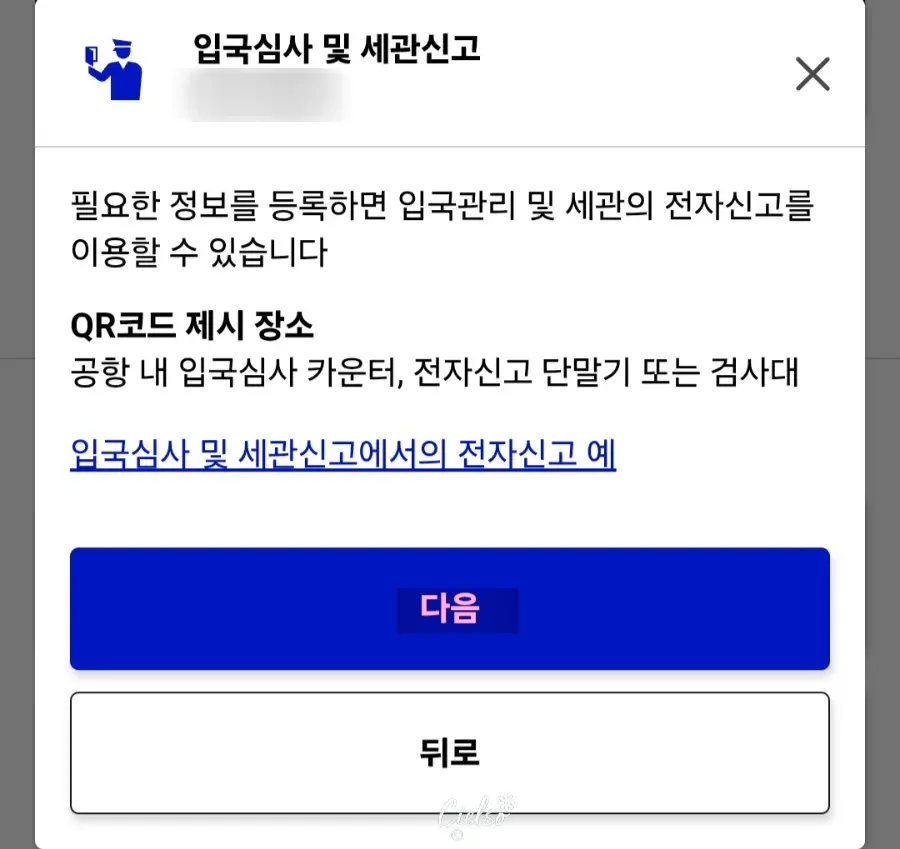
Next, select "Disembarkation Card and Customs Declaration,"
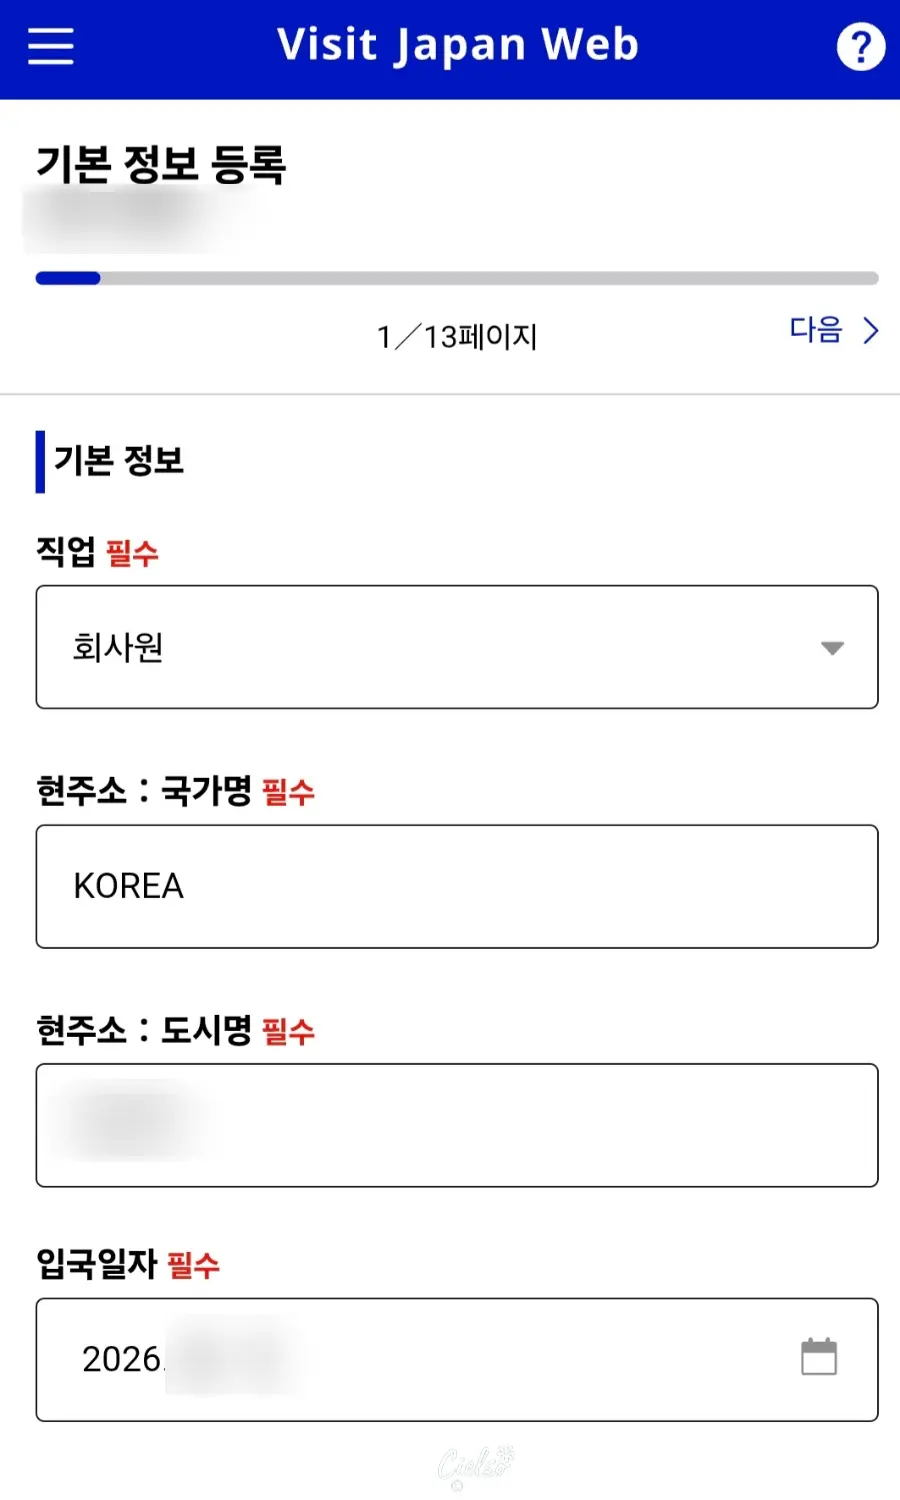
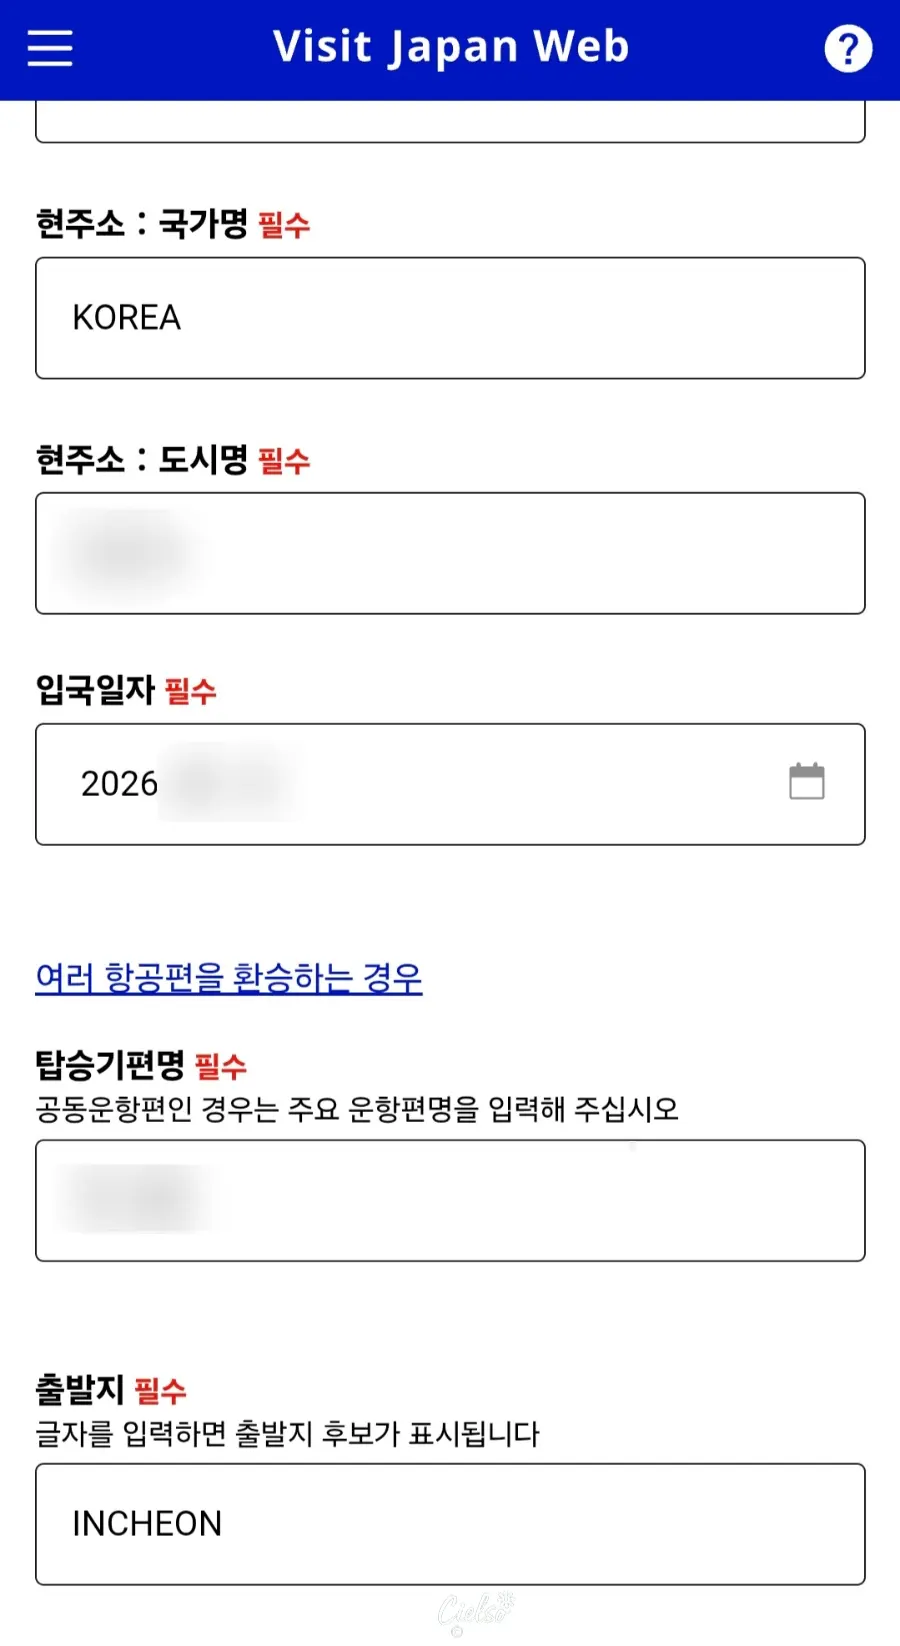
register your basic information,
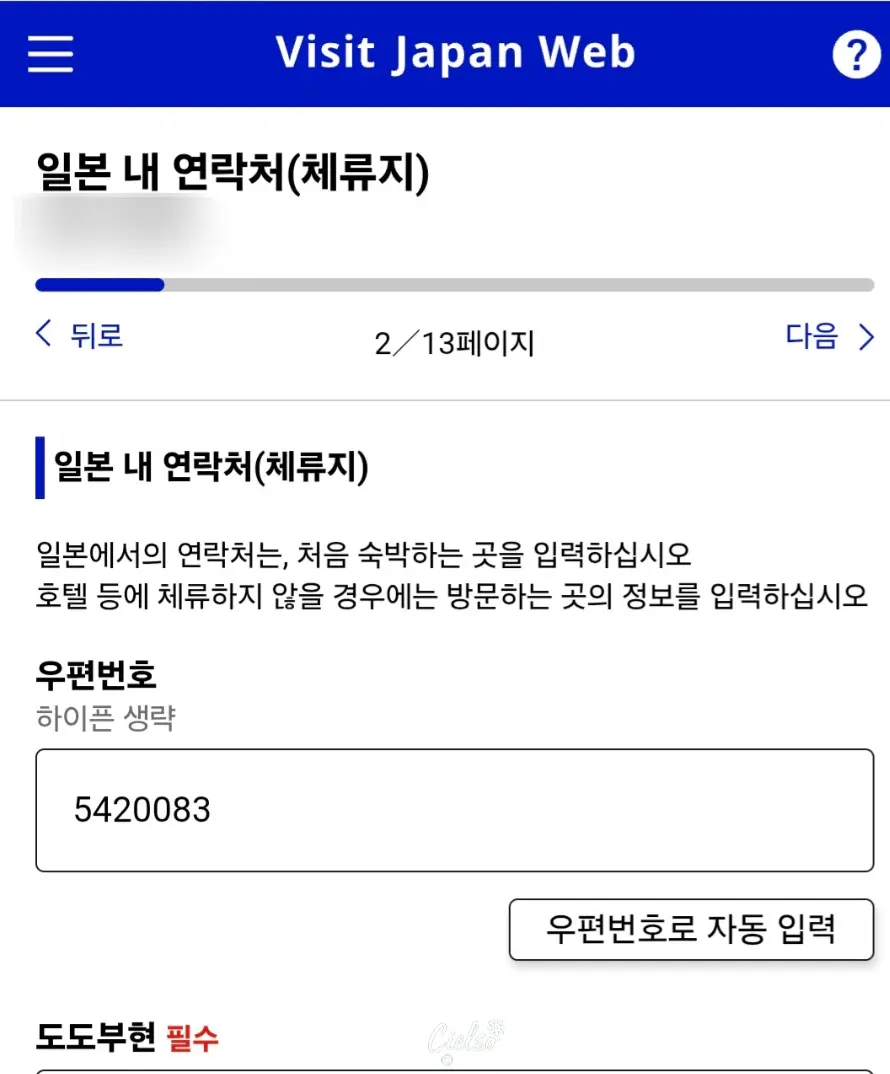
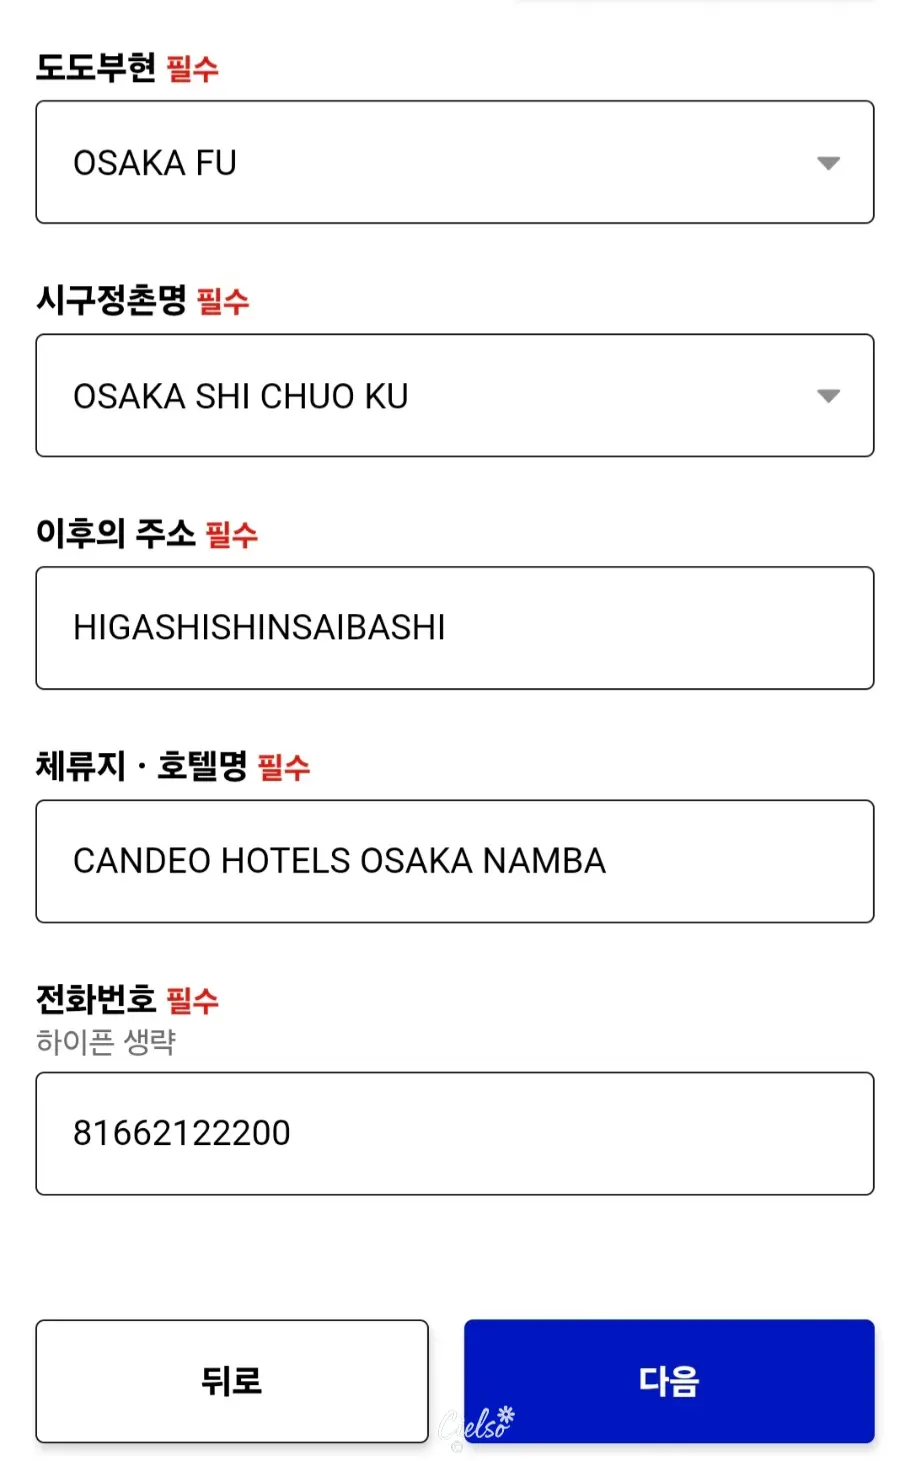
double-check your accommodation details once more,
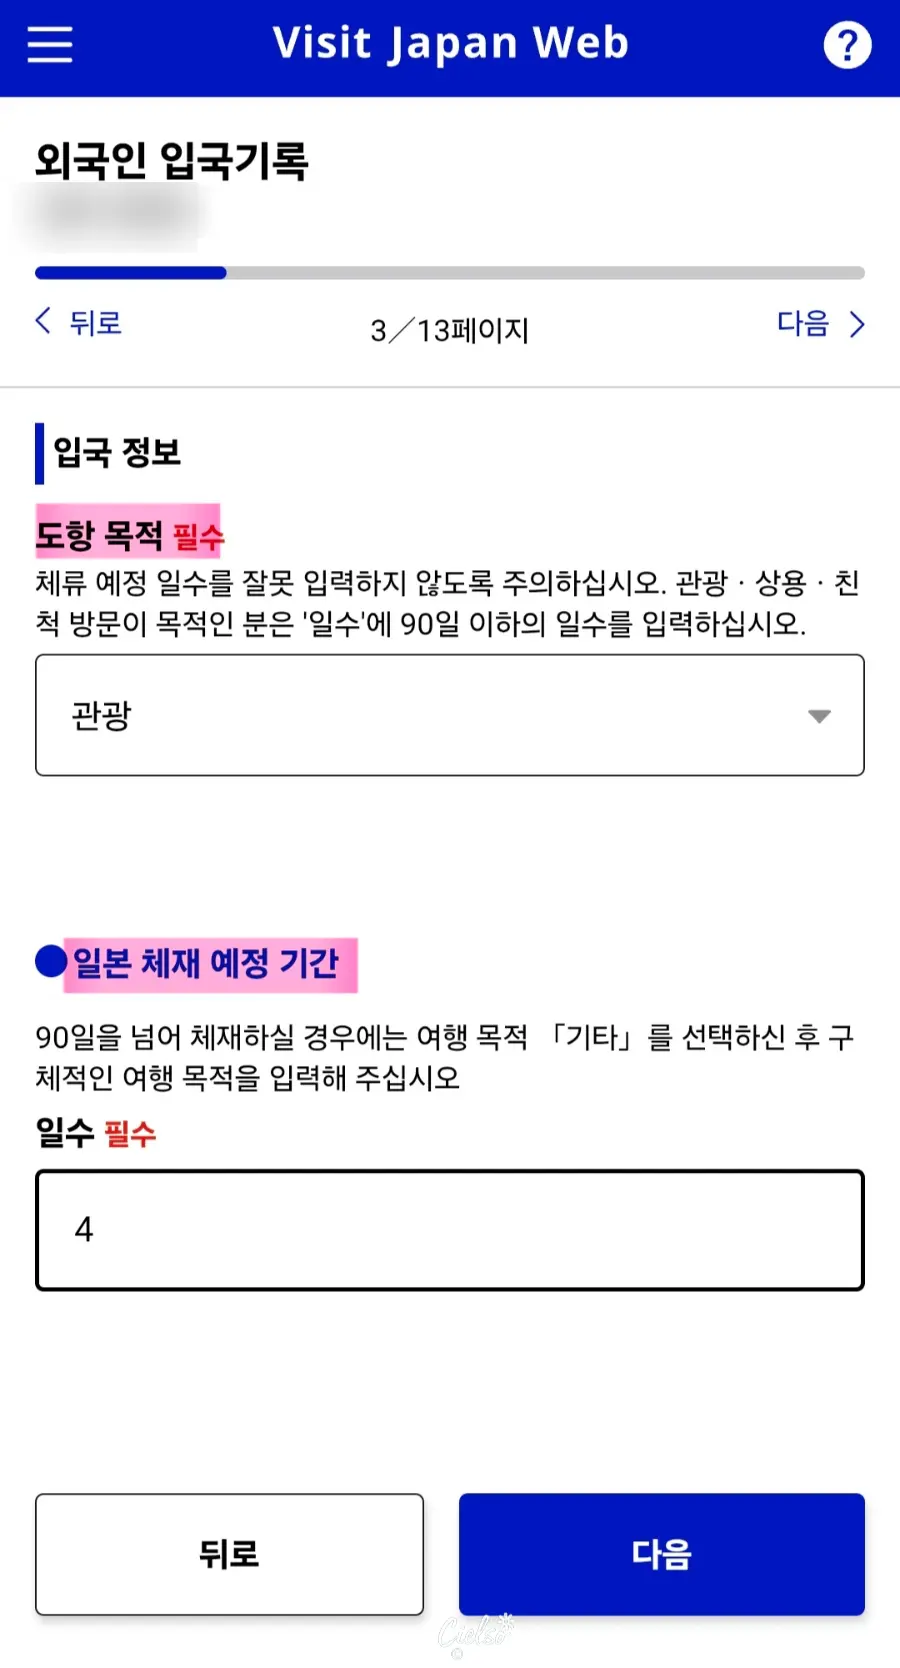
enter your purpose of travel and intended length of stay in Japan,
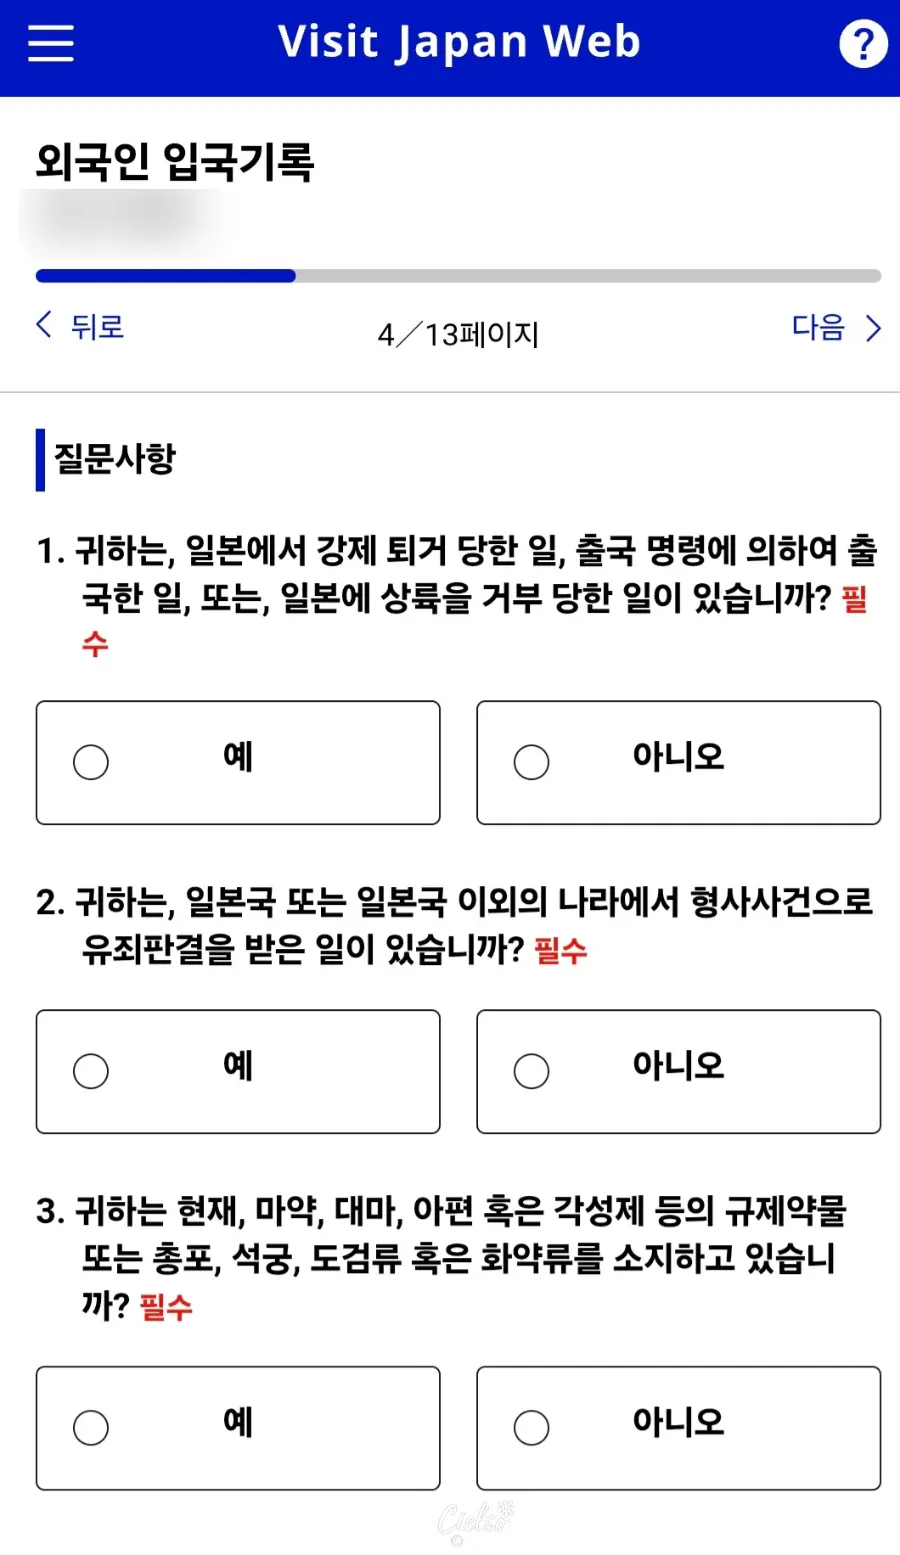
and then proceed to answer the questions.
You'll mostly be checking "No," but
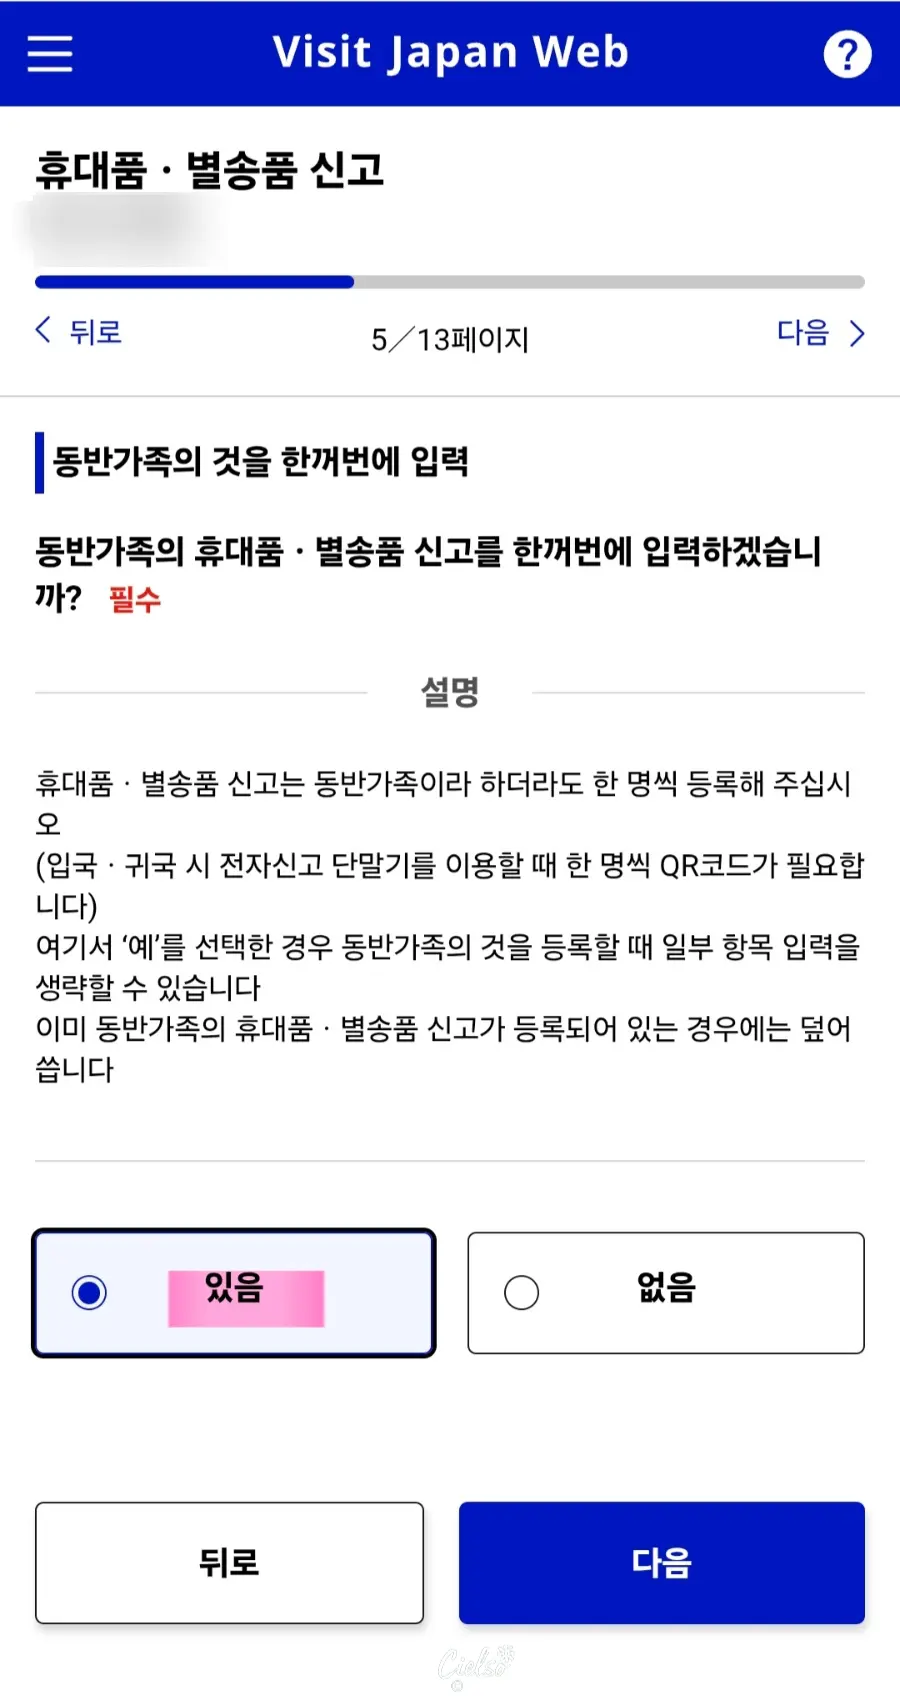
on the 5th page, if you have accompanying family,
make sure to select "Yes" to make getting your QR code much smoother!
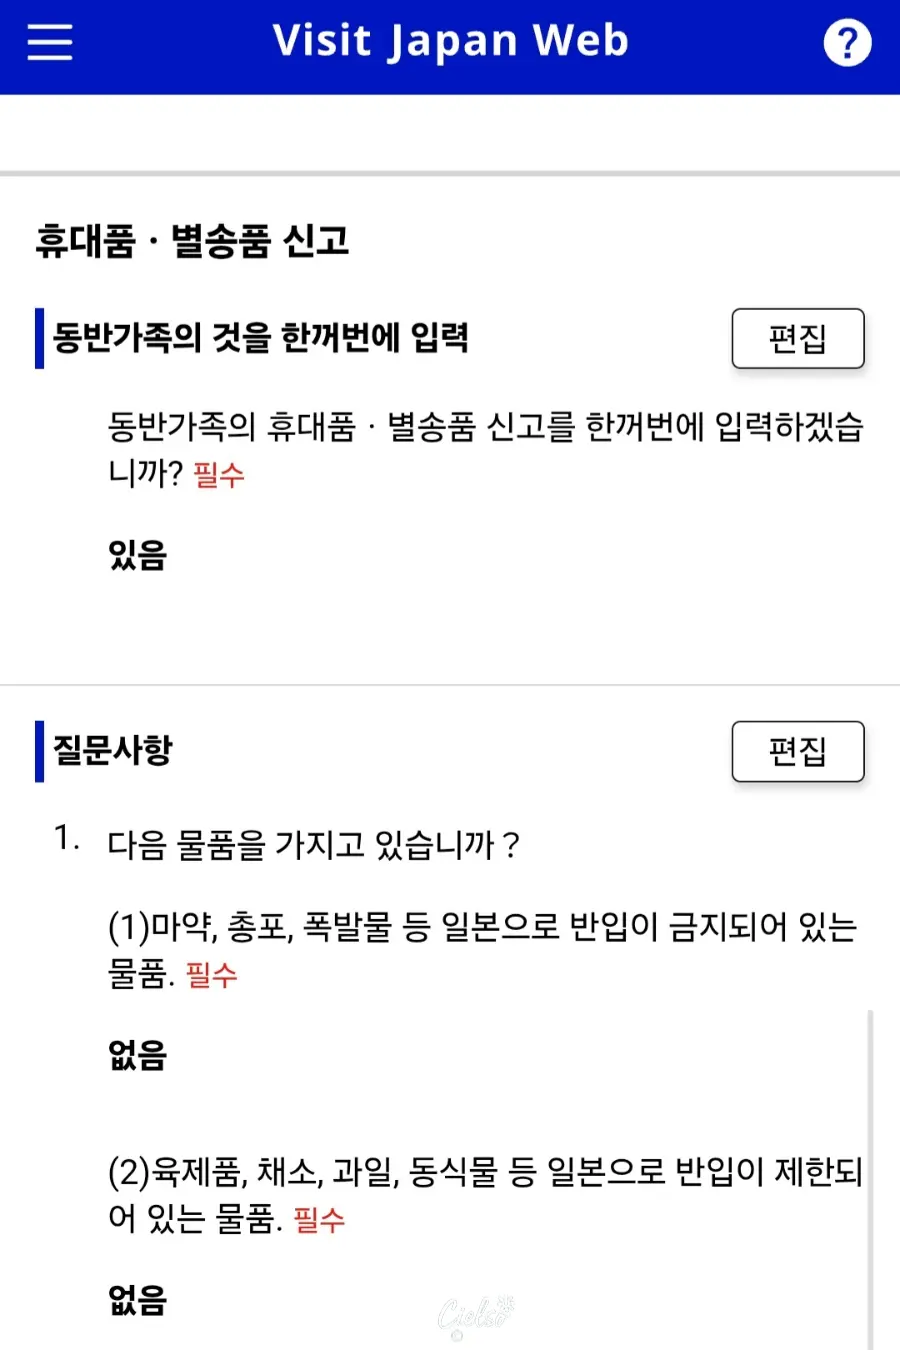
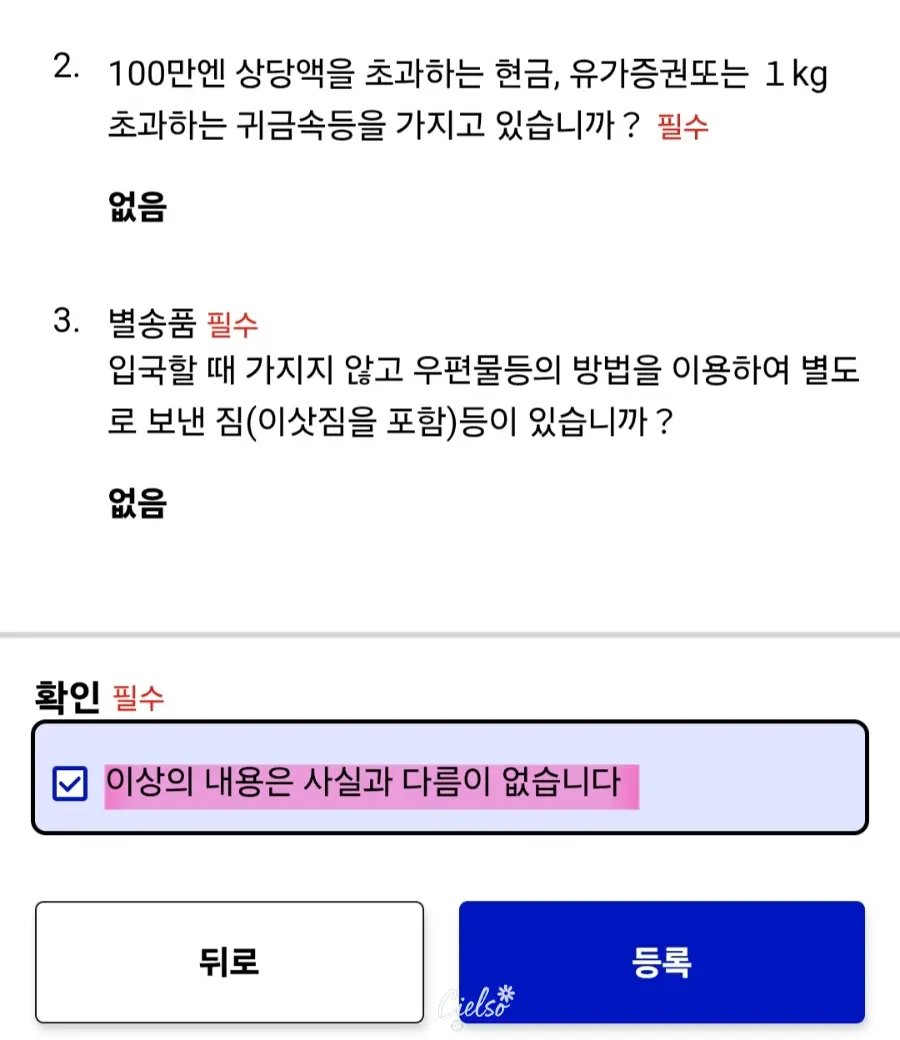
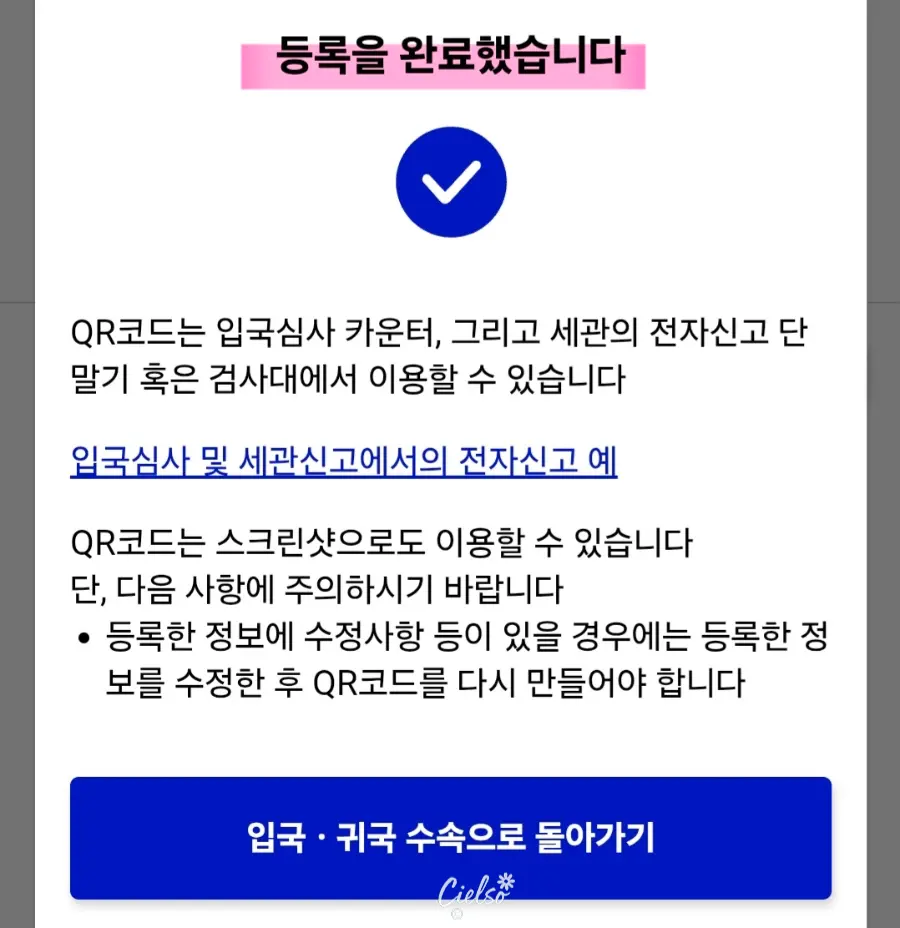
Review all your answers one last time to make sure there are no mistakes,
and tap "Register" to finish up.
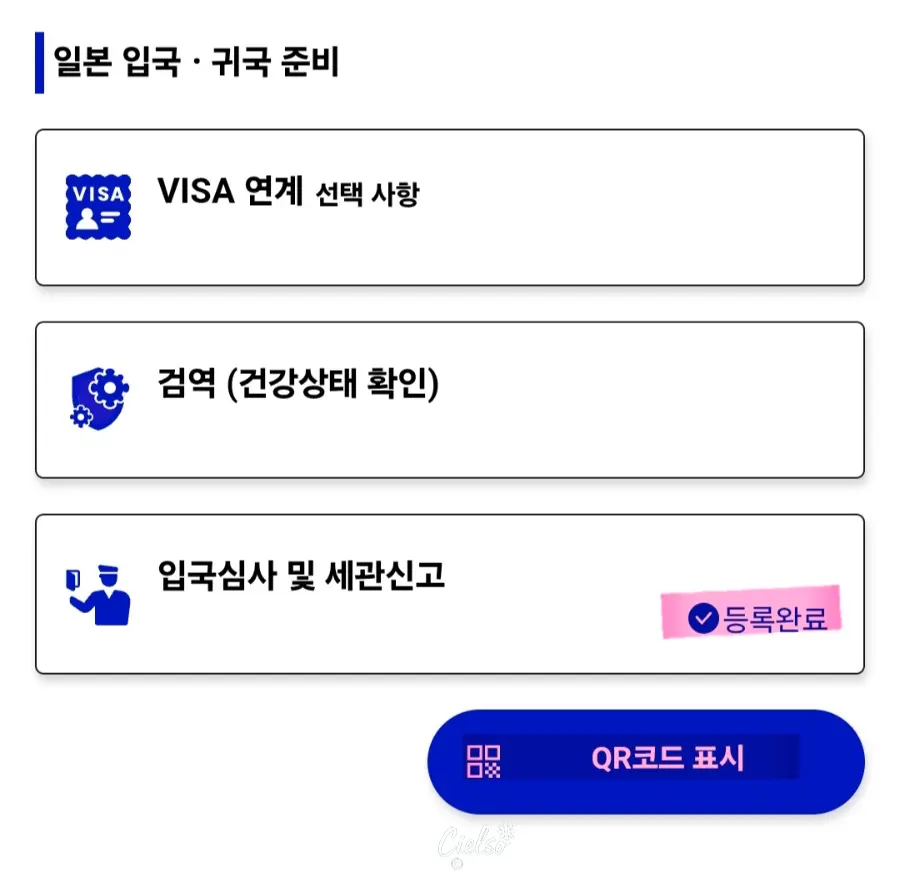
Once you register your Disembarkation Card and Customs Declaration,
the status will change from "Unregistered" to "Registered."
From there, just tap the "Display QR Code" button below,
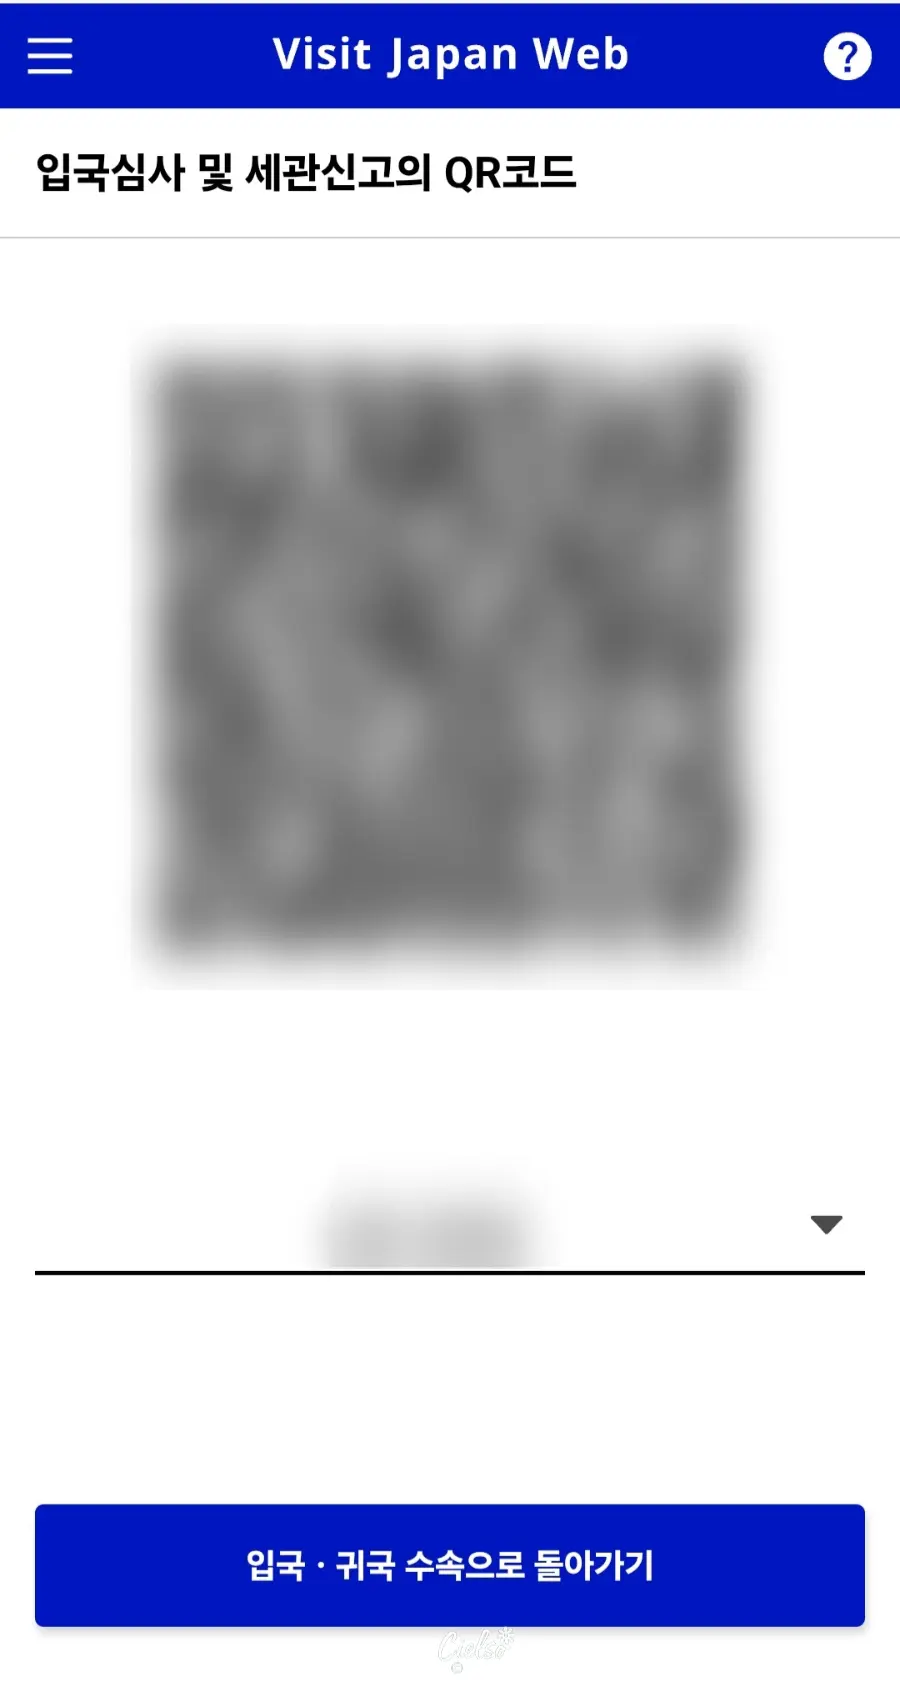
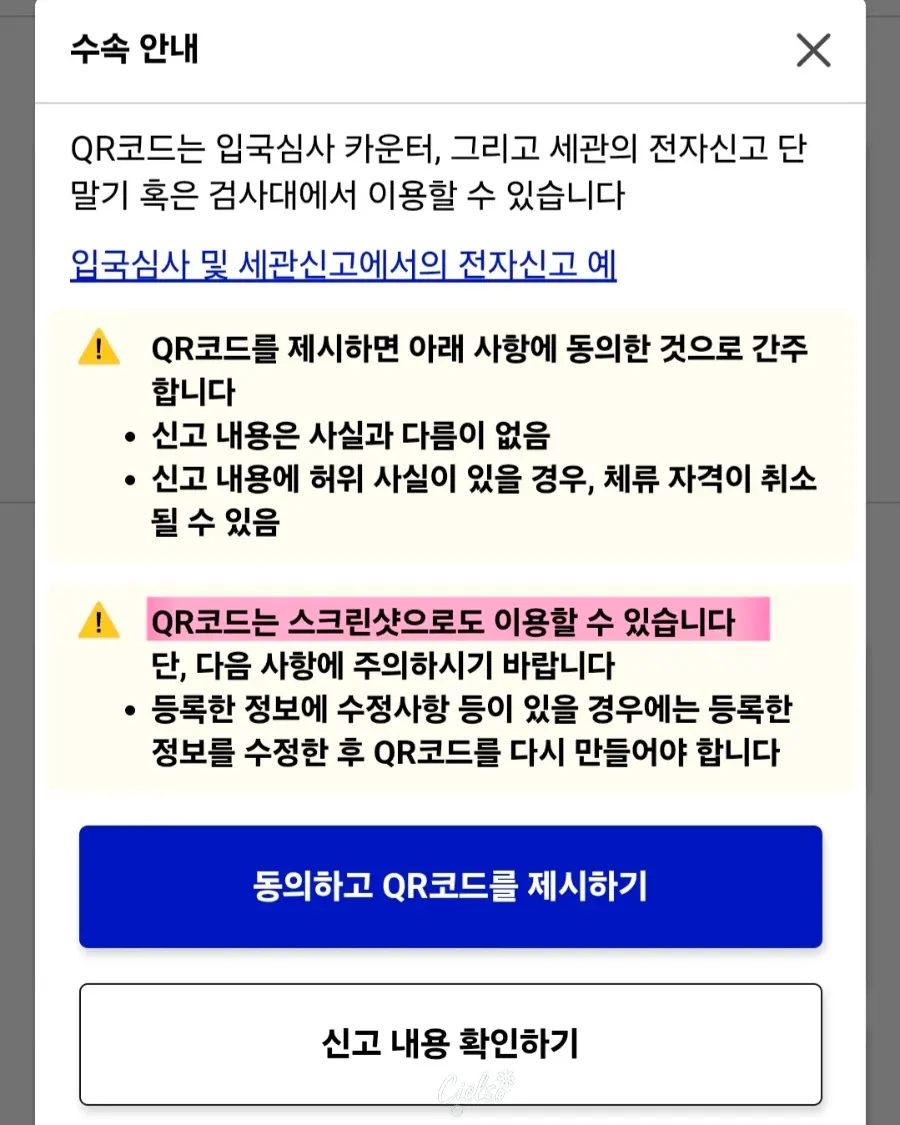
Just like in the photo, you will receive your QR codes.
Since you can also use screenshots of the QR code,
saving them to your gallery beforehand will make immigration
super quick and smooth. I highly recommend taking a screenshot!
✔︎ My honest review of using the super-convenient Visit Japan Web for Japanese immigration
To be honest, entering all the details and trying to upload my passport photo
was a bit of a hassle because it didn't register easily at first...
But when traveling with family, it was incredibly handy because I could just send the QR codes directly to my parents' phones.
It made the whole process so much easier!
Make sure to register on Visit Japan Web before you go,
and have an absolutely amazing trip to Osaka!
Cielso
ⓒ2026.Cielso All rights reserved.
Frequently Asked Questions
What is the maximum number of accompanying family members I can register on Visit Japan Web?
On Visit Japan Web, you can separately register information for accompanying family members in addition to yourself, and you can add up to 10 people. By proceeding in the same way as your own registration, you can conveniently prepare for immigration clearance when traveling with your family.
How should I enter the address for 'Candeo Hotels Osaka Namba' when filling out the accommodation information on Visit Japan Web?
If you enter the postal code of the accommodation, the prefecture and municipality names will be filled in automatically. If you choose to manually enter only the required fields, you can enter 'Osaka' for the prefecture, 'Chuo' for the municipality, and 'Higashishinsaibashi' for the subsequent address.
How should I check the option for using the tax-free QR code when registering my personal information on Visit Japan Web?
If you choose to use the tax-free QR code, you will need to separately register a photo of your passport's face page, which can be a hassle. If you find it more convenient to present your physical passport when purchasing tax-free goods, it is recommended to check 'None' for this option.
Can I use a screenshot of the QR code issued after completing the Visit Japan Web registration at immigration?
Yes, you can take a screenshot of the issued QR code and use it as is during immigration clearance. For family trips, sending the screenshots to your parents' phones in advance can make it very convenient to use on-site.
Share this article
Featured in Collections
Discover more travel stories curated around the same theme.

Related Travel Stories

Universal Studios Japan Tickets 2026: USJ Express Pass Guide
Planning a trip to Universal Studios Japan? Don't get lost in ticket options! We break down all USJ ticket types and share our best tips for using an Express Pass to beat the crowds.

Osaka Castle Tickets 2026: Hours & Amazing Pass Guide
Discover everything you need to know about visiting Osaka Castle in 2026, from ticket prices and opening hours to money-saving Osaka Amazing Pass tips.

Karaksa Hotel Osaka Namba Review 2026: Family Stay
Looking for the perfect family-friendly hotel in Osaka? Here is our honest review of Karaksa Hotel Osaka Namba, a budget-friendly gem near Dotonbori.

USJ Osaka Tickets 2026: Guide to Passes & Rides
Navigating Universal Studios Japan in Osaka can be overwhelming. Here is your ultimate guide to USJ tickets, Express Passes, and top attractions for 2026.

Oriental Hotel Universal City Review 2026: USJ Stay
Beat the massive morning crowds at Universal Studios Japan! Stay at Oriental Hotel Universal City for under $85 and master your USJ open run strategy.

Candeo Hotels Osaka Review 2026: Best Umeda Stay
Planning an Osaka getaway with family or friends? Check out our 2026 review of Candeo Hotels Osaka The Tower, a quiet luxury oasis near Umeda Station.