

Visit Japan Web Guide 2026: Easy Entry & Customs Declaration
Streamline your Japan trip! Discover the simple steps to fill out your Visit Japan Web entry and customs forms online, ensuring a hassle-free arrival in 2026.
Quick answer
- Visit Japan Web simplifies entry and customs declaration, replacing paper forms.
- Register personal and travel details, including passport info and accommodation.
- Input your Japanese hotel's 7-digit postal code for easy address autofill.
- Answer customs questions truthfully to generate your entry QR code.
- At major airports like Kansai, use kiosks for pre-screening before immigration.
How to Fill Out the Visit Japan Web Entry Form
Visit Japan Website
Text/Photos © Hi-Bubu
What Should You Prepare Before Traveling to Japan?

These days, Japan is gradually moving away from analog forms
and embracing digital culture.
Among these changes, the biggest is undoubtedly replacing traditional paper entry forms
with submissions via Visit Japan Web.
While paper entry forms are still accepted as an alternative,
they aren't usually provided on planes anymore.
Filling them out upon arrival can be a bit inconvenient.
Today, I'll walk you through how to pre-fill your Japan entry form using Visit Japan Web,
and guide you through the entry procedures in various major cities.
How to Fill Out the Visit Japan Web Entry Form

First, let's dive into how to fill out the entry form on Visit Japan Web.
Please navigate to the official website below.
>> Visit Japan Web Official Website <<
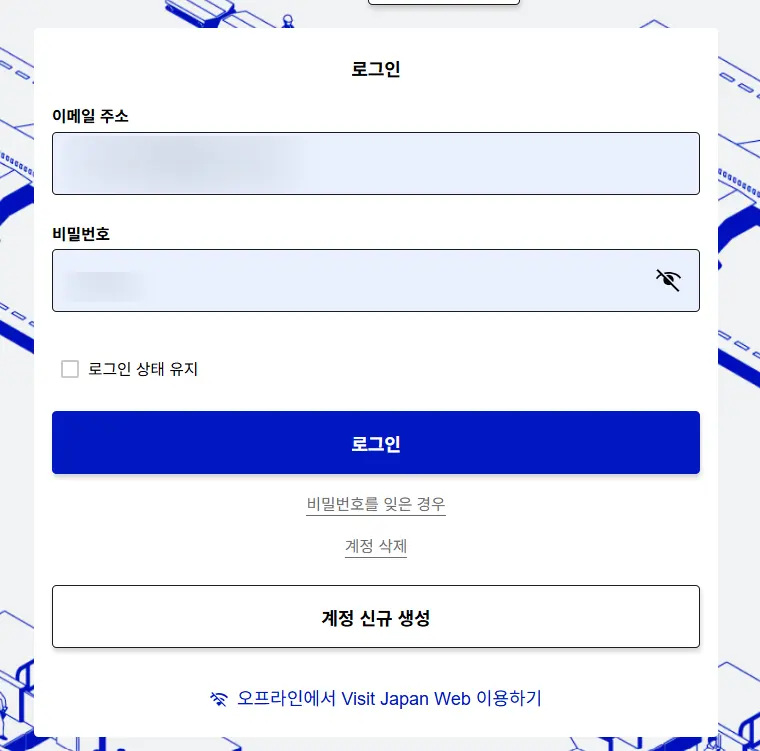
You'll then see a login screen, as pictured.
If you've registered for Visit Japan before, you can log in directly, but if it's your first time,
you'll need to create a new account.
As a reminder, your password needs to include uppercase letters, lowercase letters, numbers,
and special characters. Keep this in mind if you ever forget your password.
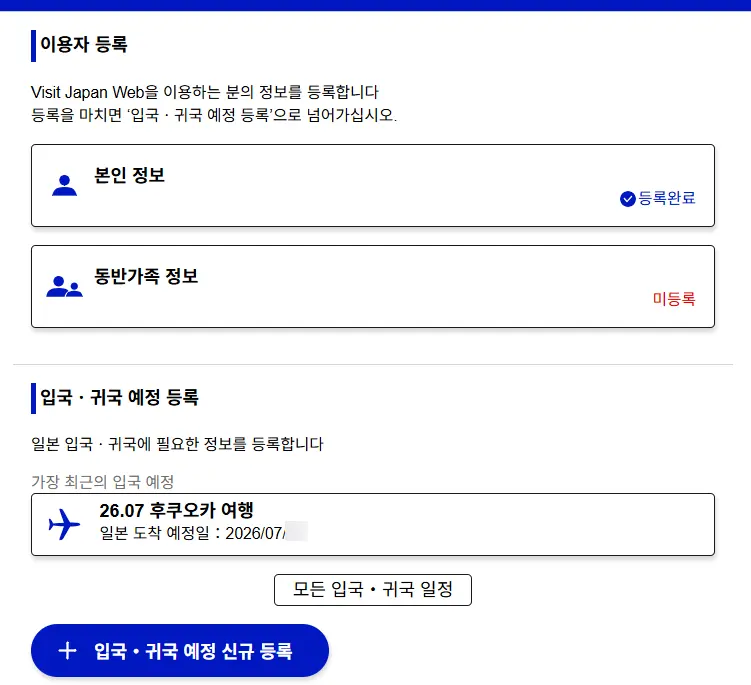
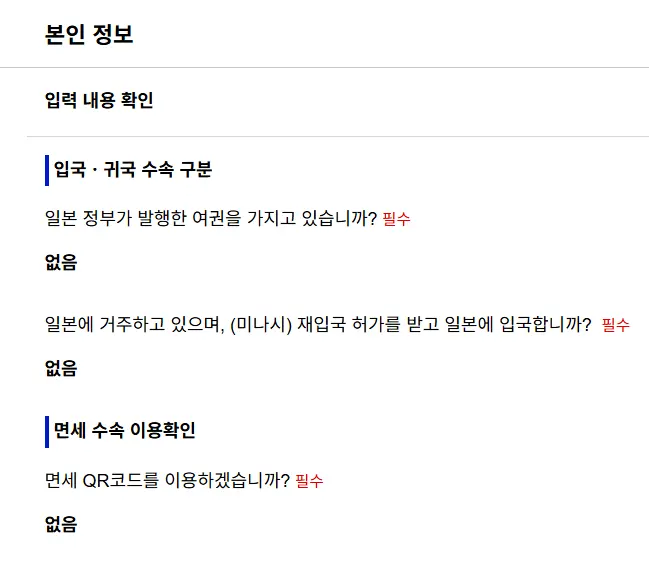
After logging in, the first step is to register your personal information under 'User Registration'.
If you've already completed this, it will show 'Registration Complete',
but if it's your first time, registration is required.
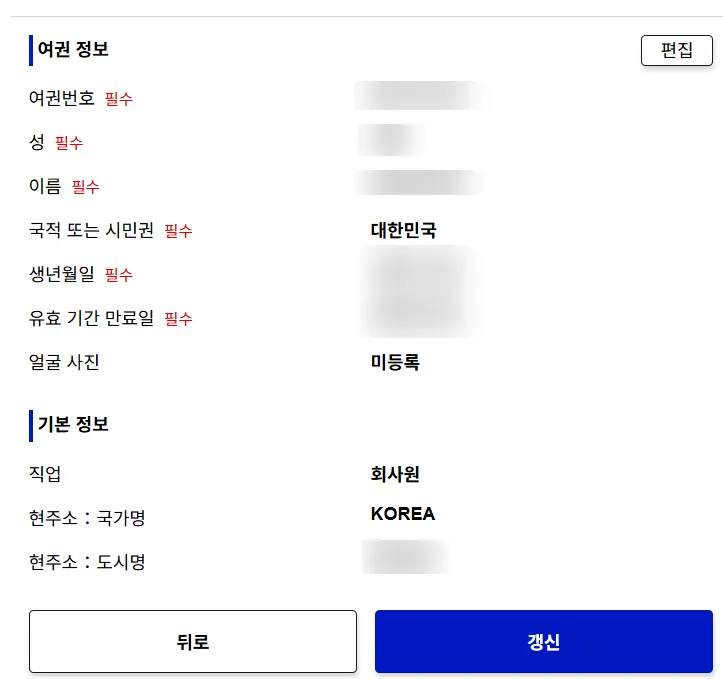
Required Personal Information
1. Passport number
2. Last name and first name
3. Nationality or citizenship
4. Date of birth
5. Passport expiration date
6. Other simple questions
Your personal information needs to include essential details for immigration screening, such as your passport number, name, and expiration date.
These are the same details you'd find on a traditional paper entry form,
and they're crucial for entry, so make sure to fill them out accurately.
If you're traveling with family, you should also enter their information at this stage.
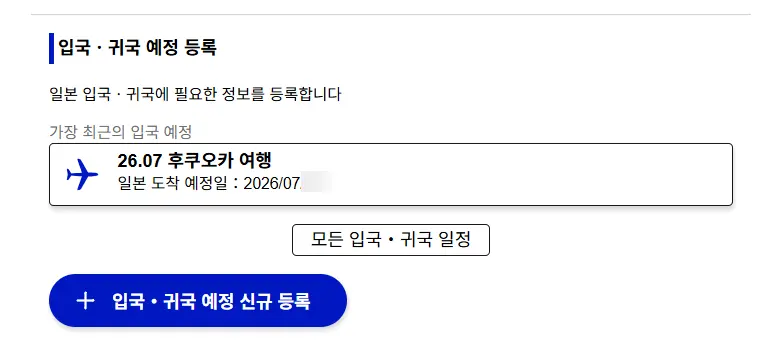
Once your personal information is registered,
the next step is to register your entry/return schedule below.
Click the 'New Registration' tab to enter information for your new travel itinerary.
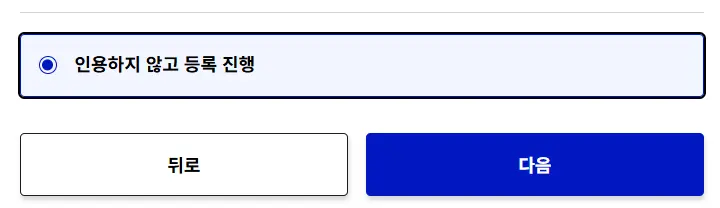
Also, since you'll likely be arriving in a new city with a different flight,
select 'Proceed without citing' and move on to the next step.
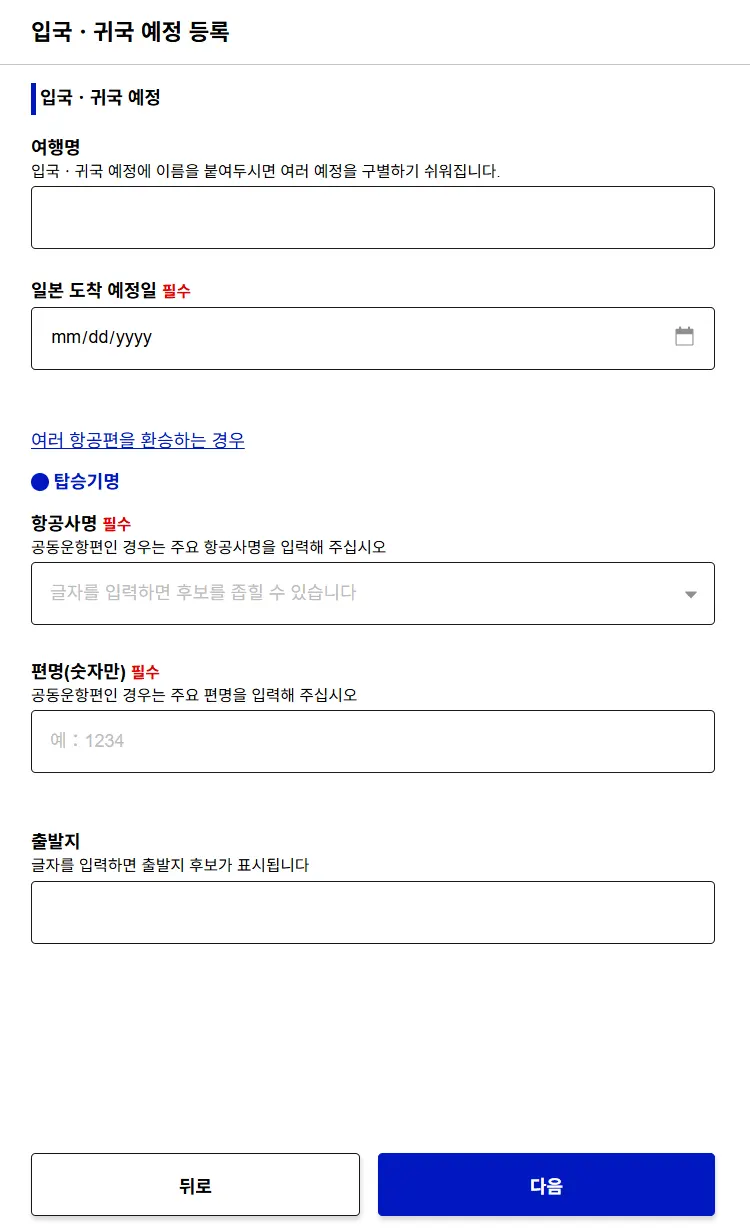
For your entry/return registration, you'll need to enter your expected arrival date in Japan,
airline name, flight number, and accommodation details.
First, the 'trip name' is just for your reference, so feel free to name it something easy to remember, like 'Oct 26 Osaka Trip'.
For the 'Japan arrival date', simply select your date of entry.
You can find your airline name and flight number on your airline booking confirmation or receipt,
where you'll see the airline code and numbers.
For example, a Korean Air flight from Incheon to Osaka might have a flight number like KE723.
Here, 'KE' is the airline code (airline name), and '723' is the flight number.
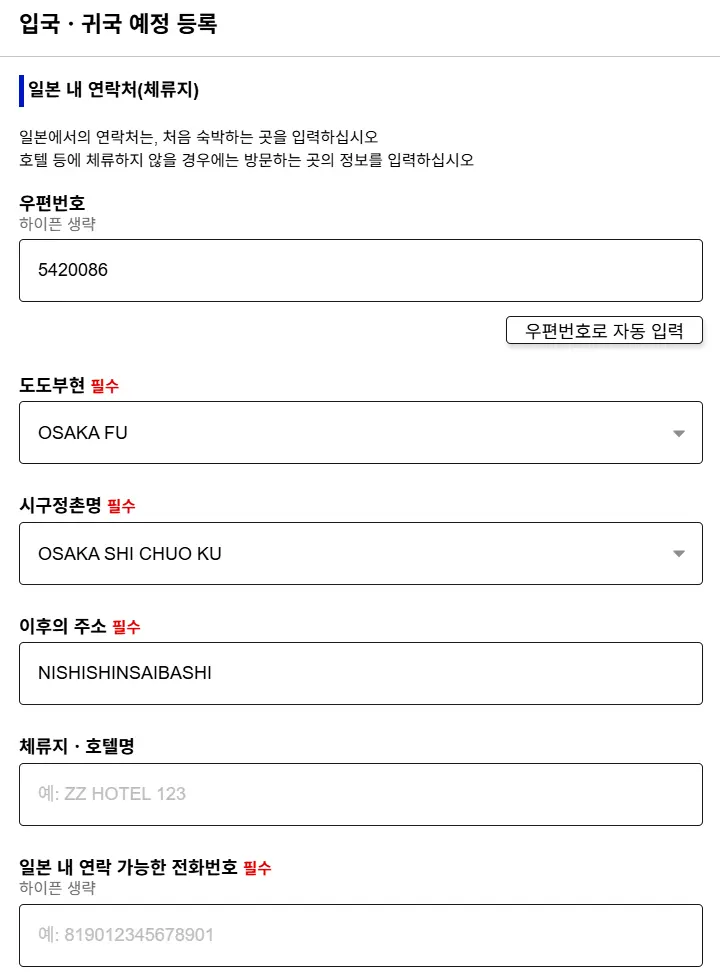
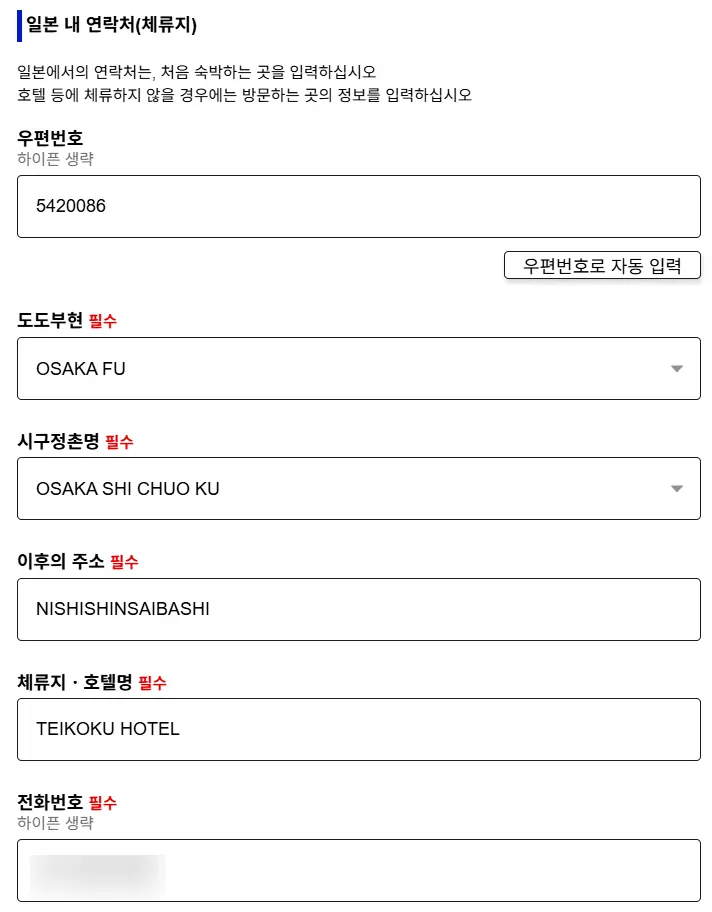
And I bet many of you might find entering your accommodation details in Japan a bit tricky.
But here's a pro tip: if you search for your hotel on Google Maps, you'll find a 7-digit postal code in its address.
Just enter that postal code, and then hit 'Auto-fill by postal code', and voilà, it will automatically fill everything in one go, just like in the image on the right!
After that, all you need to do is type in your hotel name in English.
Finally, regarding the contact phone number in Japan, you can simply input your own mobile number in the format 8210-xxxx-xxxx! Easy, right?
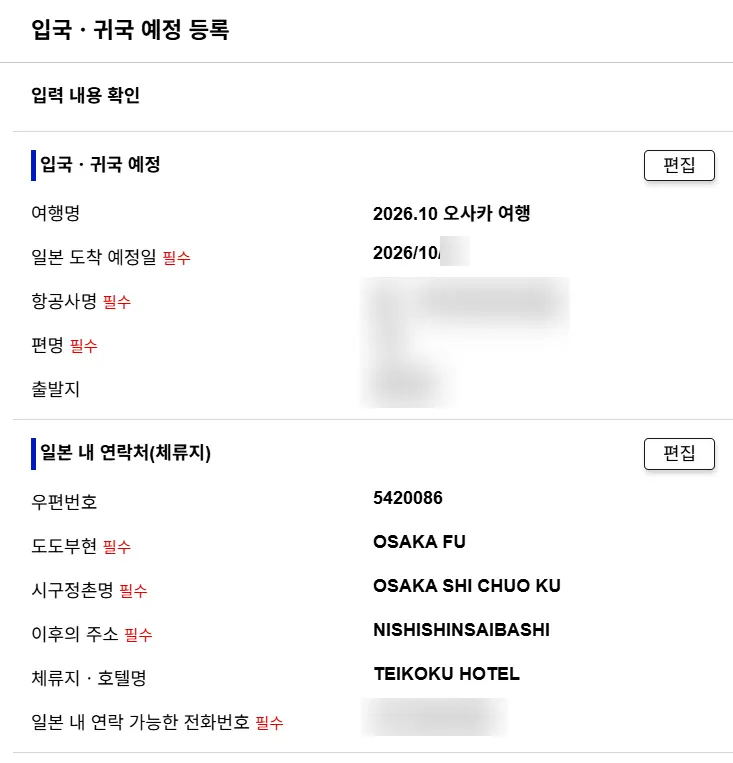
Once you've finished all your entries, make sure to head to 'Confirm Entry Details' and double-check everything!
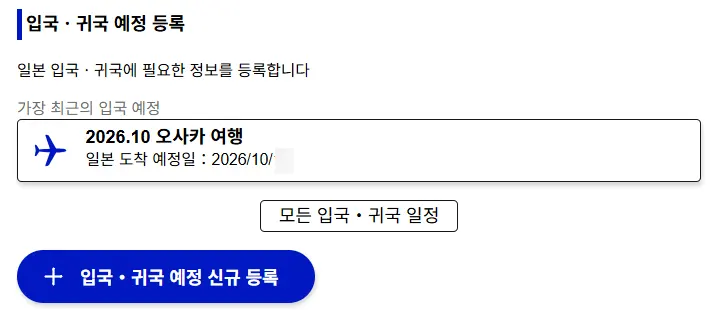
Once you've confirmed everything up to this point, you'll see a new schedule appear on the first page under 'Arrival/Departure Schedule'.
Just click on that newly created schedule.
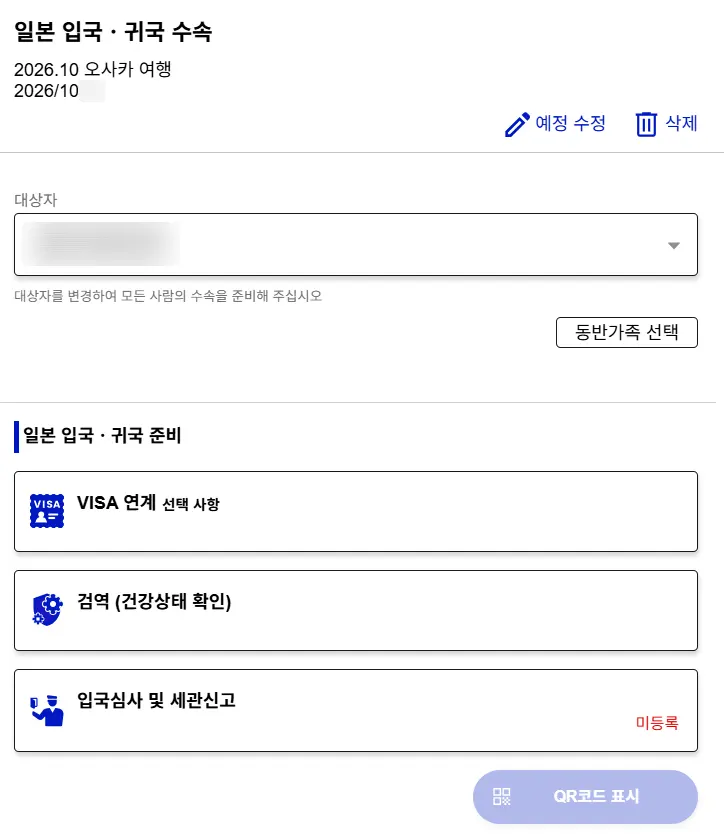
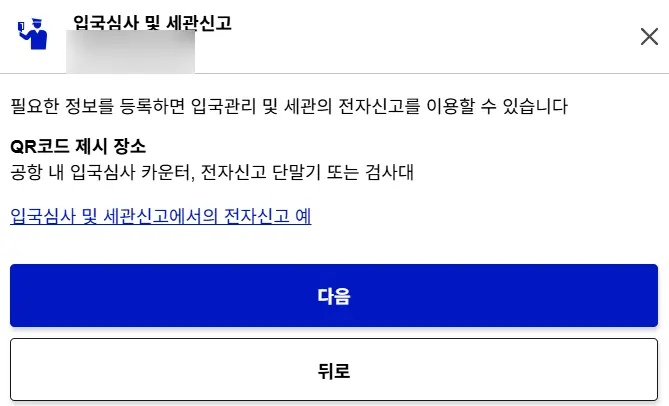
Here, you'll notice red text that says 'Unregistered' to the right of the 'Immigration and Customs Declaration' tab.
Click on this tab and then hit 'Next'.
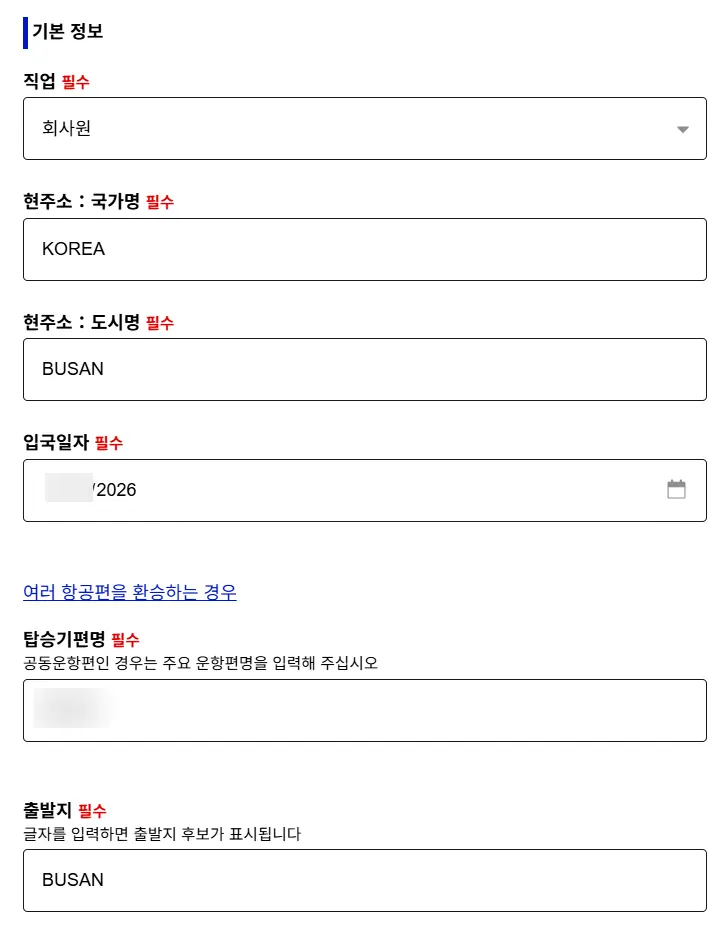
All the information you used to fill out on those paper immigration and customs declaration forms? It's all right here!
First off, you'll see that all the travel information you entered earlier has been seamlessly loaded, which is super convenient.
If, by any chance, you spot anything incorrect at this stage, I highly recommend correcting it now to avoid any future hiccups.
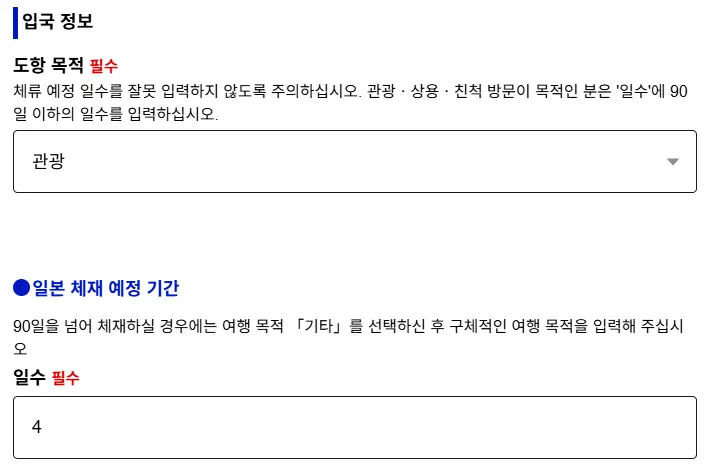
Next, for the immigration information, you'll need to enter your purpose of visit and your planned length of stay in Japan.
For your purpose of visit, simply select 'Tourism,' and for your planned length of stay, just enter the actual duration of your trip. You'll sail through this part!
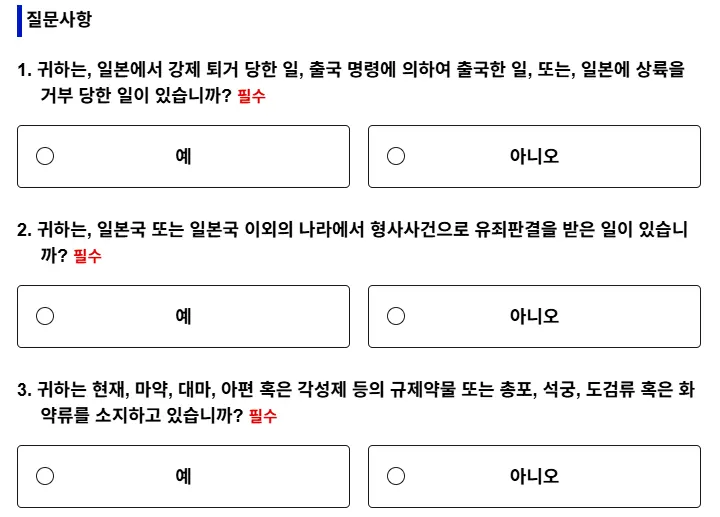
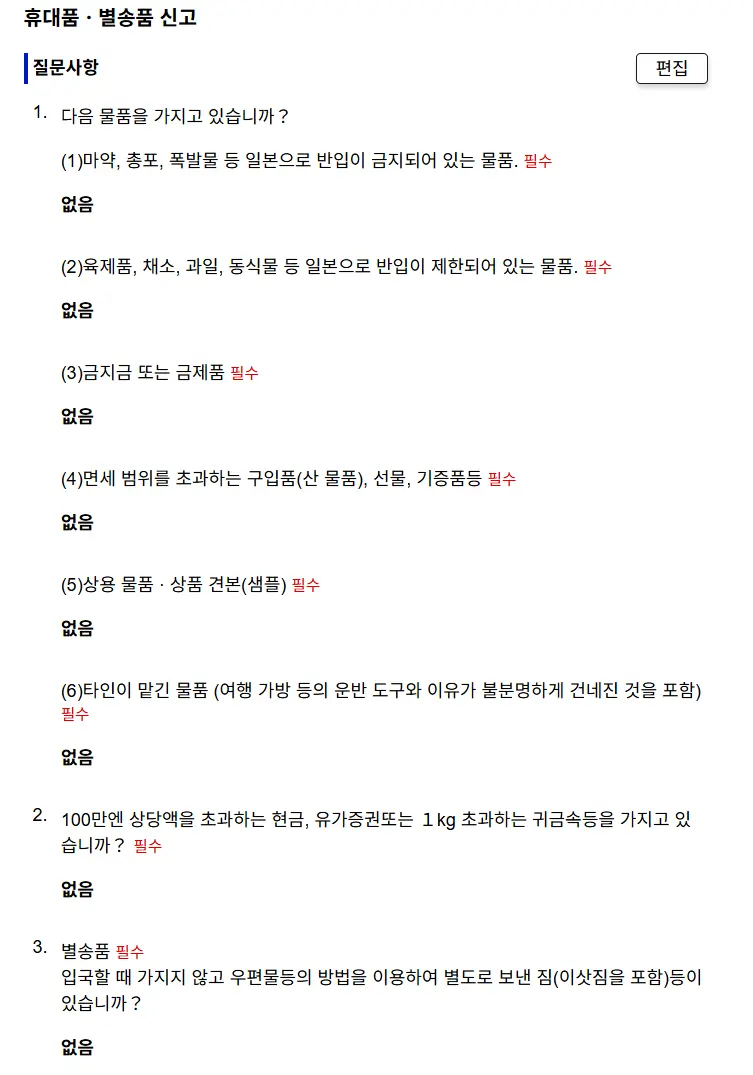
Next up are the customs declaration questions.
For questions about things like past immigration denials, criminal convictions, or possession of weapons – generally things that won't apply to most travelers – just click 'No'.
Also, there are declaration items for your carry-on and unaccompanied baggage concerning things like meat, vegetables, prohibited items, and items exceeding duty-free limits.
These are self-declaration items, so make sure to read them carefully, input everything accurately, and then you're all set to move on!
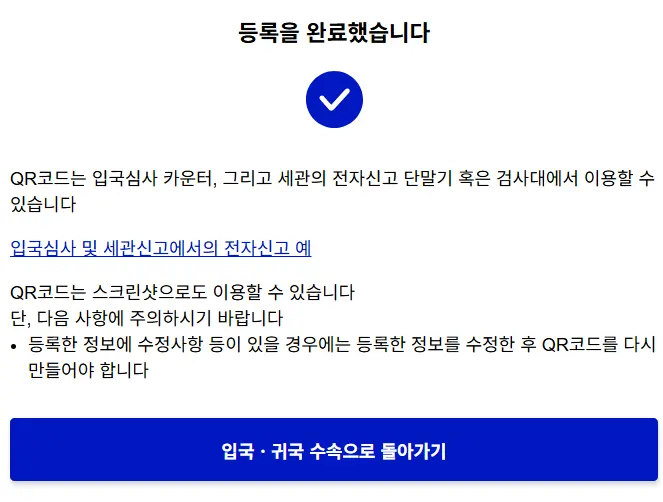
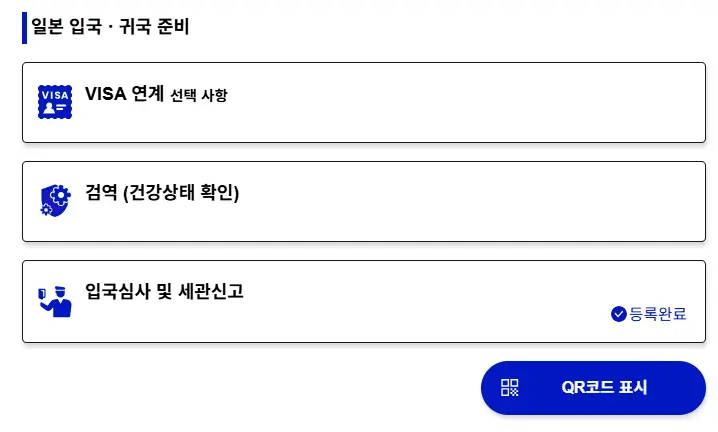
If you've accurately entered everything up to this point, you'll be greeted by a satisfying blue 'Registration Complete' notification next to 'Immigration and Customs Declaration', just like you see in the image on the right!
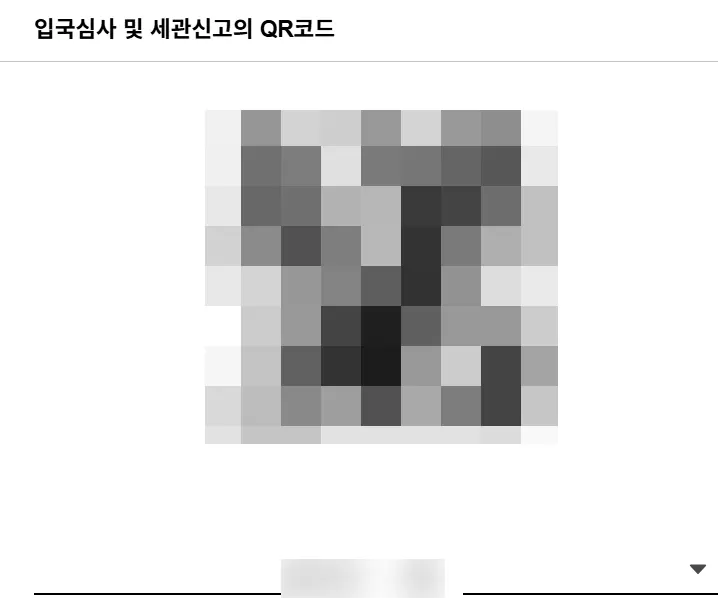
Finally, when you click 'Display QR Code,' you'll see a single QR code magically appear, ready for both your immigration and customs declaration, just like in the picture.
Do keep in mind that currently, this one fantastic QR code covers *both* your immigration screening and customs declaration! How convenient is that?
How to Enter Japan at the Airport?
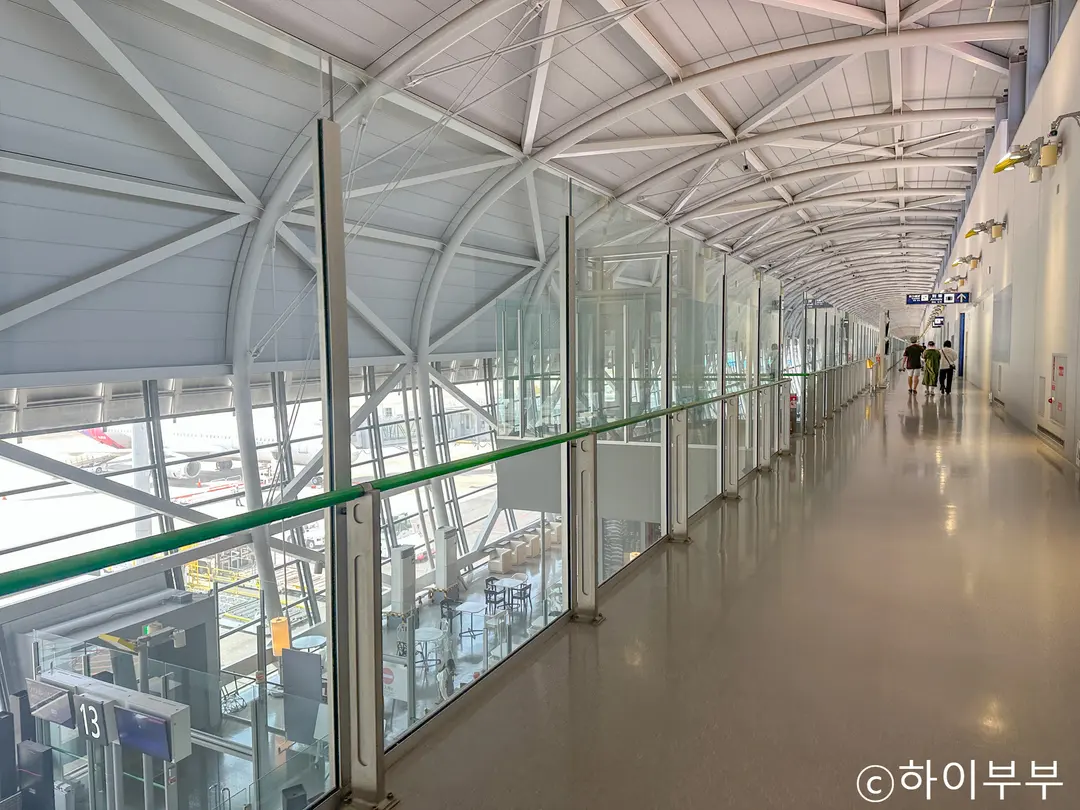
Lastly, let's talk about the entry process at major city airports these days!
Things have changed a bit, so I'll give you a quick guide.
(Here's an example from Osaka Kansai Airport.)
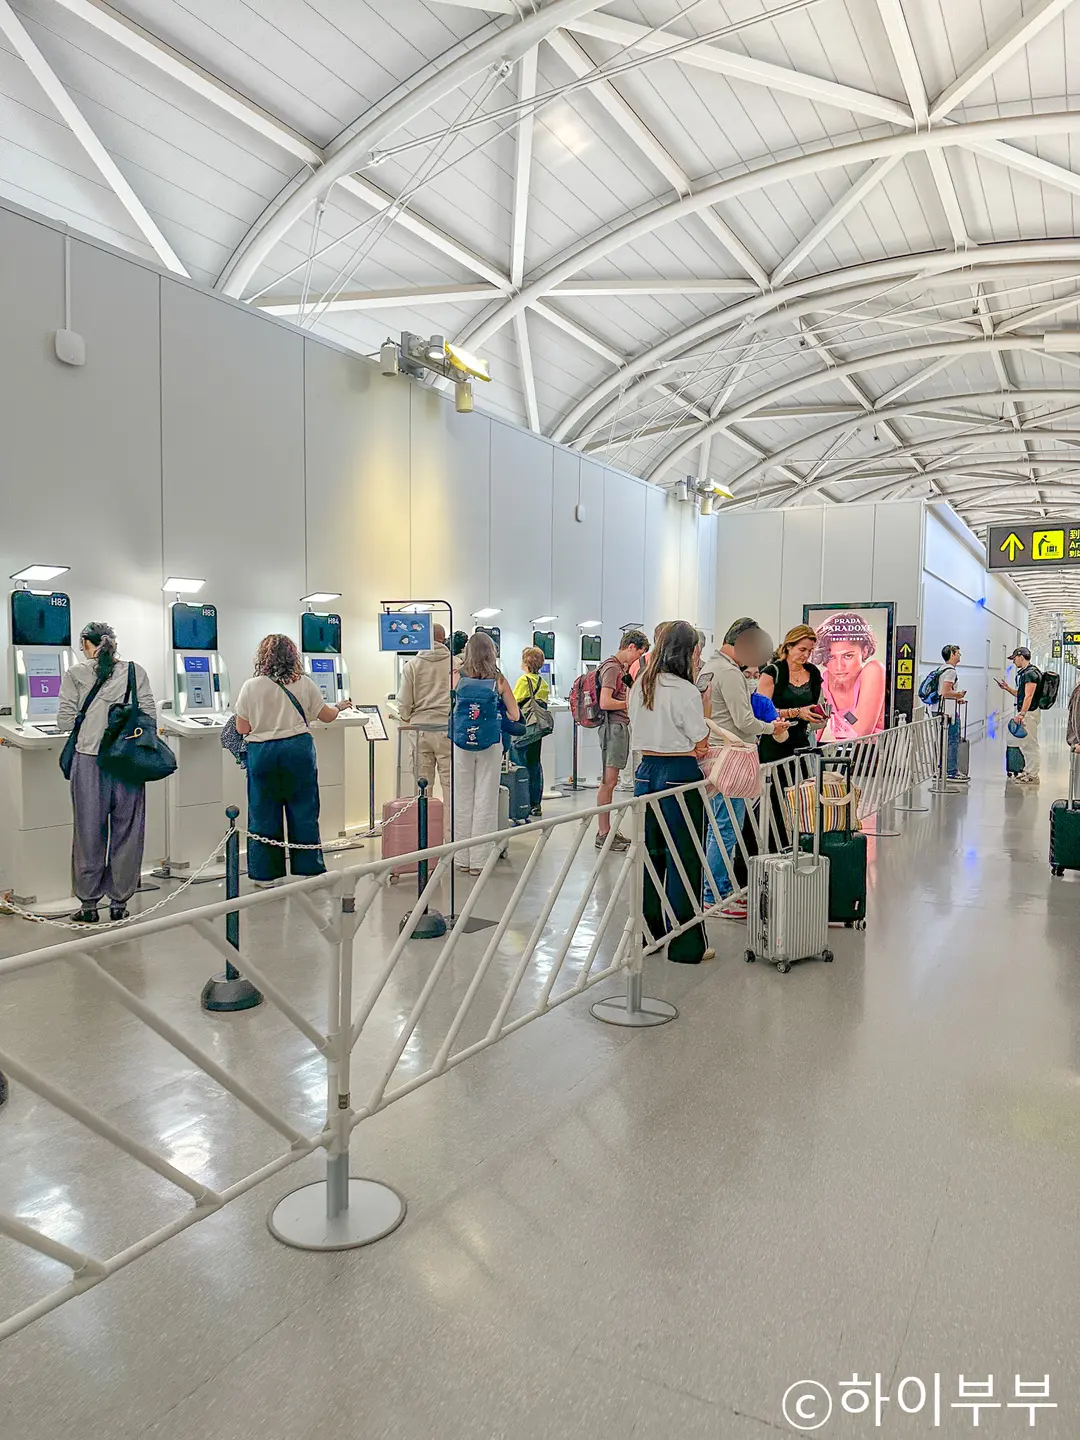
Once you land at the airport and make your way to immigration,
you'll spot kiosks like the one in the photo.
These kiosks are where you'll register your immigration information,
so think of it as a helpful pre-check.
If these kiosks are empty, you can go ahead and register your details right there.
However, if there's a long line, it's better to bypass them and head straight to the immigration hall.
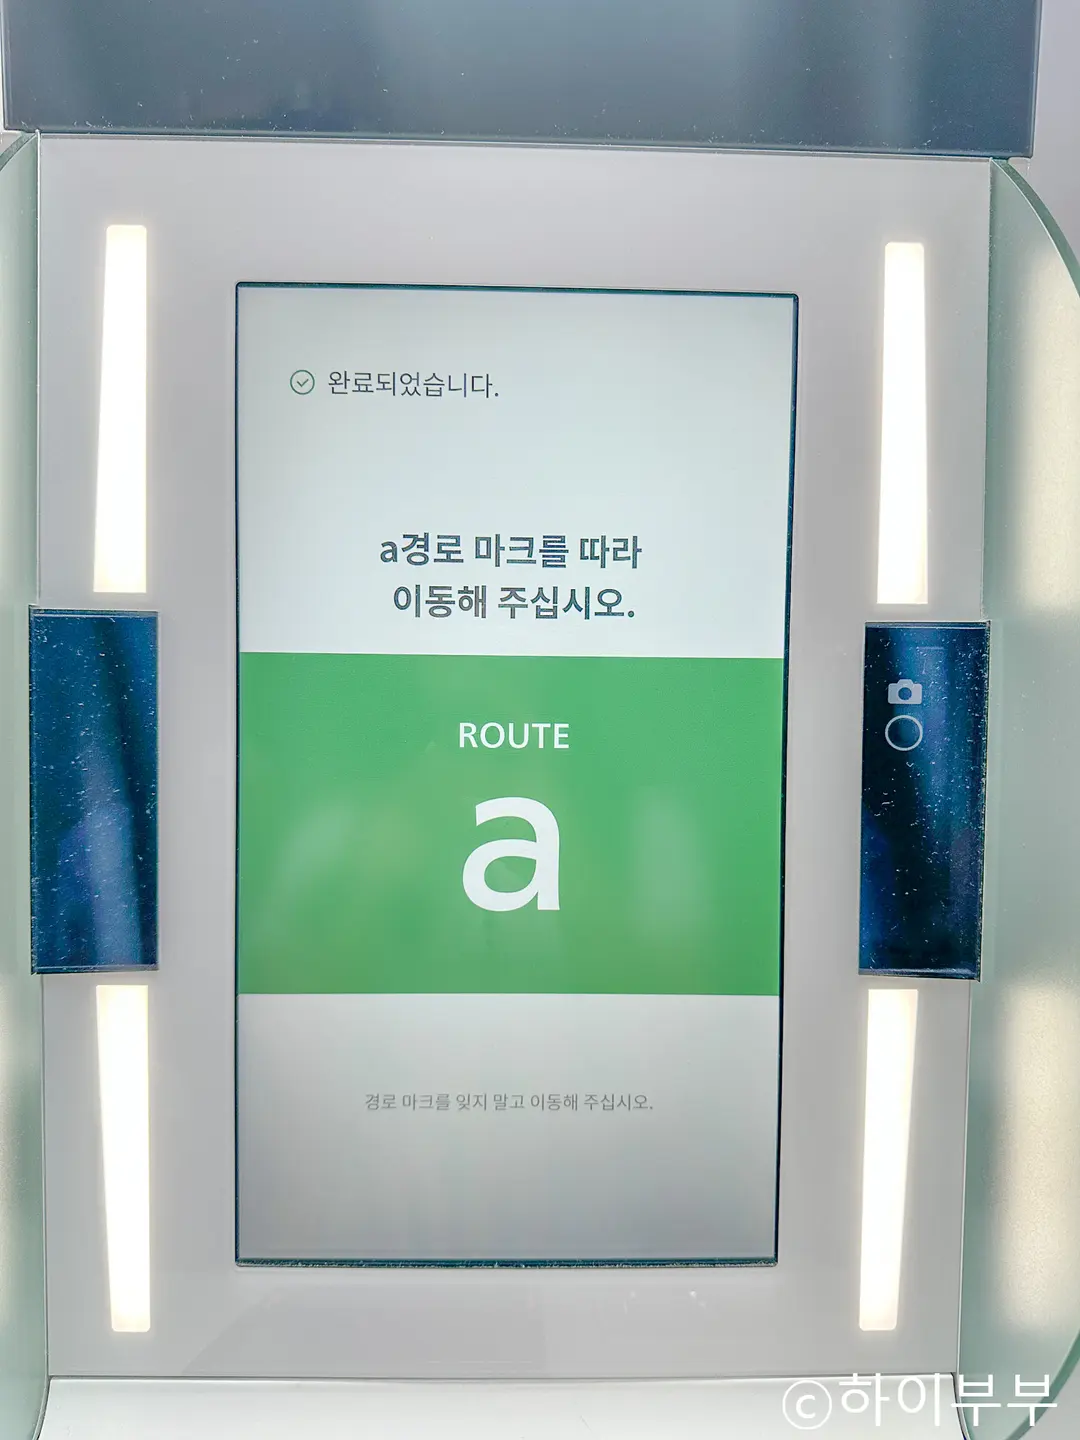
After you've successfully scanned your passport and registered your information here,
you'll be assigned a letter: A, B, C, or D.
This letter is crucial because it tells you which line to join at the immigration counter,
so definitely keep it in mind!
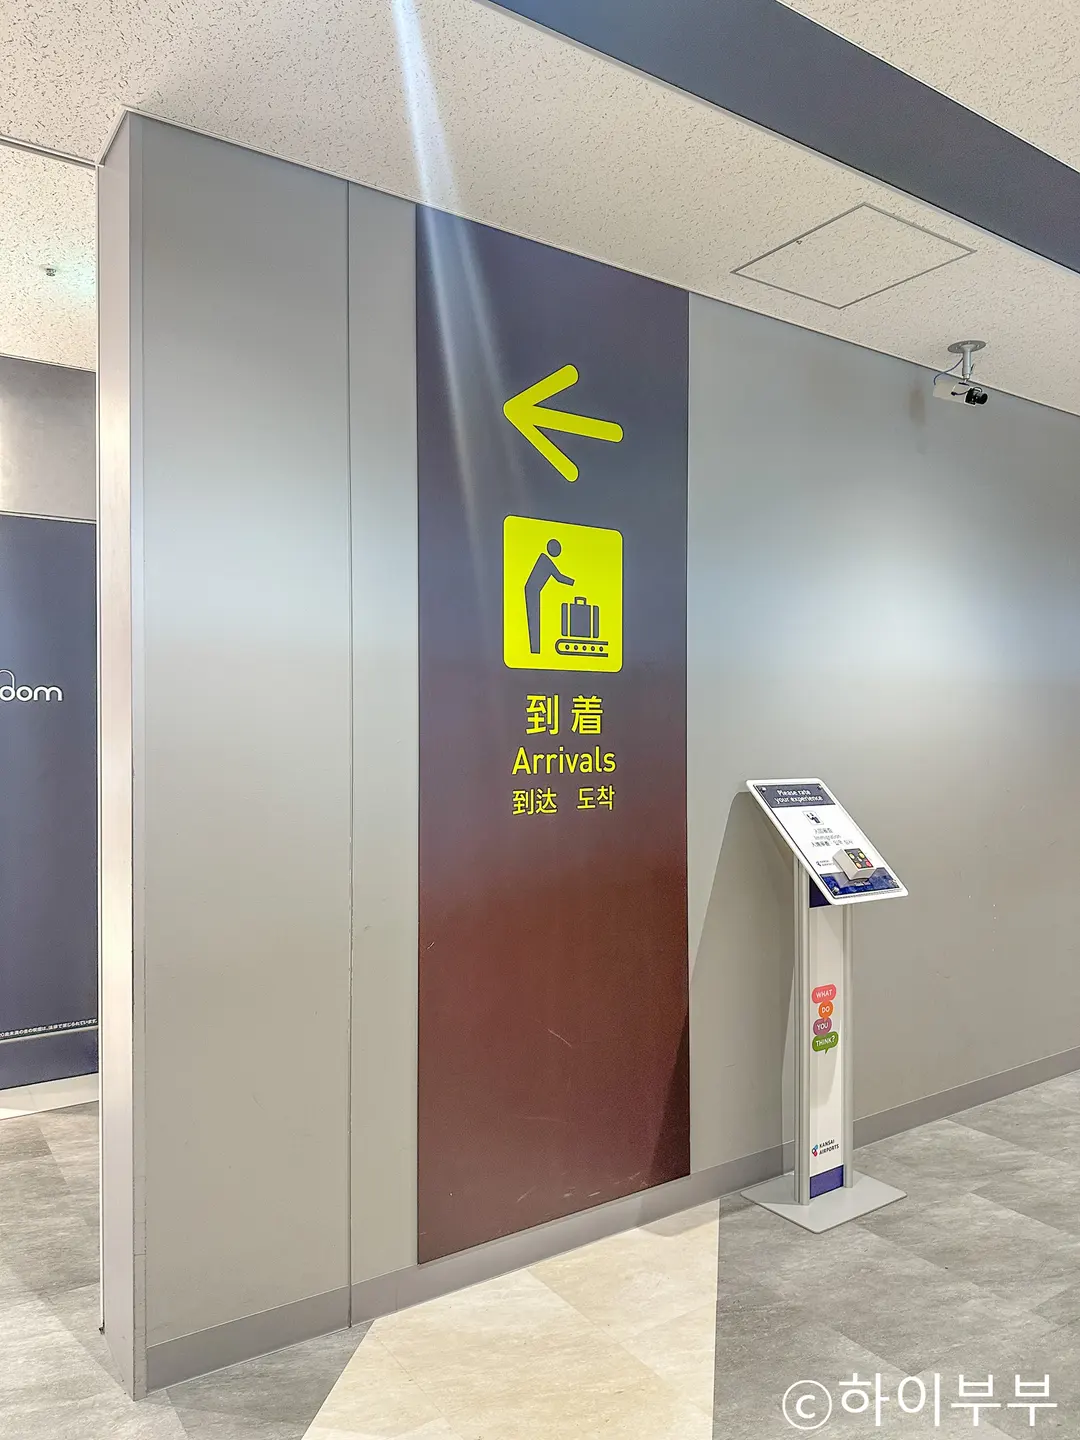
When you reach the immigration hall, simply head to the line corresponding to your assigned letter
and you're all set for your immigration interview.
Follow these steps, and you'll breeze through immigration in no time!

So there you have it – my guide on how to complete Japan's entry declaration using the Visit Japan Web, and
a simple walkthrough of the immigration process itself.
Much easier and simpler than you might have imagined, right?
Just follow these easy steps to get everything ready beforehand,
and I truly hope you have a wonderfully fun and safe journey to Japan!
▼ For your Japan adventure, don't forget these essentials too! ▼
 Japan eSIM MalTalk Recommendation: My 4-Day Review of Osaka's Unlimited Data eSIM
Frequently Asked Questions
What are the password requirements when creating a new Visit Japan Web account?
When creating a new account on Visit Japan Web, your password must include uppercase letters, lowercase letters, numbers, and special characters. You can only set your password once these conditions are met.
What is the specific method for entering your address of stay in Japan on Visit Japan Web?
Search for and enter the 7-digit postal code of your hotel on Google Maps. After entering the postal code, click 'Auto-fill by postal code' (우편번호로 자동 입력), and the address will be automatically populated. Then, you only need to enter the hotel name in English.
What indication appears when immigration and customs declarations are completed on Visit Japan Web?
Once all information is accurately entered, a blue notification labeled 'Registration Complete' (등록 완료) will appear on the right side of the 'Immigration and Customs Declaration' tab. You can then click 'Display QR Code' (QR코드 표시) to view the QR code for immigration and customs declaration.
How do you use the kiosk at Osaka Kansai Airport to process immigration information submitted via Visit Japan Web?
After landing at the airport, on the way to the immigration control area, scan your passport at a kiosk and register your information. Once registration is complete, one of the letters A, B, C, or D will appear. You should remember this as it indicates the line you need to queue in at the immigration counter.
Share this article
Related Travel Stories

USJ Express Pass Review: Skip the Lines in Osaka
Planning a trip to Universal Studios Japan? Learn how to navigate the confusing ticket options and see exactly why the Express Pass is a game-changer.

Osaka Castle Tickets 2026: Hours & Amazing Pass Guide
Discover everything you need to know about visiting Osaka Castle in 2026, from ticket prices and opening hours to money-saving Osaka Amazing Pass tips.

Karaksa Hotel Osaka Namba Review 2026: Family Stay
Looking for the perfect family-friendly hotel in Osaka? Here is our honest review of Karaksa Hotel Osaka Namba, a budget-friendly gem near Dotonbori.

USJ Osaka Tickets 2026: Guide to Passes & Rides
Navigating Universal Studios Japan in Osaka can be overwhelming. Here is your ultimate guide to USJ tickets, Express Passes, and top attractions for 2026.

Oriental Hotel Universal City Review 2026: USJ Stay
Beat the massive morning crowds at Universal Studios Japan! Stay at Oriental Hotel Universal City for under $85 and master your USJ open run strategy.

Candeo Hotels Osaka Review 2026: Best Umeda Stay
Planning an Osaka getaway with family or friends? Check out our 2026 review of Candeo Hotels Osaka The Tower, a quiet luxury oasis near Umeda Station.