

Osaka ICOCA Card 2026: Kansai Airport Purchase & Refund Guide
Planning your Osaka trip? The ICOCA card is your secret weapon for convenient travel. Learn how to easily get, use, and refund your ICOCA at Kansai Airport in 2026. Make your journey smooth!

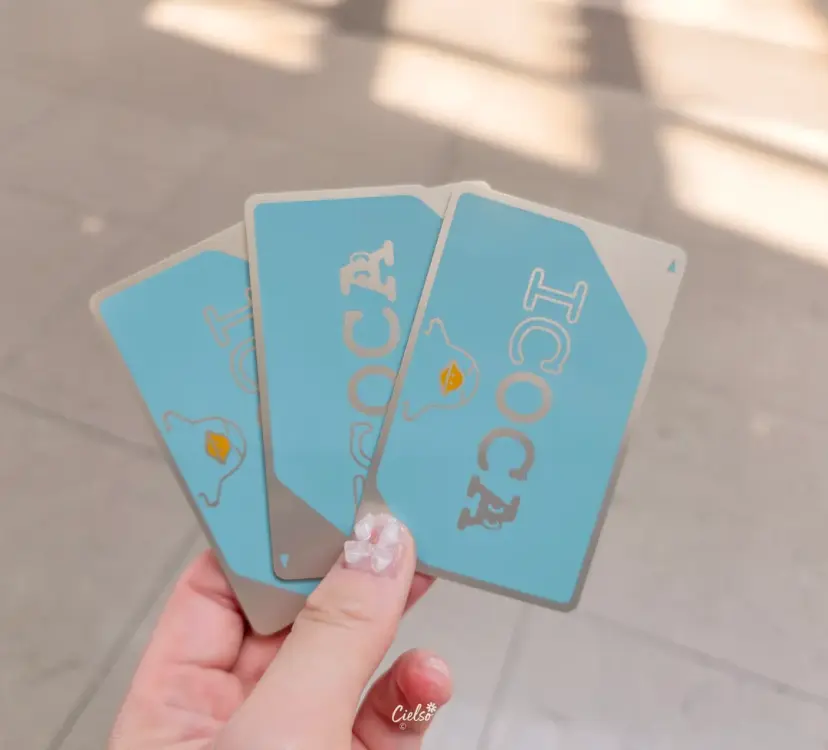
Your Ultimate Osaka Adventure
The Rechargeable Travel Card:
ICOCA
Hey there, fellow explorers! It's your travel influencer, Ciel, here to share a fantastic tip for your Osaka trip.
If you're heading to Osaka, I can't recommend the rechargeable ICOCA card enough for its sheer convenience. Let's dive in!

What is an ICOCA Card?
Think of the ICOCA card as Japan's answer to a rechargeable transit card, much like London's Oyster card or New York City's MetroCard. It's incredibly useful for navigating Japan!
Beyond just subways and buses, you can use your ICOCA card at convenience stores, select shops, and even vending machines. It truly streamlines your daily transactions and makes getting around a breeze.

🚍 Who Should Get an Osaka ICOCA Card?
The ICOCA card is a game-changer for many travelers. I highly recommend it if you:
✔︎ Haven't purchased a separate rail or city pass.
✔︎ Want to avoid the hassle of buying individual subway tickets every time you ride.
✔︎ Are exploring Osaka on an independent, flexible itinerary.
Where and How to Purchase Your ICOCA Card at Kansai Airport Terminal 1
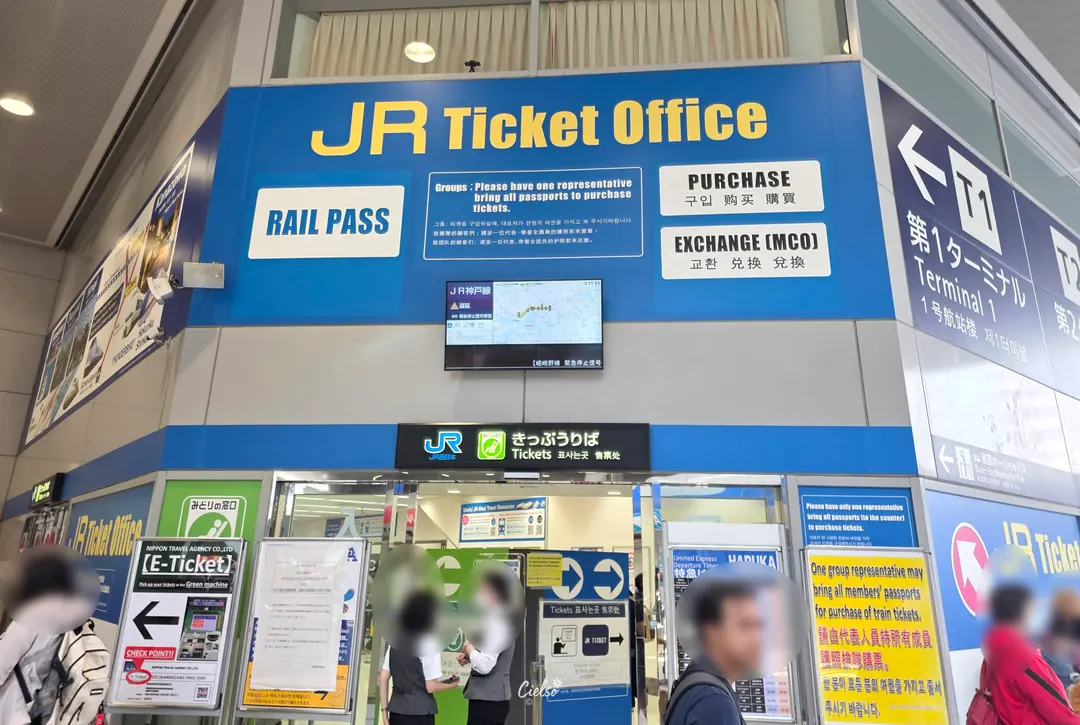
Once you arrive at Kansai Airport Terminal 1, head to the 2nd floor and look for the JR Ticket Office!
It's conveniently located on the way to catch the Limited Express Rapi:t or the Airport Rapid Express, so you shouldn't have any trouble finding it.
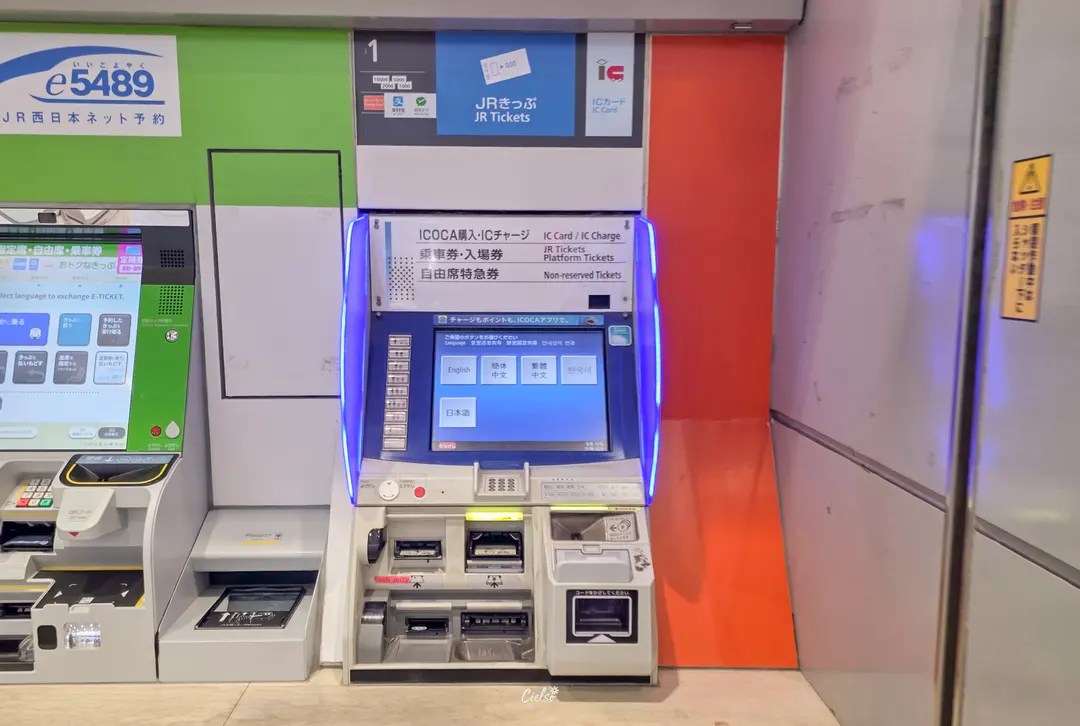
Near the JR Ticket Office, you'll spot several ticket machines. While there might only be one machine close to the JR Ticket Office specifically for ICOCA purchases, don't worry if it's occupied.
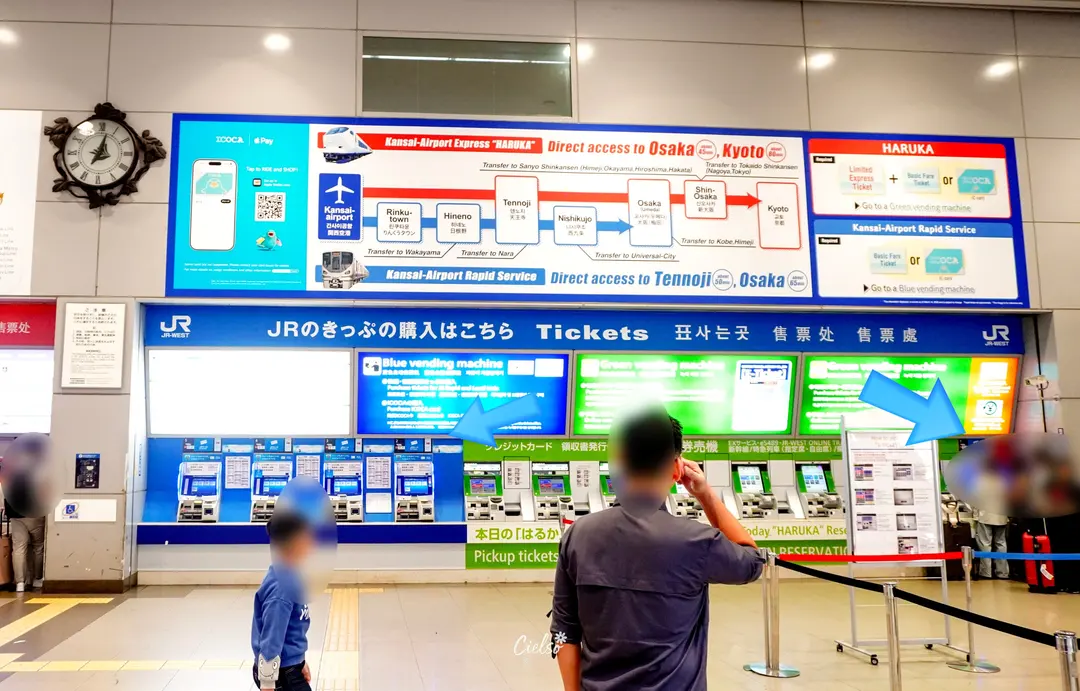
Just turn your head to the opposite side, and you'll see a "Blue Vending Machine" where you can also purchase an ICOCA card. So, look for the machines with the arrow stickers in the photos – that's where you can get your ICOCA!
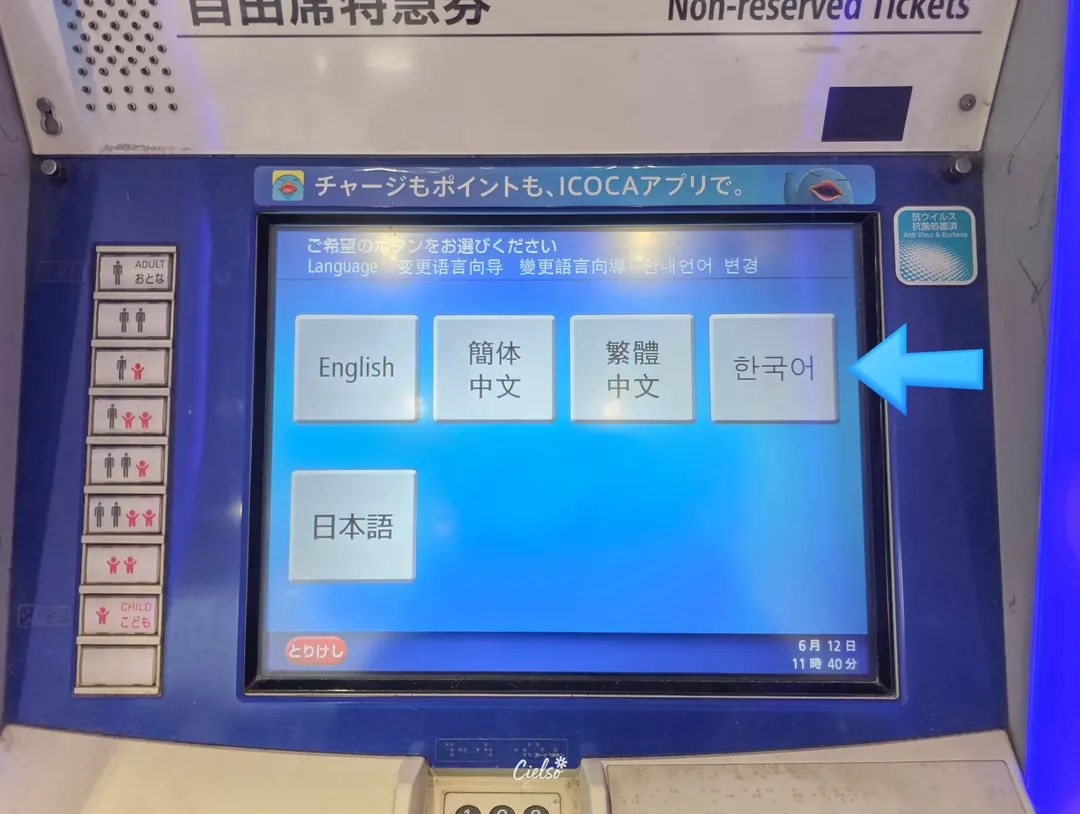
When you reach the machine, you'll see a language selection option. Choose English to make the process simple.
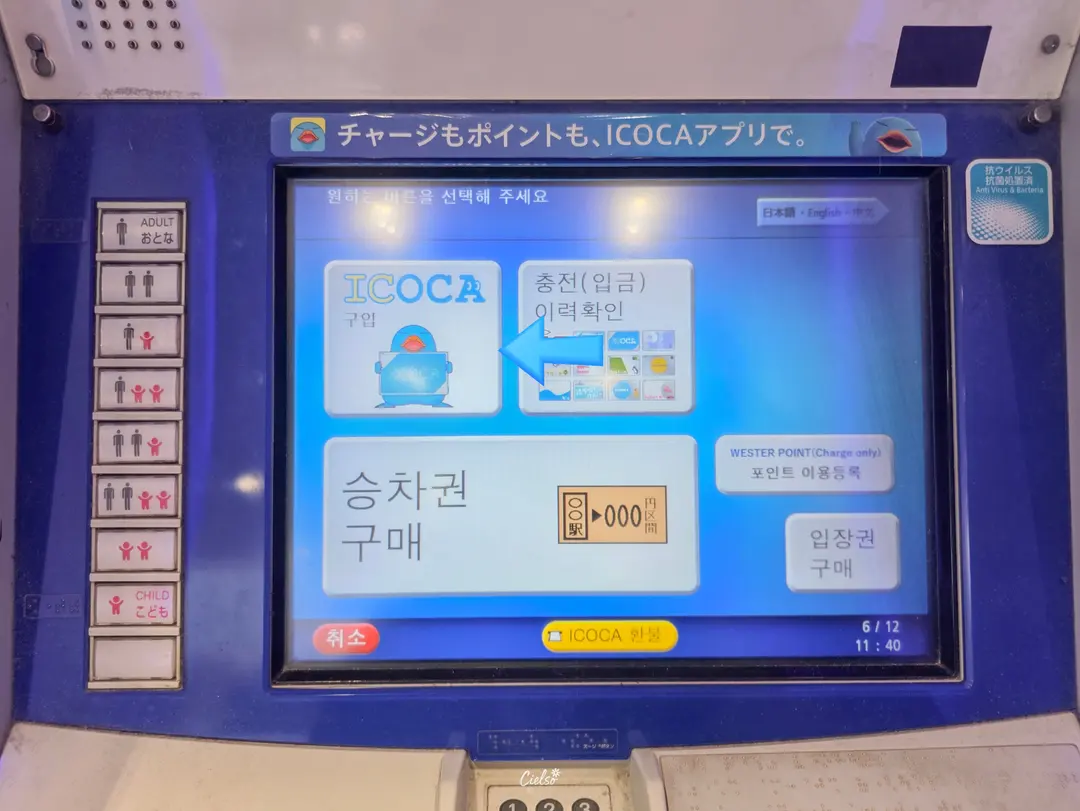
Look for the blue platypus icon and select "ICOCA Purchase."
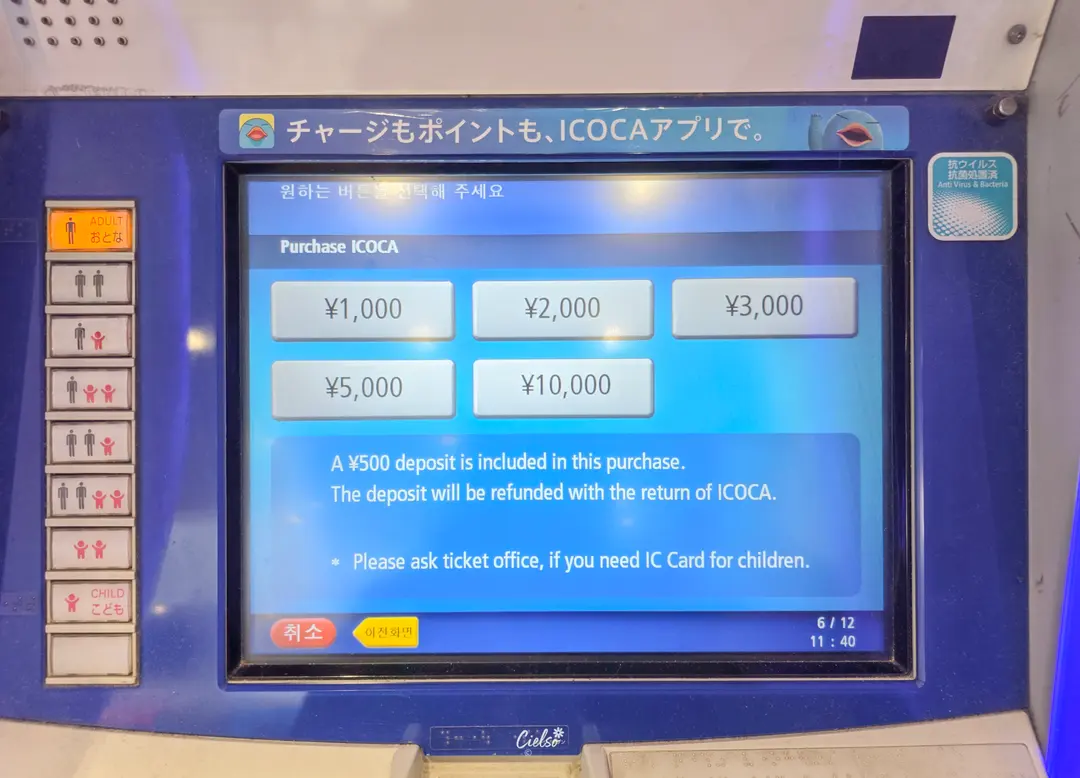
Next, select your desired top-up amount. For my trip, I opted for the Airport Rapid Express instead of the Rapi:t, and I also had an Osaka Amazing Pass. So, I initially topped up with ~$18 (3,000 JPY), adding more later as needed.
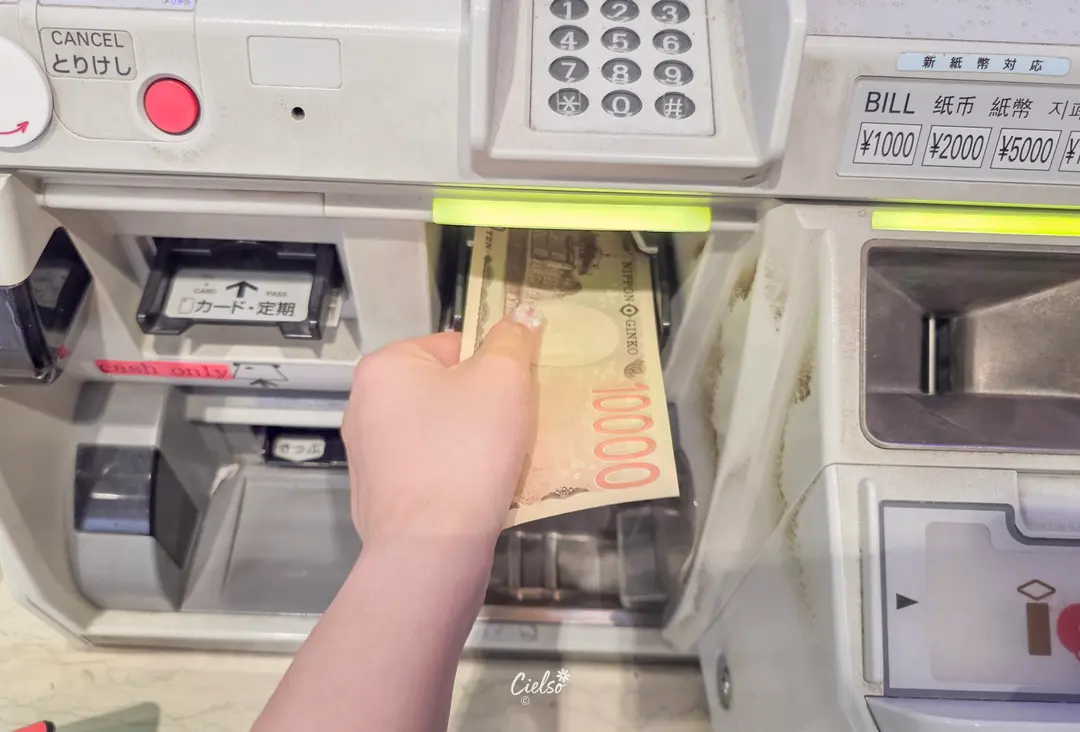
After selecting your amount, insert your cash.
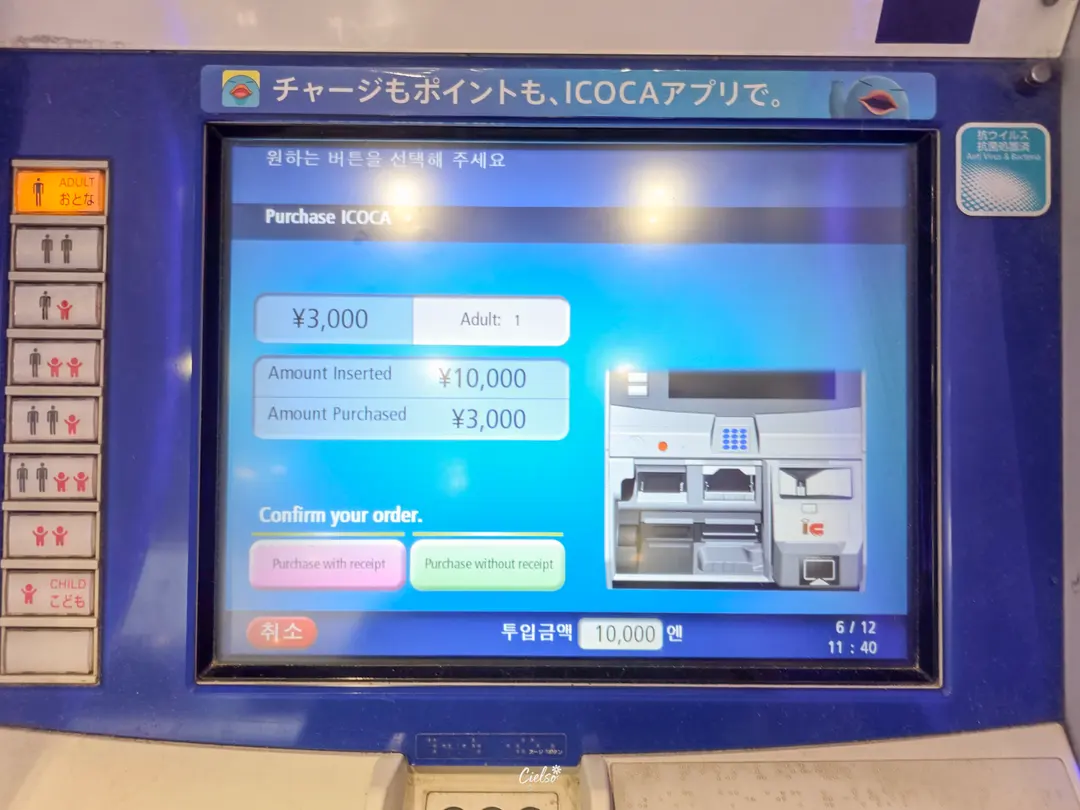
If you'd like both a receipt and your ICOCA card, press the pink button ("Purchase with receipt"). If you only want the ICOCA card without a receipt, press the green button ("Purchase without receipt").
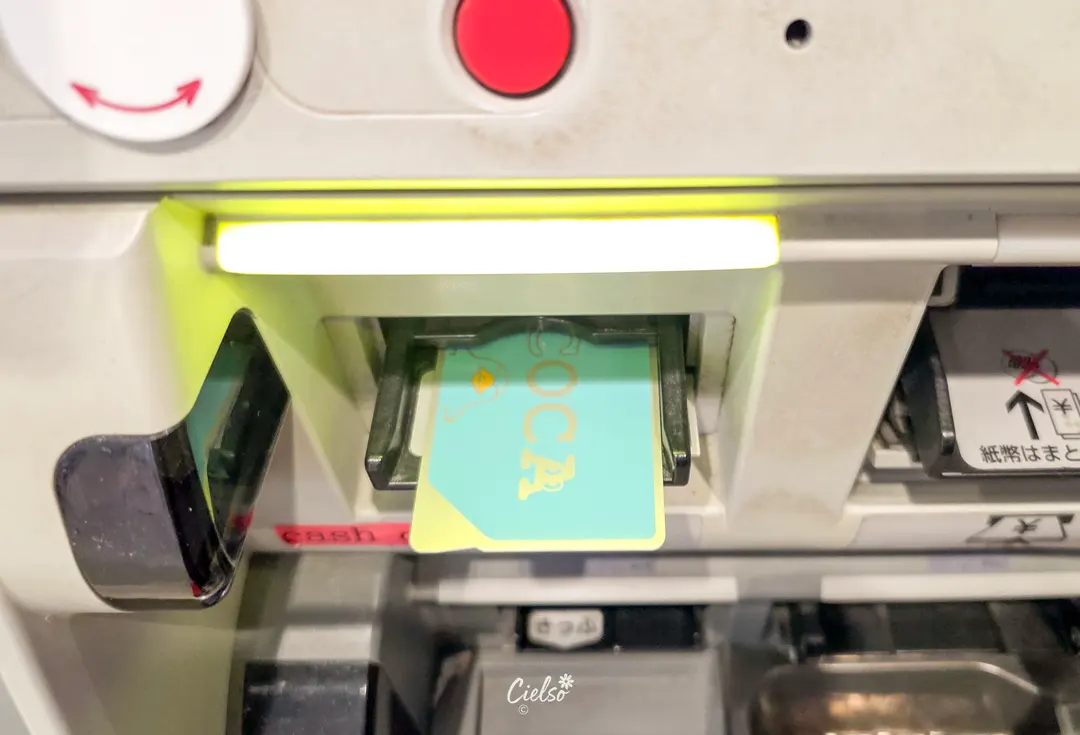
And just like that, your ICOCA card will pop out, as shown in the photo – purchase complete! With English language support, the process is surprisingly straightforward.
However, a crucial note: if you're traveling with children, they are eligible for discounted fares. In this case, you'll need to purchase their ICOCA cards separately at the JR Ticket Booth, not from the vending machine.
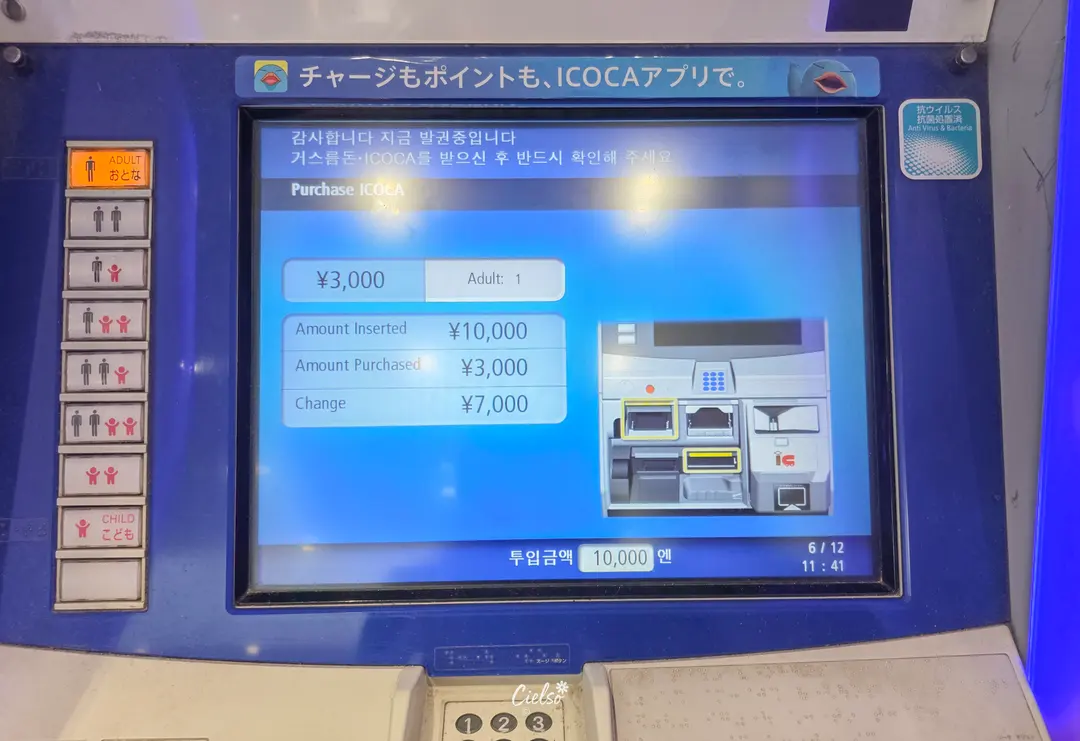
Important Things to Know When Purchasing Your ICOCA Card
A key detail: a ~$3 (500 JPY) deposit is included when you purchase an ICOCA card.
So, if you initially charge ~$18 (3,000 JPY), ~$3 (500 JPY) is the deposit, and ~$15 (2,500 JPY) is your usable balance. While you can get your remaining balance back when you return the card, here's how the refund works:
If you have ~$6 (1,000 JPY) remaining and wish to refund, you'll receive the ~$3 (500 JPY) deposit plus ~$5 (780 JPY) of your balance, after a ~$1 (220 JPY) handling fee. This means you'd get back a total of ~$8. If your remaining balance is less than ~$1 (220 JPY), you'll only receive the ~$3 (500 JPY) deposit back.
Therefore, your best bet is to try and use up all your balance, leaving only the ~$3 (500 JPY) deposit on the card before refunding!
Refunding Your ICOCA Card
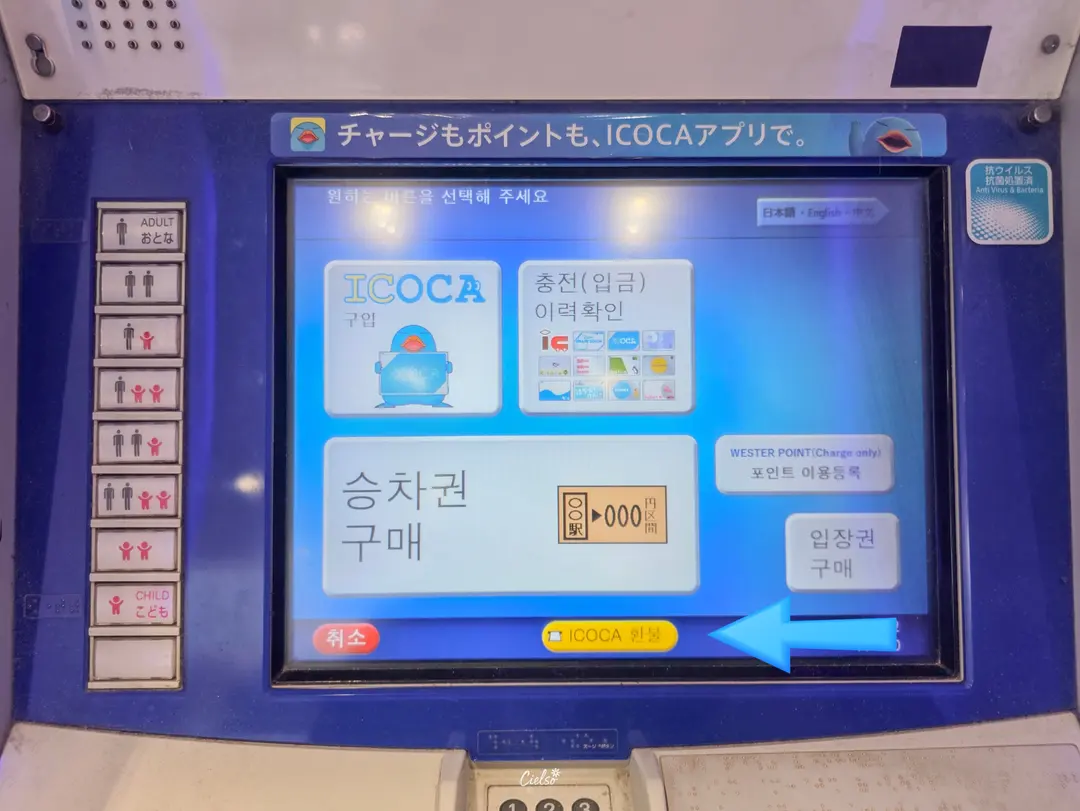
Since I used the Airport Rapid Express from Namba Station to Kansai Airport, I refunded my ICOCA card at the same vending machine where I purchased it in Kansai Airport Terminal 1.
To refund, simply select the yellow "ICOCA Refund" button, indicated by the arrow.
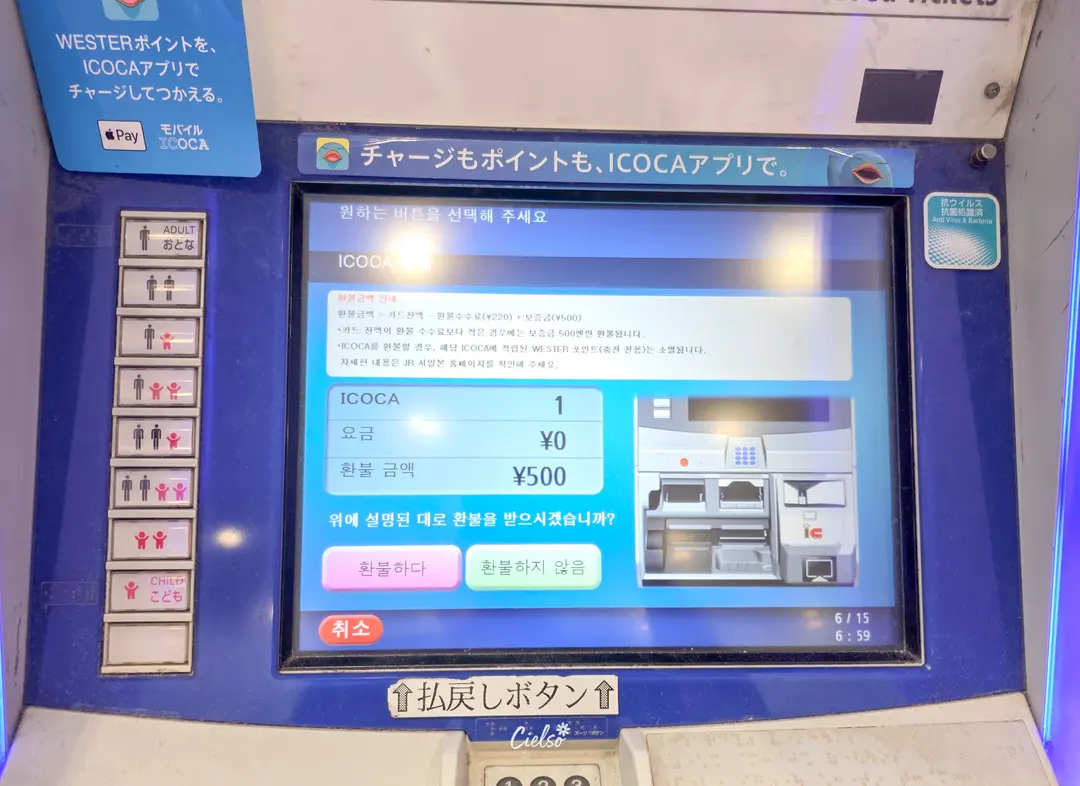
Then, choose the pink "Refund" button, and you'll complete the refund process!
What if Your ICOCA Balance is Low When You Arrive at Kansai Airport?
I actually made a mistake calculating my fare once and found my ICOCA balance insufficient upon arriving at Kansai Airport. I was quite flustered, but thankfully, there are top-up machines right there!
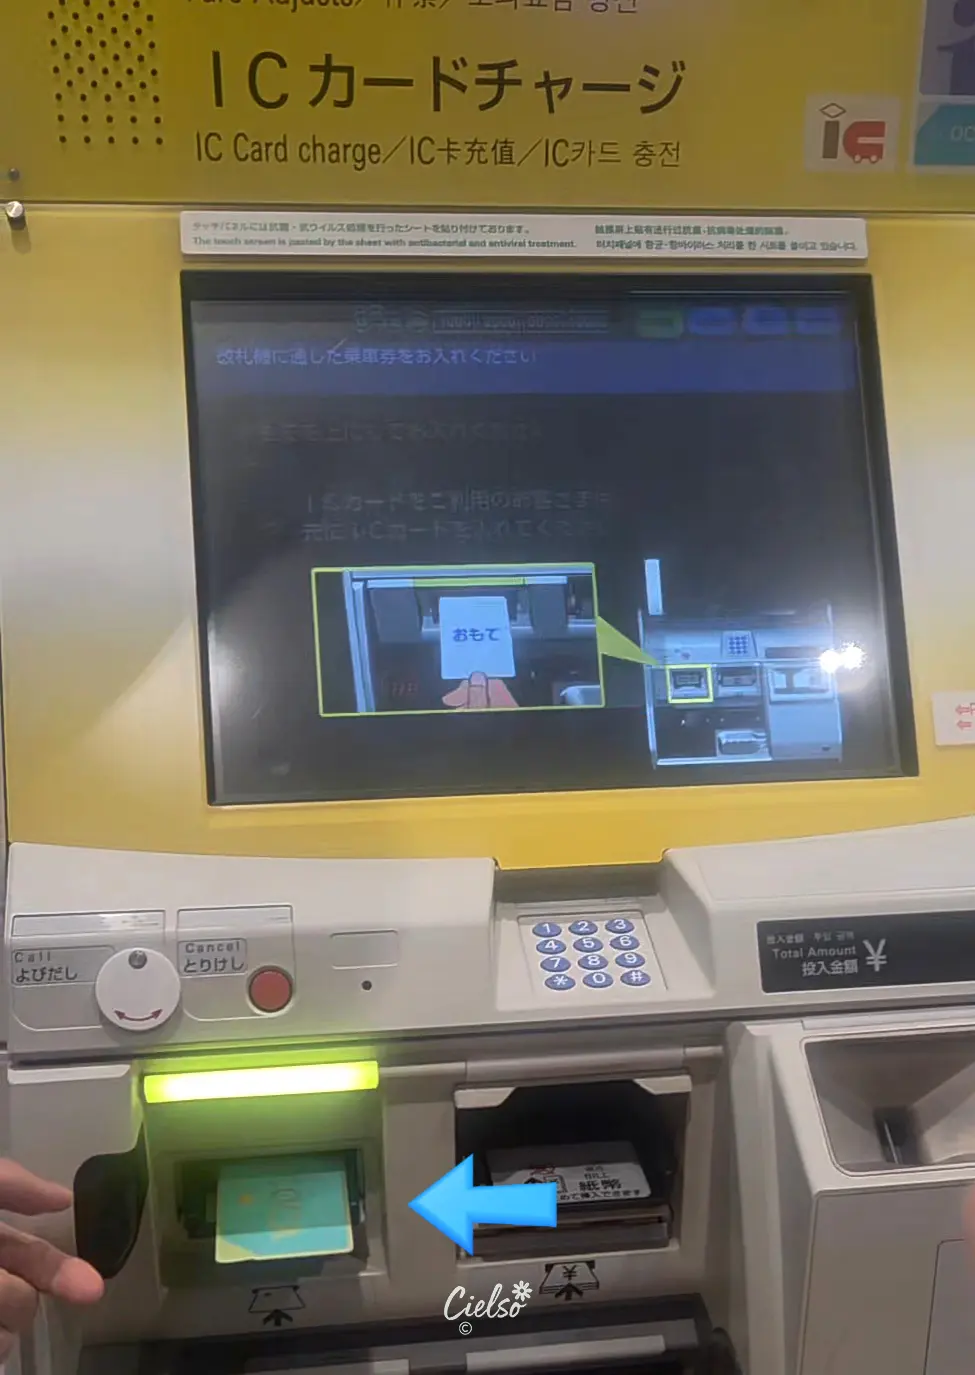
You'll find these balance top-up machines near the exit gates where you tap your card. Just insert your ICOCA card into the machine.
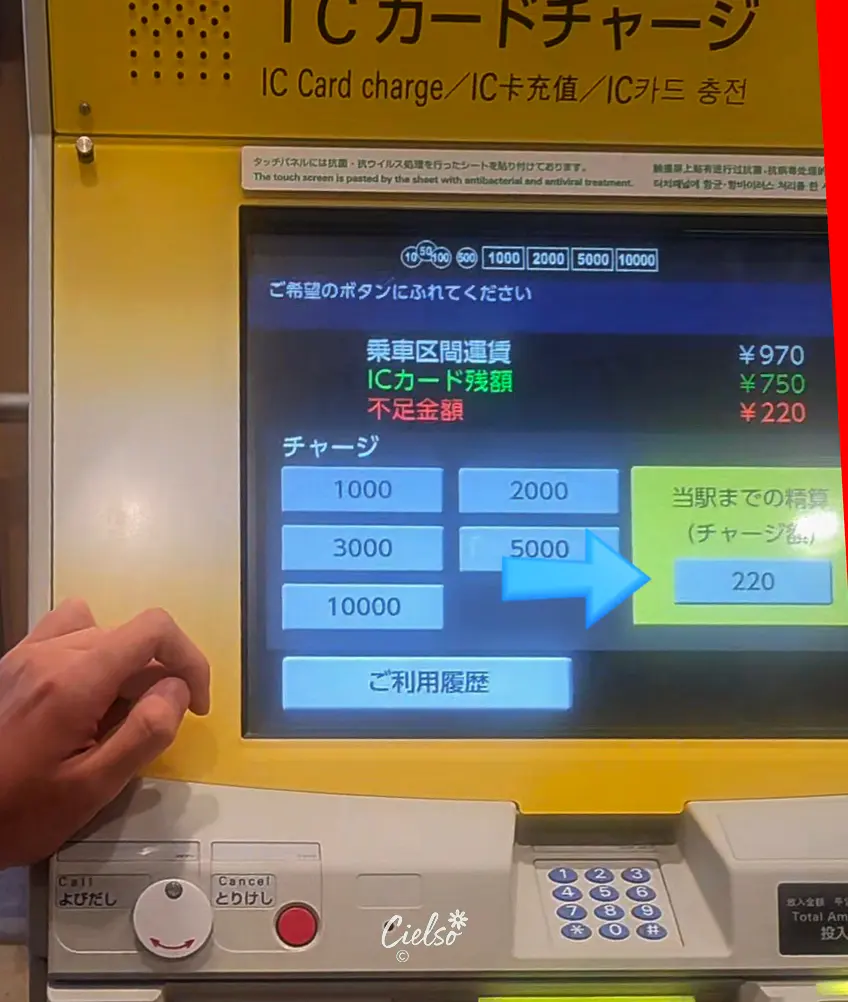
You can choose to top up just the insufficient amount or add more if you plan to use it again. Since I was heading back home, I opted to top up only the missing amount, selecting to add ~$1 (220 JPY), as indicated by the arrow.
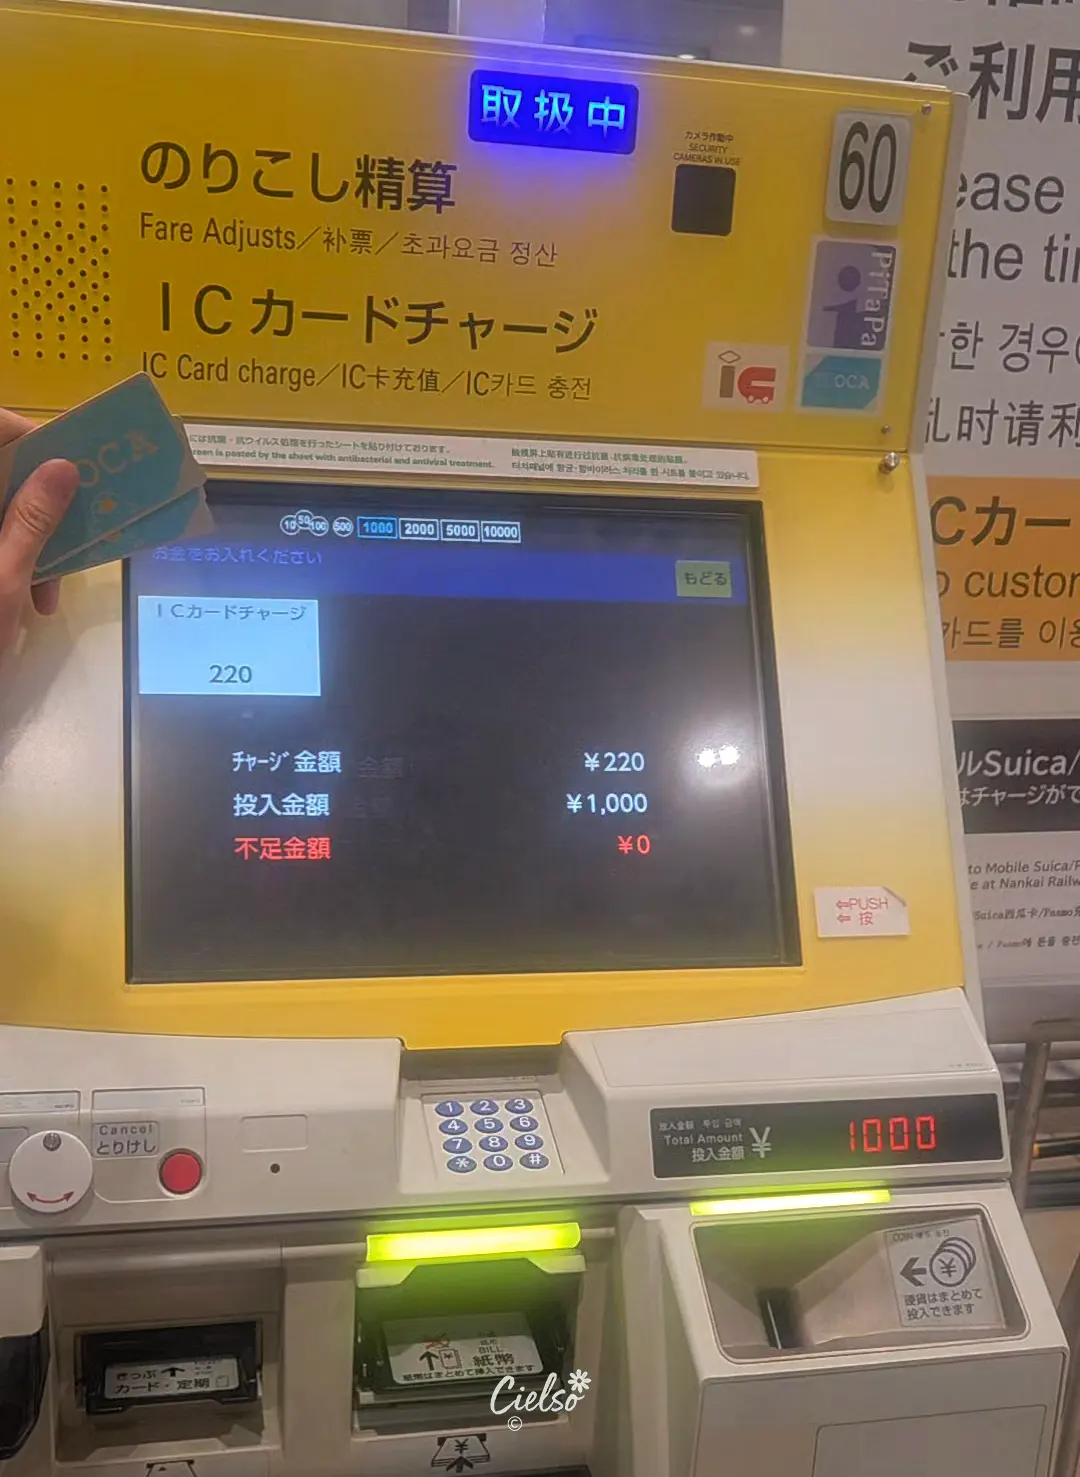
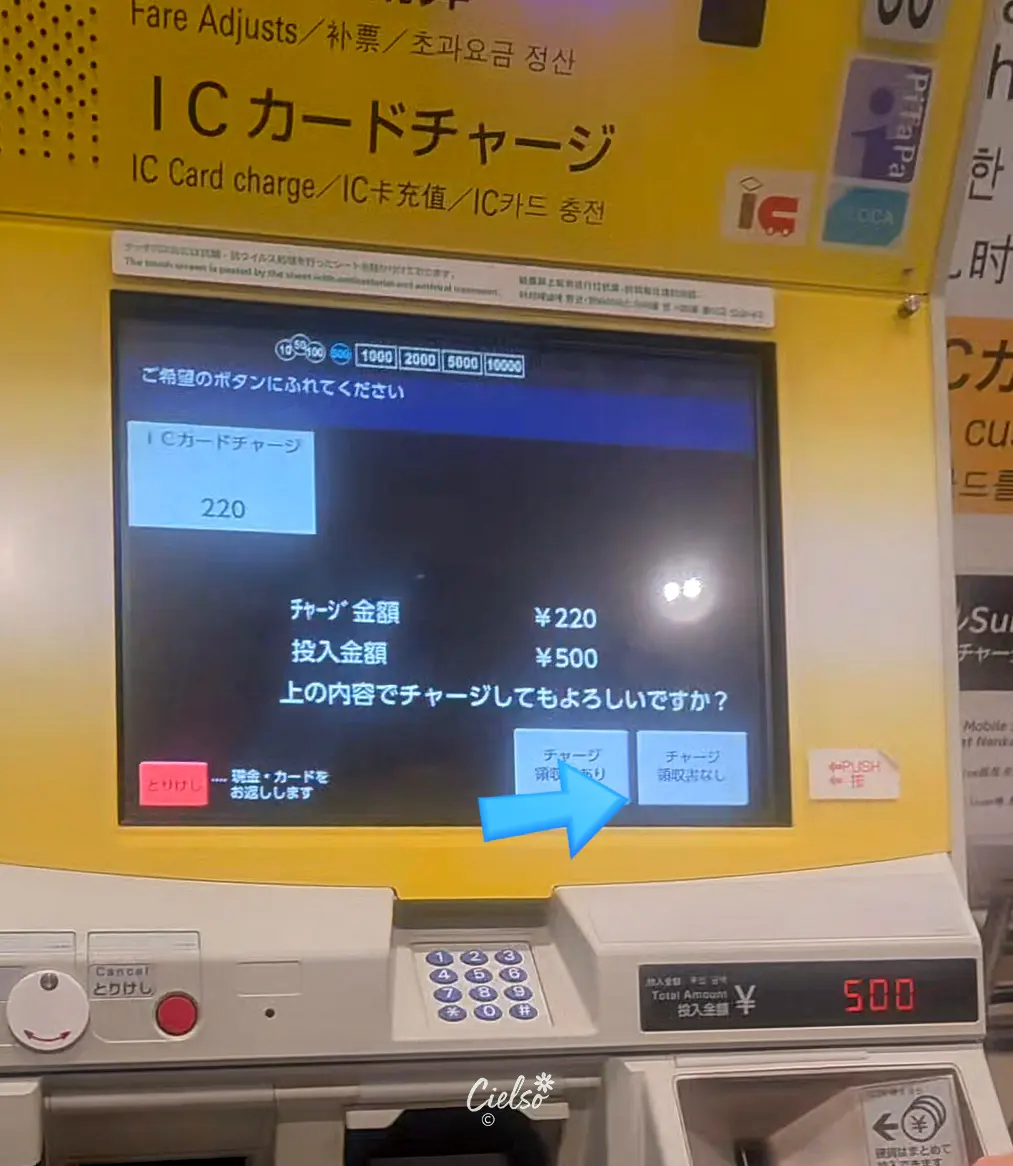
After inserting the cash, press the button indicated by the arrow in the right photo. Then, retrieve your topped-up ICOCA card. I made sure to use up all my remaining balance (excluding the deposit) before completing the refund.
If you ever find yourself in a similar predicament, don't hesitate to ask a station attendant nearby for help. They are usually very kind and helpful! (Speaking from experience – it's easy to get flustered when you're in a hurry!)
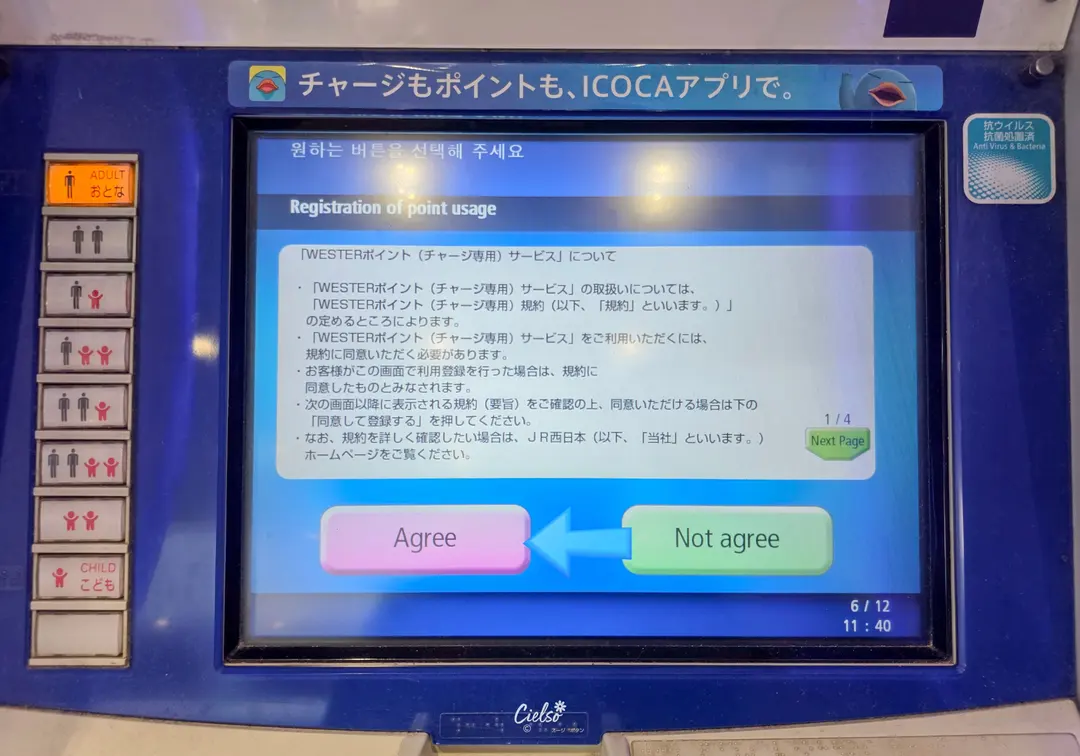
✔︎ My Experience Buying and Refunding an ICOCA Card at Kansai Airport Terminal 1
With English language options, the process was a breeze!
If you ever feel overwhelmed or unsure, don't hesitate to ask the friendly staff nearby for assistance. They'll be happy to guide you through it. So, go ahead and confidently purchase and refund your ICOCA card, and have an absolutely amazing Osaka adventure!
Cielso
©2026.Cielso All rights reserved.
Share this article
Featured in Collections
Discover more travel stories curated around the same theme.
Related Travel Stories

Universal Studios Japan Tickets 2026: USJ Express Pass Guide
Planning a trip to Universal Studios Japan? Don't get lost in ticket options! We break down all USJ ticket types and share our best tips for using an Express Pass to beat the crowds.

Osaka Castle Tickets 2026: Hours & Amazing Pass Guide
Discover everything you need to know about visiting Osaka Castle in 2026, from ticket prices and opening hours to money-saving Osaka Amazing Pass tips.

Karaksa Hotel Osaka Namba Review 2026: Family Stay
Looking for the perfect family-friendly hotel in Osaka? Here is our honest review of Karaksa Hotel Osaka Namba, a budget-friendly gem near Dotonbori.

USJ Osaka Tickets 2026: Guide to Passes & Rides
Navigating Universal Studios Japan in Osaka can be overwhelming. Here is your ultimate guide to USJ tickets, Express Passes, and top attractions for 2026.

Oriental Hotel Universal City Review 2026: USJ Stay
Beat the massive morning crowds at Universal Studios Japan! Stay at Oriental Hotel Universal City for under $85 and master your USJ open run strategy.

Candeo Hotels Osaka Review 2026: Best Umeda Stay
Planning an Osaka getaway with family or friends? Check out our 2026 review of Candeo Hotels Osaka The Tower, a quiet luxury oasis near Umeda Station.