

Visit Japan Web Registration Guide 2026: Smooth Japan Entry
Simplify your Japan trip! Our 2026 guide shows you exactly how to use Visit Japan Web for quick immigration and customs, making your entry hassle-free.

How to Register for Visit Japan Web
Visit Japan Web: Making Immigration Easy
Text/Photos © Hi Bubu

With students' winter breaks starting now,
many of you are likely planning a short trip to Japan.
The very first step in preparing for your Japan trip is
registering for the Visit Japan Web for immigration screening.
If you're registering for the first time or after a long break,
the process might seem a bit confusing.
Today, I'll briefly introduce you to how to register for Visit Japan Web and
the Japanese immigration process!
How to Register for Visit Japan Web

First, let's break down how to register for Visit Japan Web
step by step.
1. Access the Website and Sign Up
The very first thing you need to do is access the Visit Japan Web
and sign up.
First, please visit the Visit Japan Web homepage below.
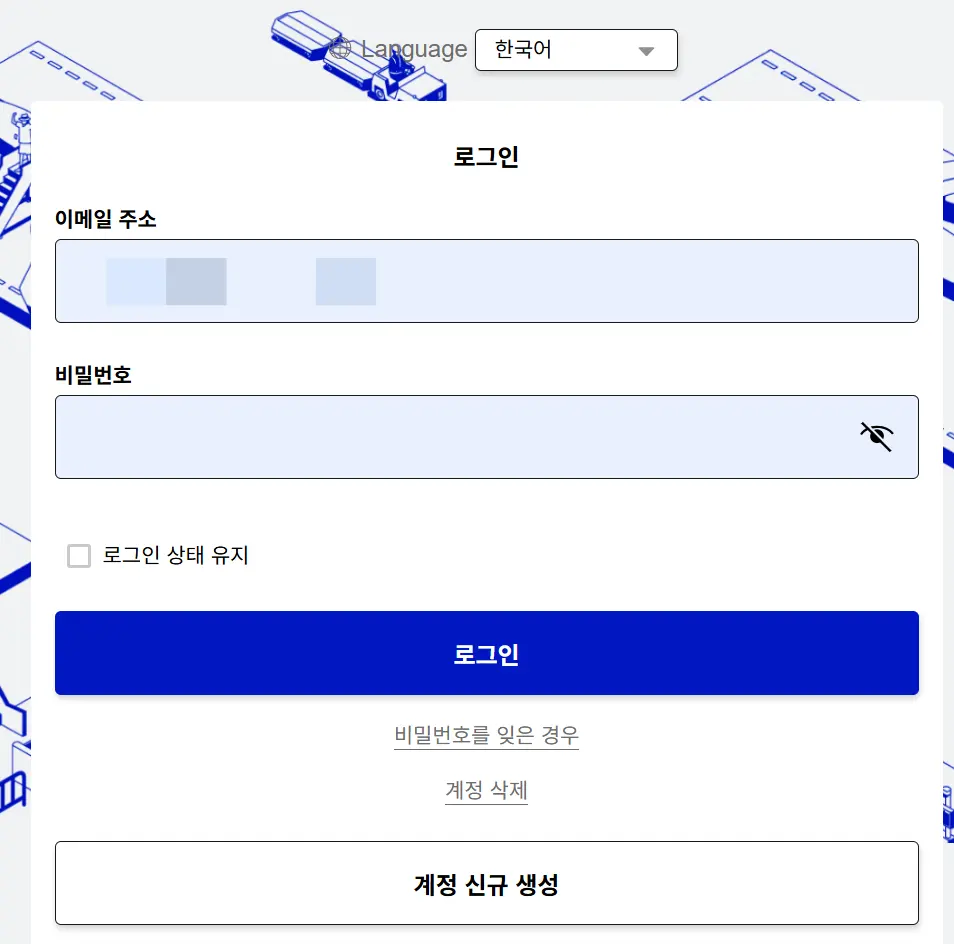
If you already have an account,
simply enter your email address and password, then
log in.
If it's your first time registering, you'll need to 'Create a new account.'
2. Register User Information
Once you've completed registration and logged in,
the next step is to register your user information.
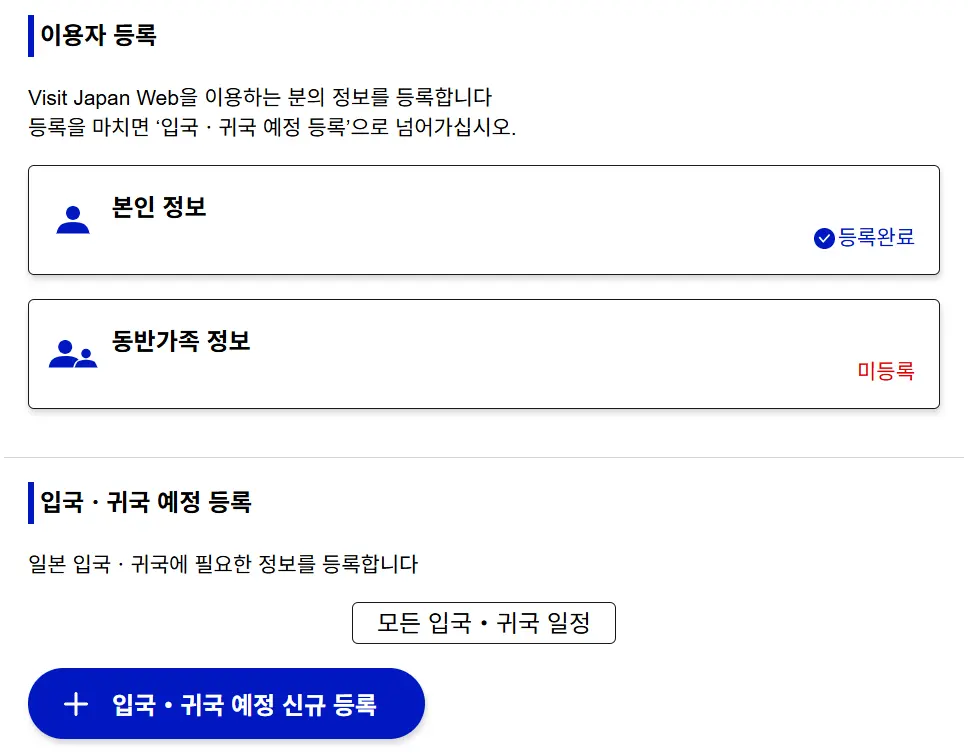
Go to 'Your Information' under the 'User Registration' tab and
register your personal details first.
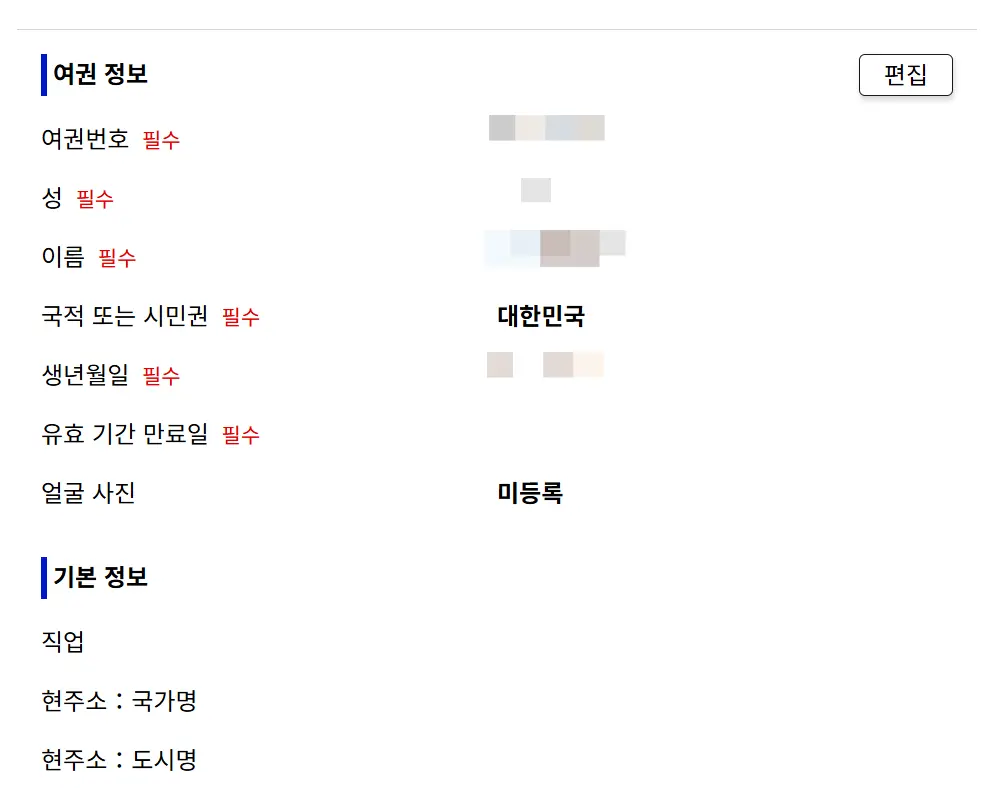
This step is for registering passport information such as your passport number, last name/first name (in English), nationality, and date of birth.
Therefore, make sure to enter it exactly as it appears on your passport.
3. Register Your Entry/Return Plan
After registering your passport information,
you'll then need to register your entry/return plan.
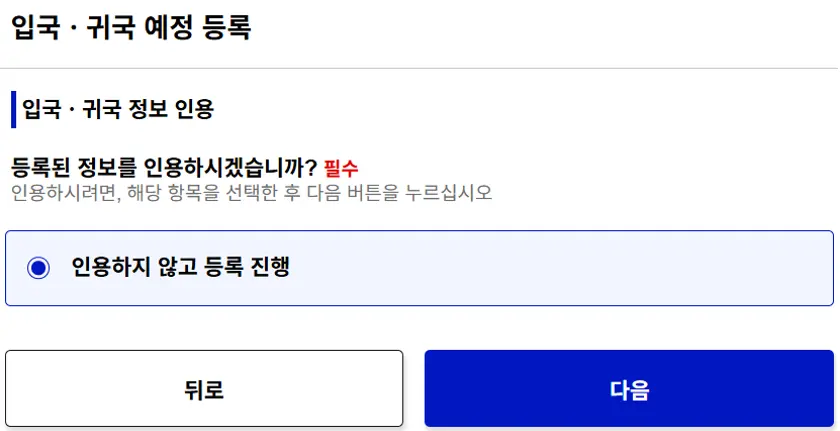
When you click, it will ask if you want to cite registered information.
This usually doesn't apply to those who are not long-term residents or re-entering.
So, choose 'Proceed with registration without citing'
and move on to the next step.
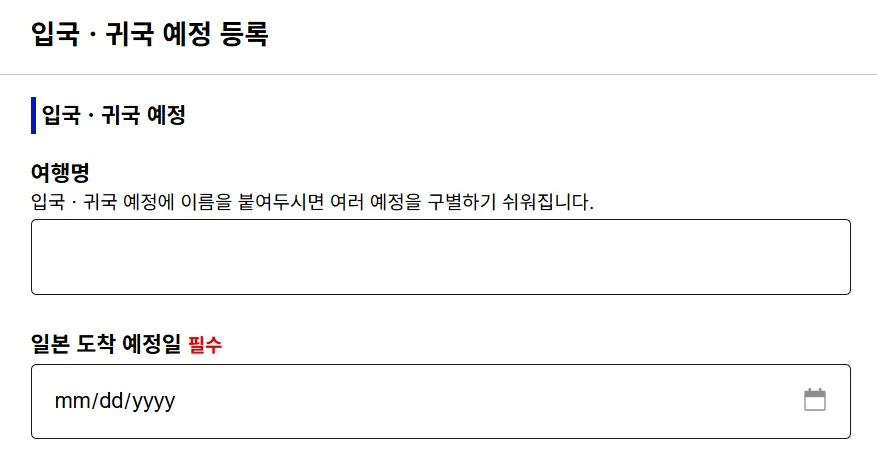
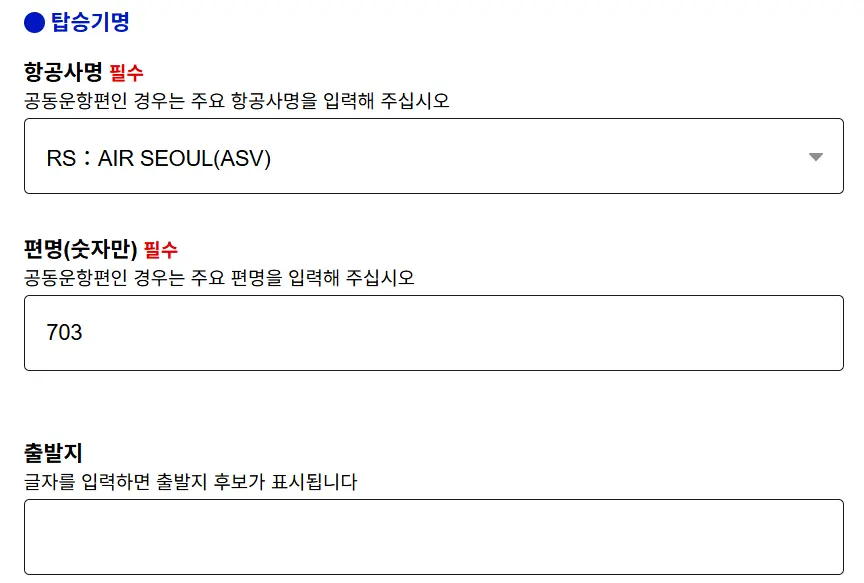
Next, you'll need to enter your entry information.
You can enter your trip name freely.
The Japan arrival date is the day you arrive in Japan.
For airline name and flight number, enter them exactly as they appear on your
e-ticket received via email.
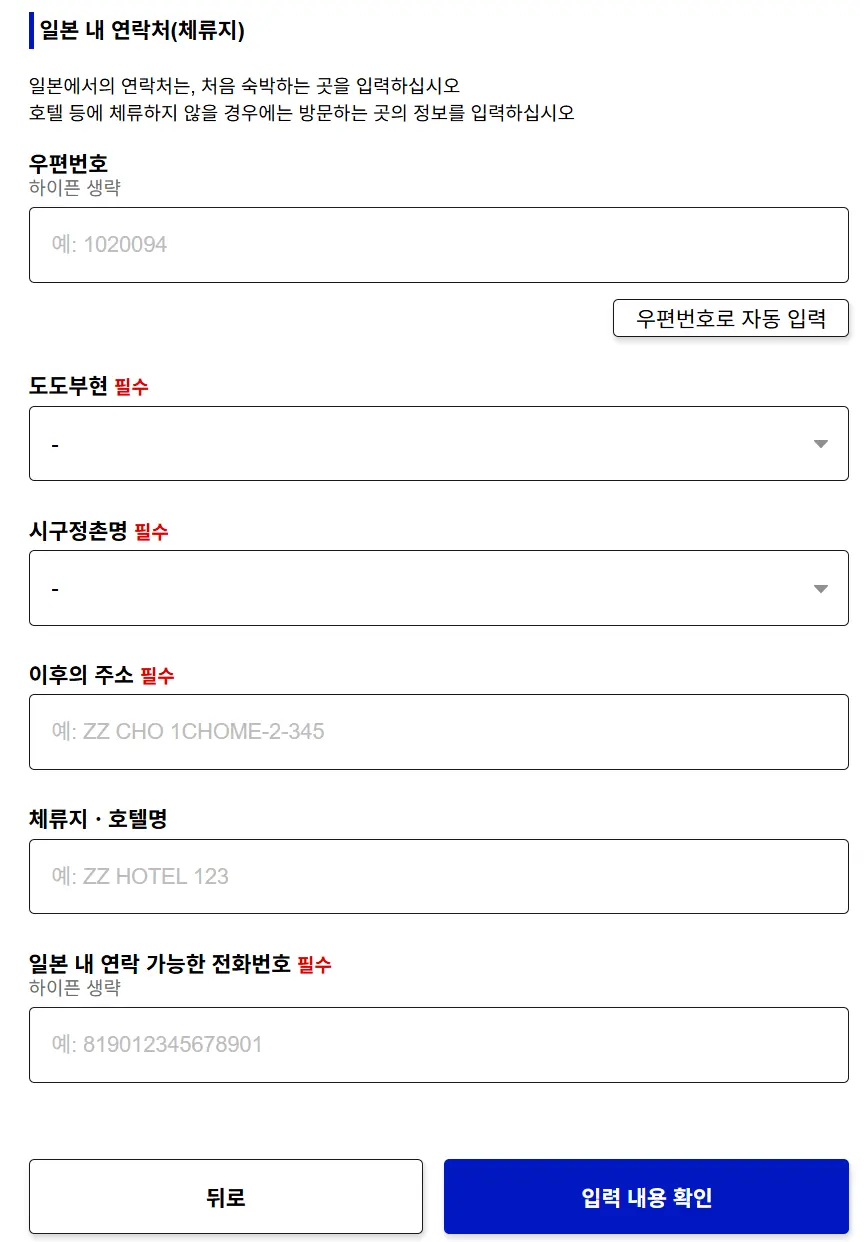
Next up is something that might seem tricky to enter:
your contact information and place of stay in Japan.
Simply enter your hotel's
information here, and it's easily solved!
❗️ If you search for your hotel's name on Google Maps,
You'll see a 7-digit postal code for your address.
After you enter it, just click 'Auto-fill',
and all the address fields will be automatically filled in for you!
Then, all that's left is to input your hotel name (in English) and
the hotel's phone number,
then hit 'Confirm Entry Details' to wrap it up!
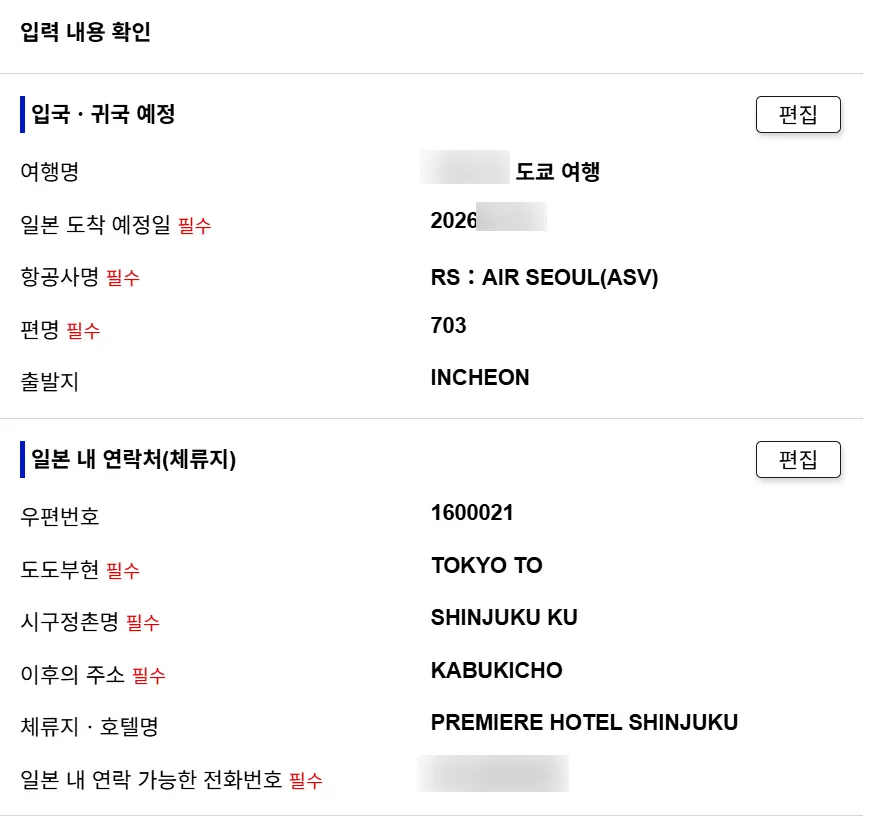
Once everything's entered, double-check your details
to make sure there are no mistakes.
4. Getting Your QR Code for Immigration and Customs
Now that all the basic information for your immigration screening
has been completely filled out,
it's time to get your QR code for immigration and customs procedures!
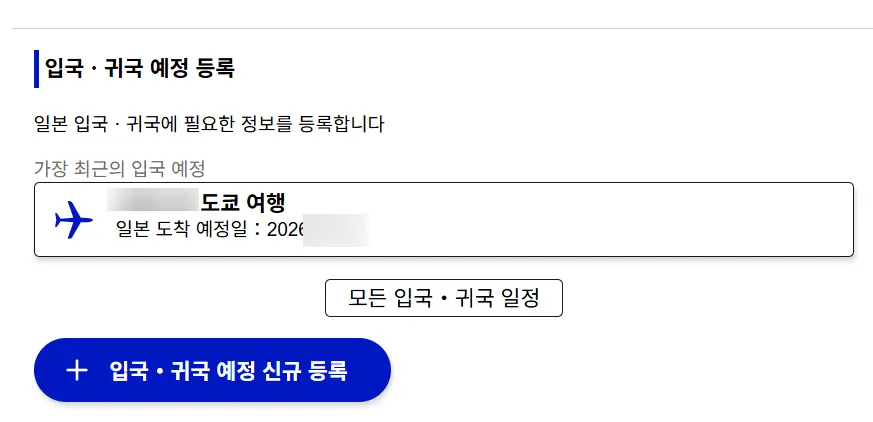
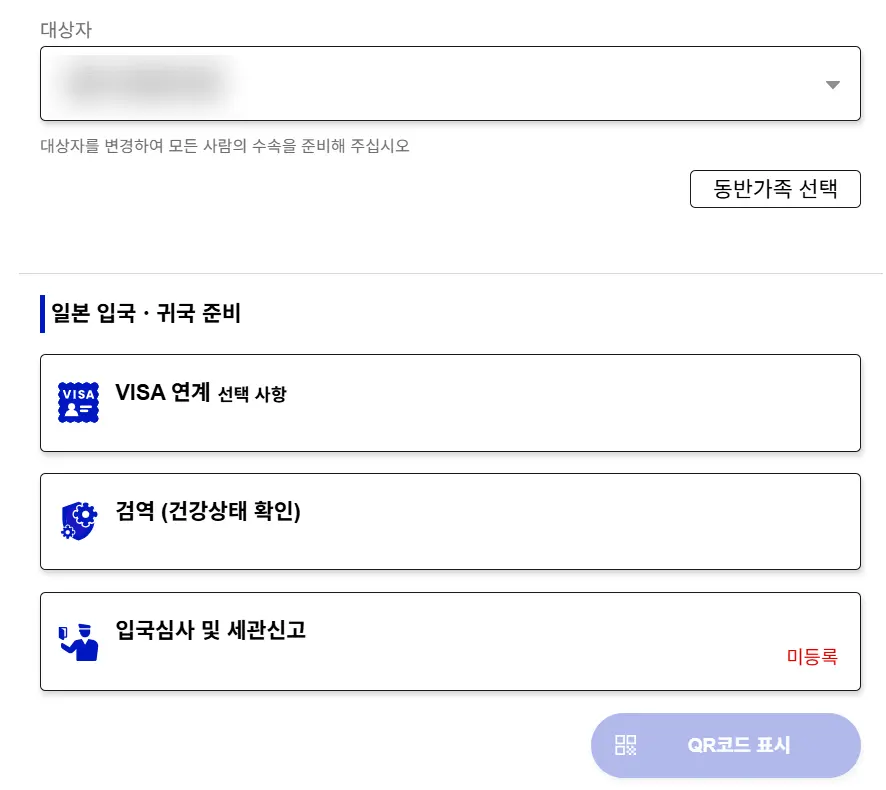
Go into the entry/return plan you've created
and click on 'Immigration and Customs Declaration'.
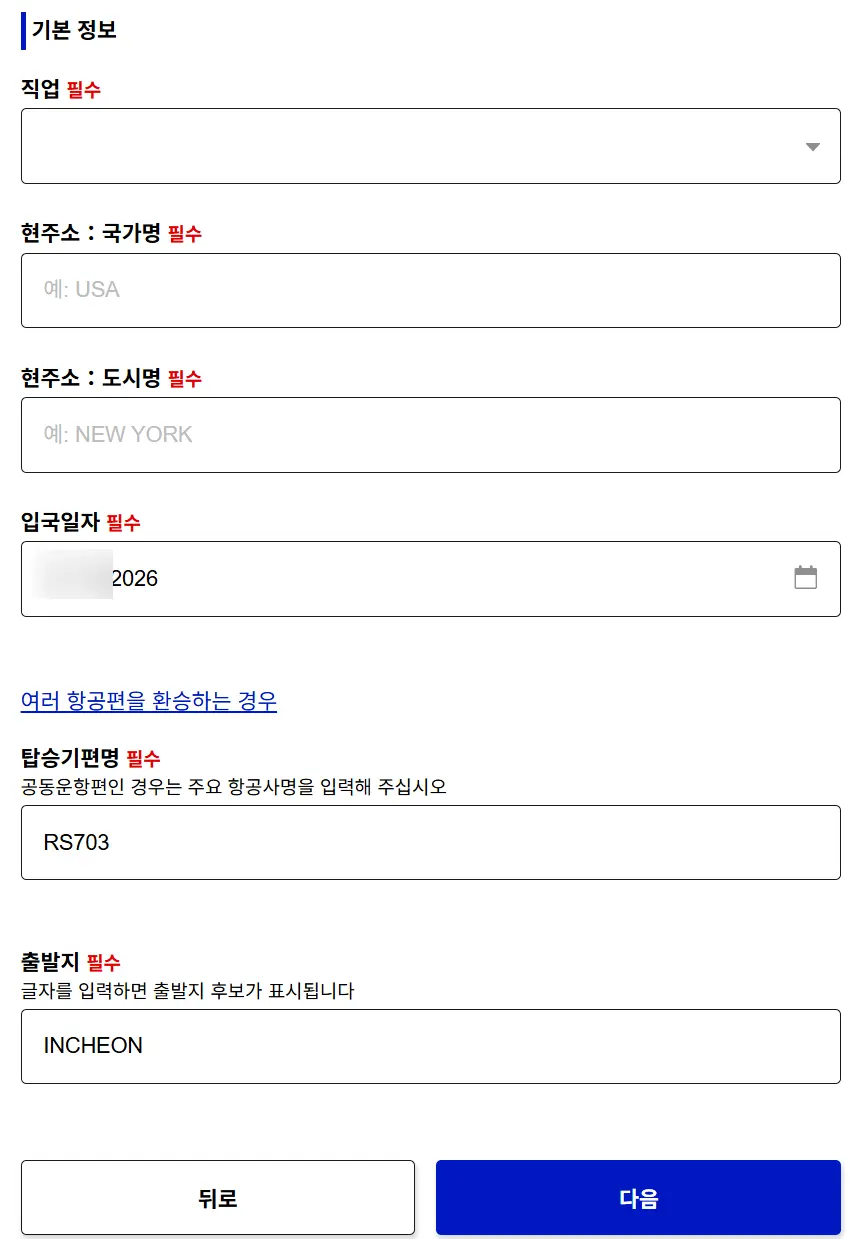
For the basic information, you'll need to enter your occupation, country, city, date of entry,
flight number, and departure point,
then just hit 'Next'.
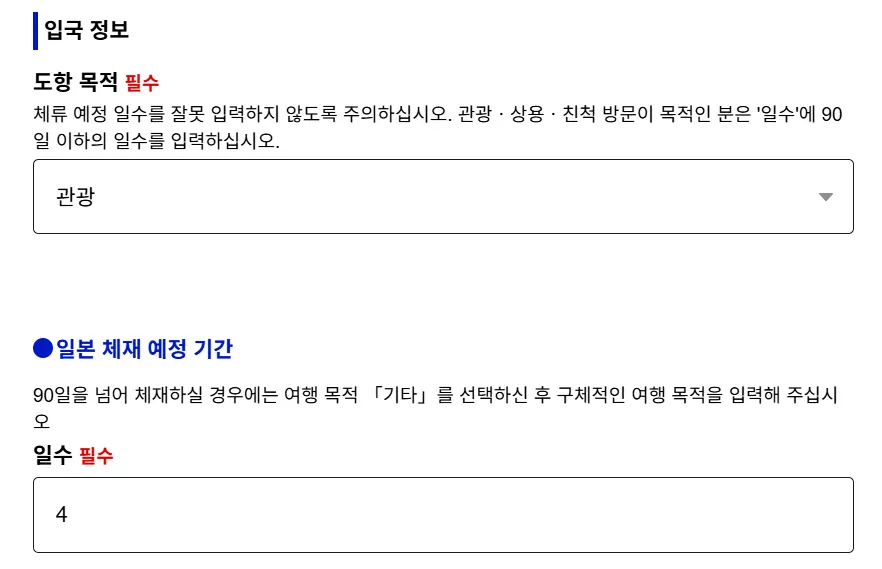
Next, select 'Tourism' as your purpose of entry
and enter the number of days you'll be staying in Japan.
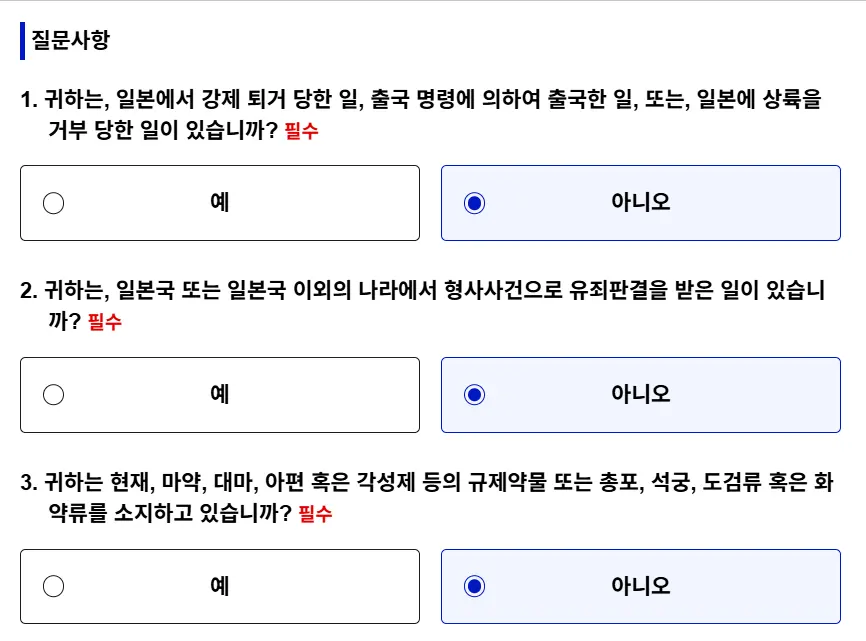
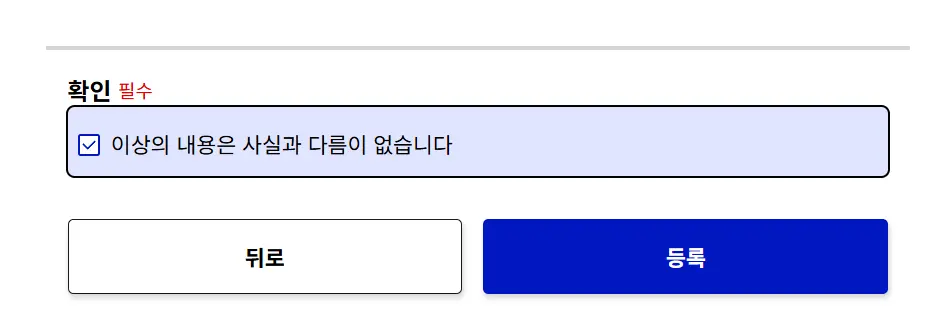
Finally, you'll need to answer some questions for your immigration and customs declaration.
For most travelers, none of these will apply to you,
so you can safely select 'No' for all of them.
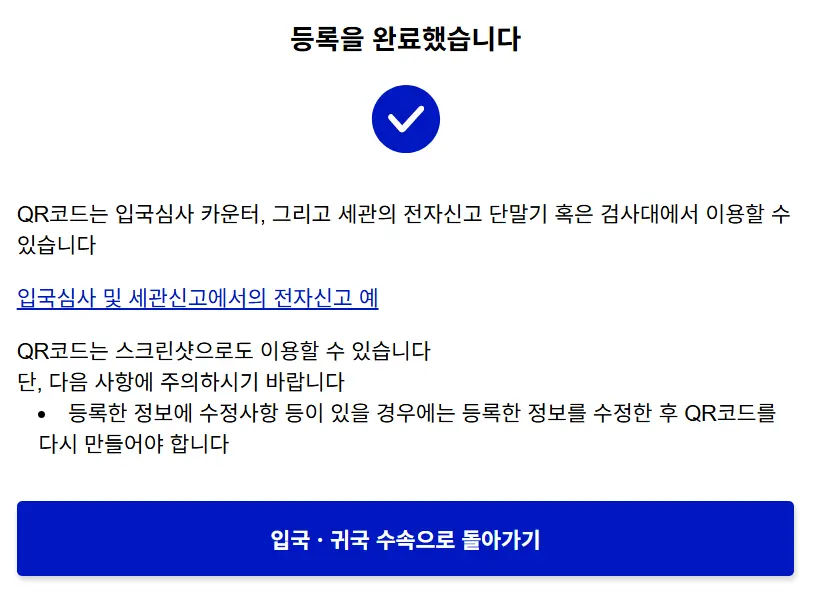
If you've followed along and completed all these steps,
you'll receive your QR code, just like the one shown on the right!
This QR code is the most crucial item you'll need for Japanese immigration, so make sure to remember it!
Japan Immigration Procedures Using Visit Japan


Finally, let me walk you through the process of clearing Japanese immigration
using the Visit Japan Web registration you just completed.
Step | Immigration Procedure |
1 | Face-to-face Immigration Screening (QR code needed) |
2 | Self-service Customs Registration (QR code needed) |
3 | Baggage Claim |
4 | Entry Complete |
It's incredibly simple, right?
By registering for Visit Japan Web in advance from your home country,
all you'll need is your QR code and passport,
and you can breeze through immigration without any extra steps.
Since your information is already entered via Visit Japan Web,
it's highly unlikely that the immigration officer will need to ask you any special questions.
So, be sure to use the creation and registration methods we've covered today
to get everything ready beforehand!
Frequently Asked Questions
How do I enter my contact information and place of stay in Japan when registering for 'Entry/Return Registration' on Visit Japan Web?
You can enter the information for the hotel where you will be staying. Search for the hotel name on Google Maps, enter the 7-digit postal code, then click 'Auto-fill'. After that, simply add the hotel name (in English) and phone number.
What is the most important item to prepare for Japanese immigration screening after registering on Visit Japan Web?
It is the QR code issued upon completion of Visit Japan Web registration. This QR code will be used as the most crucial item for Japanese immigration screening.
How many steps are involved in the Japanese immigration screening process using Visit Japan Web?
The Japanese immigration screening process using Visit Japan Web consists of a total of 4 steps: face-to-face immigration inspection, self-registration at customs, baggage claim, and completion of entry.
What personal information should I enter during the 'User Registration' step on Visit Japan Web?
In the 'User Registration' step, you must enter the information exactly as it appears on your passport, including your passport number, last name/first name (in English), nationality, and date of birth.
Share this article
Related Travel Stories
Haneda Limousine Bus to Shinjuku: 2026 Review
Looking for the easiest way to get from Haneda Airport to Shinjuku? Read our 2026 Haneda Limousine Bus review for booking tips, prices, and boarding guides.

Mt. Fuji Day Tour from Tokyo: Best 2026 Itinerary & Review
Planning a trip to Mount Fuji? This Tokyo day tour review covers the best photo spots, itinerary, and budget tips for an unforgettable 2026 adventure.
Tokyo Metro Pass 2026: Booking & Subway Usage Guide
Maximize your Tokyo adventure in 2026! Learn how to book, exchange, and use the Tokyo Metro Pass to save money and time on unlimited subway rides across the city.

Remm Roppongi Tokyo Review 2026: Affordable Tower Views
Experience the magic of Tokyo with breathtaking Tokyo Tower views from your room at Remm Roppongi. Our honest review reveals why this hotel is a top pick for value.

Harry Potter Studio Tokyo Tickets 2026: Best Deals
Step into the Wizarding World! Here is your complete 2026 guide to booking Harry Potter Studio Tokyo tickets, comparing prices, and maximizing your tour.

Harry Potter Tokyo Tickets 2026: Best Discount Hacks
Planning a trip to the Warner Bros. Studio Tour Tokyo? Learn how to book cheap Harry Potter Tokyo tickets, compare deals, and claim exclusive promo codes!